Make Your Own Deodorant with this Simple Guide (DIY Natural Deodorant Guide)
I’ve worked with enough ingredients to know when something’s not great for my skin.
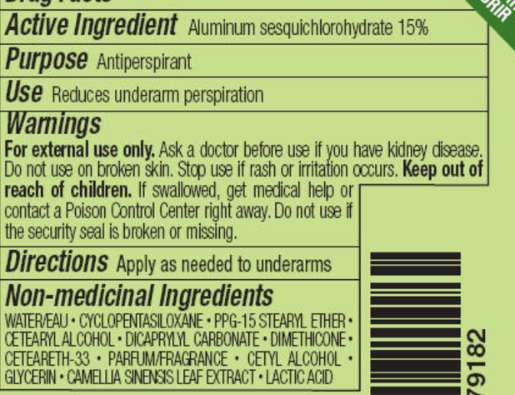
Most commercial deodorants have aluminum, synthetic fragrance, and a laundry list of lab-made extras that have zero business being in daily skincare, especially not on your armpits, one of the most sensitive areas of your body.
A multi-billion dollar problem
Here’s the thing that really gets me: we’re talking about a $26.96 billion industry that’s built on blocking your body’s natural processes with questionable ingredients (check the deodorant market size here).
And for what?
So you don’t sweat?
Ha! Don’t make me laugh!!
Your body is literally designed to sweat
Your body is literally designed to sweat. LITERALLY (More on sweat here, here and here if you’re interested).
Basically, sweat is how you regulate temperature and eliminate toxins. But somehow we’ve been convinced (big companies making money – AHEM!!) that aluminium-based antiperspirants, which work by plugging your sweat ducts, are the only way to stay fresh.
The fear of “stinking”
Don’t you have that BELIEF that if the deodorant (or, better said, ANTIPERSPIRANT) is not VERY STRONG you’ll end up smelling (stinking) and this will give you an incredibly bad report in terms of making you feel repugnant towards others??
Sweating IS normal. Sweating IS natural. It is how your body cools itself, detoxifies and supports healthy skin.
Blocking it entirely doesn’t stop sweat, it messes with what your body is trying to do.
Time for a better way
I totally get it and I’ve been there (many years ago). In fact, we’ve been taught this since our teens. That strong antiperspirants are the only way to feel “acceptable.”
But there’s another way, one that works WITH your body, NOT against it.
What if I told you that smelling fresh has far less to do with “stopping sweat” and far more to do with how you care for your skin and what you put on it?
Why take the risk?
The research on aluminum isn’t exactly comforting as many of you already know.
Some studies raise concerns about its potential effects as a metalloestrogen and the risks of daily exposure through cosmetics (source here).
The long-term verdict might still be out, but honestly, WHY OH WHY gamble with your health when there are simple, effective alternatives?
Something simpler, cleaner, and better for your skin.
My own deodorant journey
I’ve been making my own deodorants for years, and I stopped “stinking” a long time ago. I suppose the detox period worked, and my body adjusted accordingly.
I change formulas constantly as I like to keep things exciting (and I sell my cosmetics at the local market so I need to keep trying new things). Check this article, this article, this article, this article and this article for GREAT info on natural deodorants and for some great experiments you can try you might enjoy the below:
- DIY Deodorant that Works. I Worked Hard on Perfecting the Formula.
- DIY Deodorant Recipes with Arrowroot
- 9 Spectacular Shea Butter Deodorant Recipes for Every Need!
The recipe you’ll love
The recipe I’m sharing below isn’t some Pinterest fail waiting to happen. It’s a smooth, creamy balm with no baking soda (because rashes aren’t cute), no irritation, and no 3 p.m. panic about whether you still smell fresh.
Just effective, skin-loving ingredients that work without compromise.
It’s surprisingly easy to make, costs pennies per application, and actually improves your underarm skin over time instead of just masking problems.
Why you’ll actually want to try this
This is a DIY where the results speak for themselves.
I’m not talking about some craft project that looks cute on social media but falls apart the moment you actually try to use it.
This stuff WORKS.
1. Gentle on the skin
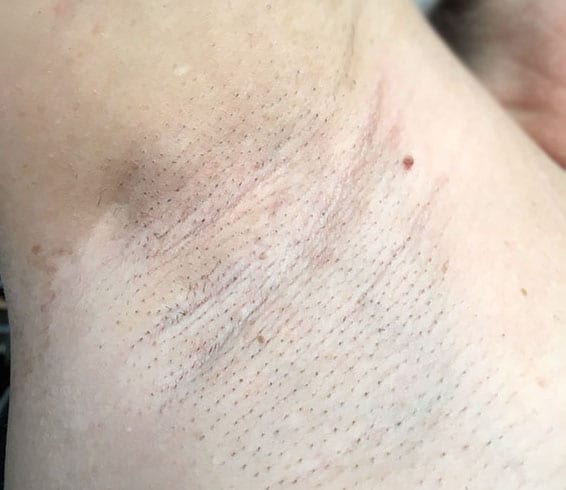
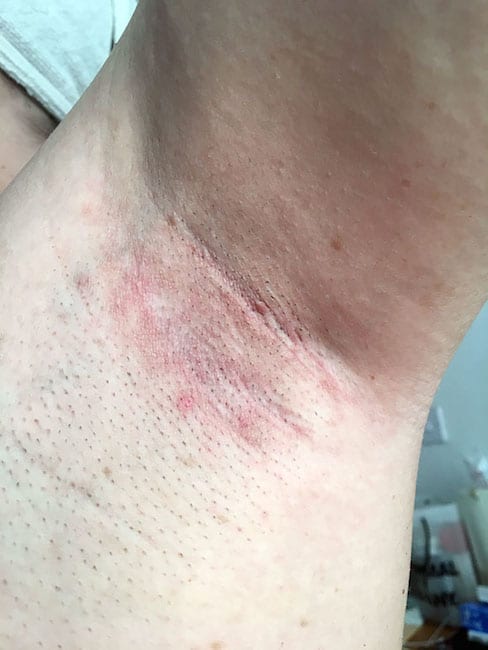
No baking soda means no rash (many are allergic to it. I have tried it in formulas and after 2-3 weeks I get the rash, so unfortunately this is a no-no for me.)
Actually, baking soda is one of the most common causes of natural deodorant irritation. It creates an alkaline environment that can disrupt your skin’s natural pH balance. My skin definitely doesn’t agree with it.
When your skin is constantly irritated, you’re WAY more likely to abandon natural deodorant altogether and run straight back to the aluminum ones. Ouch.
2. Keeps you fresh
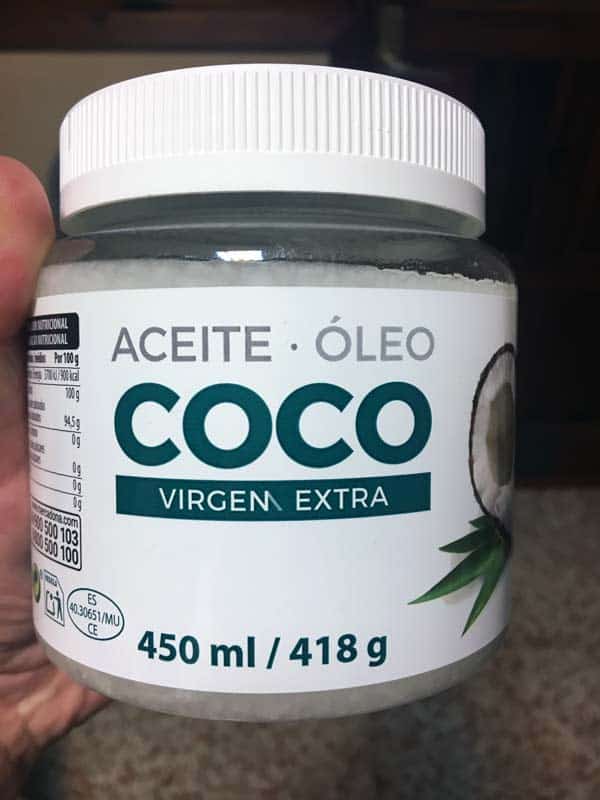
Coconut oil contains lauric acid and other medium-chain fatty acids that naturally fight odour-causing bacteria (more on fatty acids here).
The idea here is for you not to just mask the smell, but preventing it at the source.
This means confidence that lasts through unexpected Zoom calls, surprise grocery runs, and those days when you forget you have a dentist appointment until you’re already in the car.
Research shows coconut oil has proven antimicrobial and antifungal properties (see here, here and here).
OF INTEREST: fresh sweat is actually ODOURLESS. Yep, you read that right. The smell only happens when bacteria on your skin break down the sweat. So the real goal isn’t stopping sweat (which is impossible anyway), it’s managing the bacteria. This is why coconut oil works so well. It’s not trying to plug your pores like aluminum does. Instead, it’s creating an environment where odour-causing bacteria can’t thrive. A much smarter approach at the end of the day!
3. No weird ingredients
You know exactly what’s going on your skin
As you can see above, commercial antiperspirants and deodorants can contain ingredients you wouldn’t want to put on your skin. Well, I wouldn’t. Many are linked to irritation, disrupt your skin’s natural balance, or raise questions about long-term health effects.
When you can’t say half the ingredients out loud without stumbling, how are you supposed to trust what you’re putting on your skin EVERY SINGLE DAY?
4. Easy to make
10 minutes and kitchen equipment only
If you can melt butter and stir things together, you can make this.
5. Sustainable
Those deodorant sticks add up in your budget AND in the landfill.
This recipe costs literally pennies per application, and you can reuse the same jar over and over and over.
It’s creamy, clean, and VERY effective.
Ok. So what’s actually in this recipe that makes it so good.
The ingredients are VERY EASY to find (check the links if you’re missing any of them at home).
Here’s what you need:
- Arrowroot powder (get it here): Helps absorb moisture without blocking sweat (we’re not trying to stop sweat, just manage it!)
- Coconut oil (get it here): Naturally antibacterial and keeps things smooth
- Shea butter (get it here): Adds that lovely creamy texture and calms the skin
- Kaolin clay (get it here): Gentle, helps neutralise odour
- Essential oils: I like lavender or tea tree, but it works unscented too
You’ll end up with a soft balm that melts into your skin. No residue, no clumps, no stress.
The science behind each ingredient (for the curious like me)
> Arrowroot powder (manages moisture)
Unlike antiperspirants that block sweat entirely, arrowroot powder absorbs moisture while allowing natural detoxification.
Your body is DESIGNED to sweat as we saw above. It’s how you regulate temperature and eliminate toxins.
Blocking this process completely can lead to clogged pores and skin issues. Not ideal.
Arrowroot has been used traditionally for CENTURIES as a natural absorbent and is way gentler than cornstarch for sensitive skin.
When you switch to natural deodorant, you WILL sweat more at first. Your body has been used to having its sweat ducts blocked by aluminum. When you remove that blockage, things need time to rebalance. This is NORMAL. Most people experience a 1-2 week adjustment period when switching from antiperspirant to natural deodorant. Read my article on the topic here.
> Coconut oil (natural antibiotic)
Virgin coconut oil has been used as a moisturiser for centuries, and clinical studies show it improves skin disorder symptoms by moisturising and soothing skin (source here).
Coconut oil contains lauric acid and other medium-chain fatty acids that naturally fight odor-causing bacteria as I told you above. So you get dual action: bacterial protection AND skin nourishment.
Most commercial deodorants dry out your underarm skin over time (because ingredients like alcohol, aluminum salts, and synthetic fragrances strip moisture and disrupt the skin’s protective barrier) , but this actually IMPROVES it.
Yep – win-win!
Studies even show coconut oil’s antimicrobial activity is effective against antibiotic-resistant bacteria (there us scientific evidence supporting the claim that coconut oil and its derivative, monolaurin, a chemical made from lauric acid, which is found in coconut oil and human breast milk).
> Shea butter (great for the skin barrier)
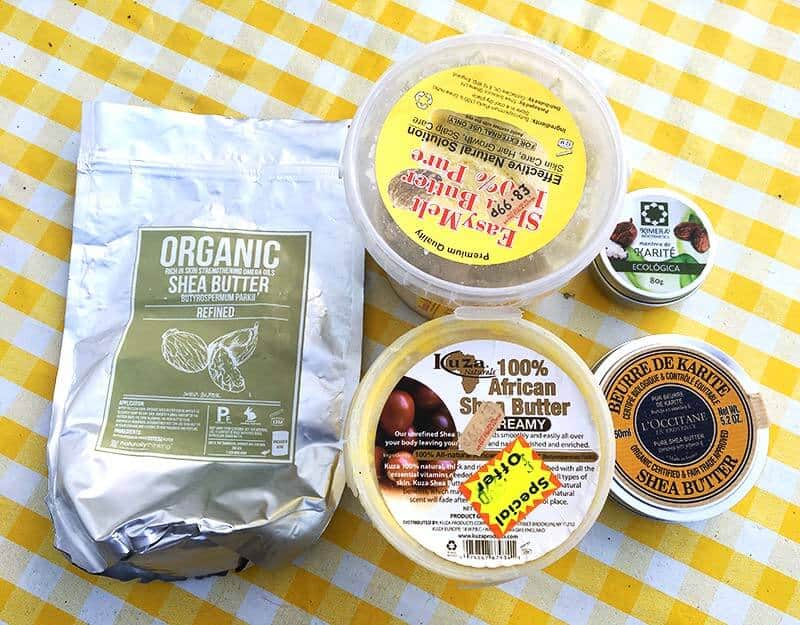
Shea butter contains vitamins A and E, plus essential fatty acids that support skin barrier function. I have written COUNTLESS articles about shea butter. You can check them all here.
(Think about it. A strong skin barrier means it will be less sensitive and also less prone to irritation because the barrier protects the skin).
When your skin is properly moisturised and protected, you’re WAY less likely to experience that dreaded “deodorant rash” that unfortunately sends people running back to conventional products.
It also gives the deodorant that perfect creamy texture (I love it) that glides on smoothly without tugging or pulling at your skin.
> Kaolin clay (gives gentle detox)
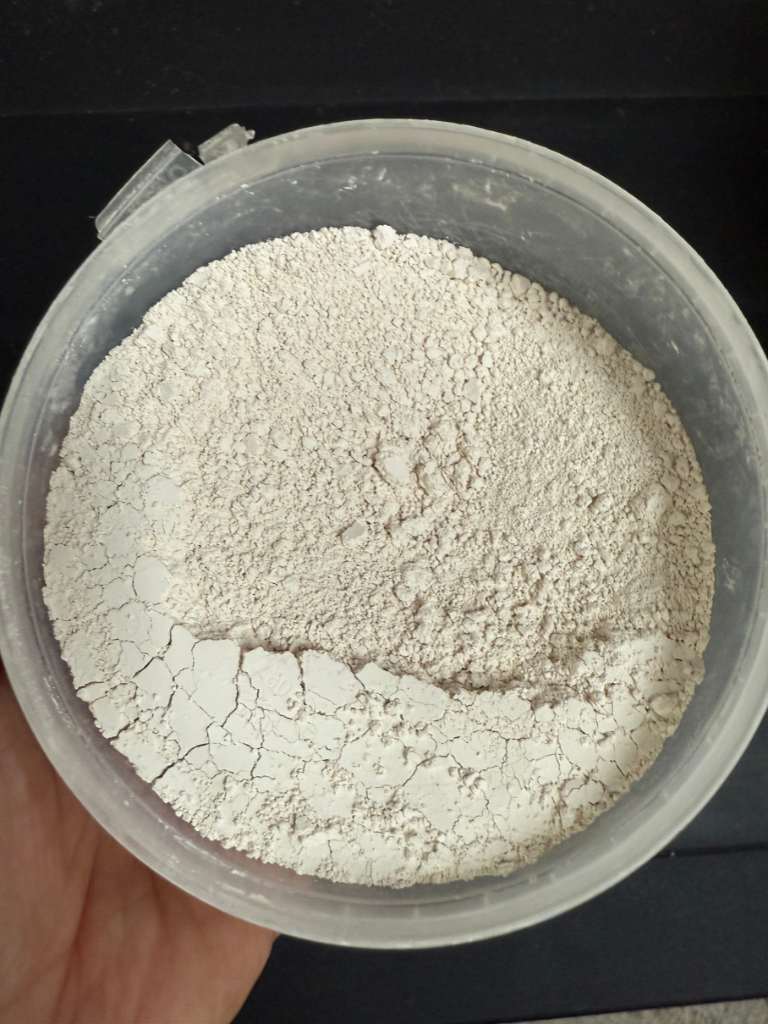
Unlike aluminum that blocks pores completely, kaolin clay gently draws out impurities while being gentle enough for daily use.
You’re actually IMPROVING your underarm skin health rather than just covering up odour.
When your skin health is good, the long term odour control also improves.
> Essential oils (these are optional for some power boost)
A few drops of lavender or tea tree oil can add extra antimicrobial action.
BUT (and this is important): less is more.
3-5 drops MAX. Any more and you risk irritation, especially on sensitive underarm skin.
The formula works perfectly without them too, so don’t stress if you want to keep it simple.
Perhaps try without the first time and with the second time.
Here’s the recipe (finally!)
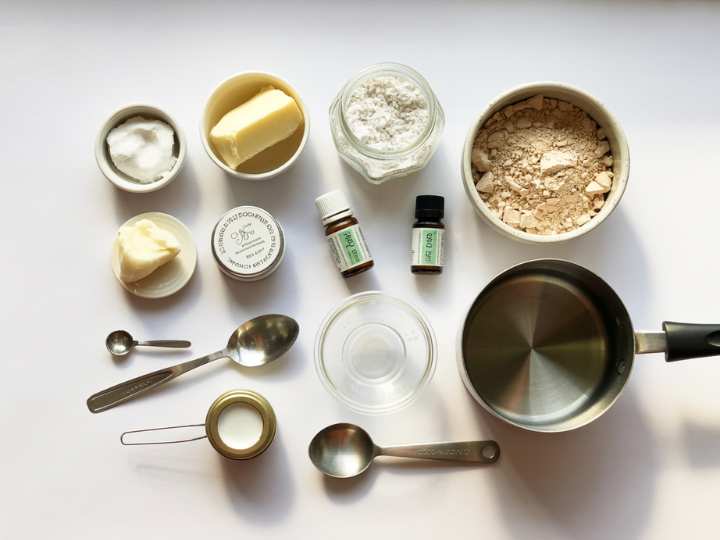
You’ll need:
- 2 tbsp coconut oil (get it here) (Moisturises)
- 2 tbsp shea butter (get it here) (Nourishes and soothes)
- 3 tbsp arrowroot powder (get it here) (Absorbs moisture)
- 1 tbsp kaolin clay (get it here) (Gently detoxifies)
- 3–5 drops essential oil (optional – lavender or tea tree). These add scent and can boost antimicrobial action (lavender = calming, tea tree = antibacterial).
Equipment needed (spoiler: you already have it)
- Small saucepan
- Glass bowl (for makeshift double boiler)
- Spoon for stirring
- Small jar or tin for storage
- Measuring spoons
That’s it.
Let’s make it (step by step)

1. Step 1: melt the coconut oil and shea butter
Gently melt the coconut oil and shea butter over low heat. I use a makeshift double boiler (just a glass bowl sitting over a saucepan with a little water in it).
**Why low heat? Because we don’t want to damage any of the beneficial properties in these ingredients.
2. Step 2: mix in the two powders
Take the bowl off the heat (important!) and stir in the arrowroot powder and kaolin clay.
Stir until it’s TOTALLY smooth. No lumps and no clumps.
3. Step 3: Add your scent (if you want)
If you’re using essential oils, add them now. Remember: 3-5 drops MAX.
Give it another gentle stir to distribute evenly.
4. Step 4: pour and wait
Pour the mixture into your clean jar or tin.
Let it cool and solidify. The fridge is fastest (about 30 minutes), but room temperature works too (just takes longer).
And you’re done!
How to use it (super simple)
Application technique
- Scoop out a small amount with clean fingers (a pea-sized dab is plenty)
- Rub between your fingers to soften (body heat melts it quickly)
- Apply gently to clean, dry underarms
- That’s literally it
When to apply for best results
- After showering on completely dry skin
- Before getting dressed (give it a minute to absorb)
- Reapply if needed after intense workouts
How much is enough?
Less is more with this deo. A pea-sized amount covers both underarms easily.
If you’re using too much, you’ll know – it’ll feel greasy or take forever to absorb.
Storage and shelf life
Where to keep it
Store in a small jar or tin with a tight-fitting lid. Something you’d actually want to see on your bathroom shelf.
Keep it somewhere cool and dry. NOT the steamy bathroom windowsill because it might turn into deodorant soup!
How long it lasts
3-4 months easily, especially if you keep it clean.
Pro tip: Don’t dip in with dirty hands. Use a small spoon if necessary. Use a wooden spoon, as metal can react with the kaolin clay and reduce the deodorant’s effectiveness over time.
Signs it’s time for a new batch
- Weird smell (it should smell like your ingredients, nothing different)
- Change in texture that doesn’t improve at room temperature
- Any visible mould (though this is rare if stored properly)
When things go wrong… (a troubleshooting guide)
1. It’s too soft/liquidy
Problem: Stored somewhere too warm, or you live in a hot climate.
Fix: Pop it in the fridge for a bit. For permanent solution, add a little more arrowroot powder to the next batch.
2. It’s too hard to apply
Problem: Too much powder, or stored somewhere very cool.
Fix: Let it warm up to room temperature, or rub between fingers longer before applying. Next batch, use slightly less powder.
3. Skin irritation (rare but possible)
Problem: Sensitivity to one of the ingredients.
Fix:
- Try without essential oils first
- If still irritated, you might be sensitive to coconut oil (some people are)
- Switch coconut oil for another carrier oil like jojoba
4. Not working effectively
Problem: Usually happens during the transition period from commercial deodorant.
Fix:
- Give it time (1-2 weeks for your body to adjust)
- Make sure you’re applying to completely clean, dry skin
- Try adding a bit more kaolin clay to the next batch
5. Staining clothes
Problem: Using too much product.
Fix: Use less! A pea-sized amount should absorb completely and not transfer to clothes.
Make it YOUR own (customisation options)
One of the best things about making your own deodorant is that yu can tweak it EXACTLY how you want it.
For different activity levels
Light activity/office work: Stick with the basic recipe. It’s perfect for everyday use.
High activity/gym life: Add an extra ½ tbsp of kaolin clay for more absorption power. You might also want to try tea tree essential oil for its extra antimicrobial kick.
Super sensitive skin: Skip the essential oils entirely and reduce the kaolin clay to ½ tbsp. Sometimes less is more.
Seasonal variations
Summer formula: Add an extra ½ tbsp arrowroot powder to handle increased moisture. Store in the fridge if your house gets really hot.
Winter formula: Increase shea butter to 2½ tbsp for extra skin nourishment when the air is dry and your skin needs more love.
Scent preferences and combinations
Calming blend: 3 drops lavender + 2 drops chamomile Energizing morning blend: 3 drops peppermint + 2 drops rosemary Antibacterial powerhouse: 4 drops tea tree + 1 drop eucalyptus
Unscented: Skip the oils completely (honestly, this works just as well)
Remember: NEVER exceed 5 drops total.
For different skin types
Oily/acne-prone skin: Increase kaolin clay to 1½ tbsp for extra oil absorption.
Dry/mature skin: Reduce arrowroot powder to 2½ tbsp and add an extra ½ tbsp shea butter.
Super sensitive/reactive skin: Replace coconut oil with jojoba oil (it’s technically a wax and less likely to cause reactions).
The bigger picture: why this actually matters
Your daily health investment
Think about it: you use deodorant EVERY. SINGLE. DAY.
That’s 365 days a year of putting something on one of the most absorbent areas of your body.
By switching to this natural formula, you’re:
- Reducing daily exposure to questionable chemicals
- Actually improving your underarm skin health over time
- Supporting your body’s natural detoxification process
- Saving money (this recipe costs about £2/$2.50 to make and lasts 3-4 months)
Part of something bigger
The natural personal care market isn’t just growing, it’s EXPLODING.
We’re talking about a shift from that $26.96 billion conventional market toward cleaner alternatives.
You’re not just making deodorant. You’re making a statement about what you’ll accept for your body and your family.
Once you start making your own personal care products, it’s addictive. You start looking at everything in your bathroom cabinet differently.
Teaching others (the ripple effect)
Share this recipe with others.
There’s something pretty amazing about sharing knowledge that helps people feel better in their own skin.
Plus, it makes a great gift! Many of my customers buy my products to give to others. They love everything I make.
Ready to ditch the aluminum? Here’s what happens next…
So here we are.
You’ve got the recipe, you know the science, you understand what to expect (hopefully! Otherwise I didn’t do a good job).
So, what’s stopping you?
Maybe you’re thinking:
- “What if it doesn’t work for me?”
- “What if I mess up the recipe?”
- “What if I smell during the transition period?”
I get it. I’ve been there.
But here’s the thing: you’re already taking a risk every day by putting aluminum and synthetic chemicals on your skin.
Why not take a risk on something that could actually IMPROVE your health?
Your 30-day challenge
Give this recipe 30 days. That’s it.
Make a batch this weekend (seriously, it takes 20 minutes). Use it consistently for a month.
If after 30 days you’re not convinced, you can always go back to the aluminum stuff.
But I’m willing to bet you won’t want to.
What you’ll gain
In just one month, you’ll have:
- Cleaner, healthier underarm skin
- Confidence in knowing exactly what’s going on your body
- A new skill you can share with others
- Money saved (and a smaller environmental footprint)
- The satisfaction of making something that actually WORKS
Final thoughts
Stop overthinking it.
Grab those ingredients, set aside 20 minutes this weekend, and make something that makes actual sense for your body.
Now go make something amazing.
Love,
Patri xx