
Sephora Skincare Products: Natural DIY Serum Alternatives That Cost A LOT Less
When it comes to Sephora skincare products I am one of those great believers that you’re not paying for the ingredients. You’re paying for the bottle.
I know that might sound blunt, but after nearly a decade as a certified organic skincare formulator, reading ingredient lists is second nature to me. And what I see, again and again, is that the actives doing the real work in high-street serums are the same ones you can source yourself, often for a few pounds or dollars, not fifty or a hundred.
I want to be clear about something before we start. This isn’t about knocking beautifully packaged products. Some of them are genuinely well-made. This is about giving you the knowledge to make your own choice.
Because once you understand what’s actually inside a serum, you can decide for yourself whether the price tag is worth it, or whether you’d rather make something just as effective at home.
I’m a maker at heart. I always have been. There is something deeply satisfying about knowing exactly what’s going on your skin, where every ingredient came from, and how much it cost you to make. That’s the spirit behind everything I share here.
So let’s get into it.
This post contains affiliate links. As an Amazon Associate I earn from qualifying purchases, at no extra cost to you.
What’s actually inside a serum? (and why it matters)
A serum is, at its core, a delivery system. It’s designed to carry one or two key active ingredients into your skin more efficiently than a regular moisturiser can.
Everything else in the formula (the thickeners, the stabilisers, the fragrance, the preservatives, the beautiful packaging) is there to make the product feel nice, look appealing, and last on the shelf. None of that is doing the skincare work.
The active ingredient is. And in most serums, there’s just one or two of them.
Once you know what that active is and what it actually does, making a functional DIY alternative becomes a lot more straightforward than you might think. Not always perfect, not always identical, but genuinely effective — and I’ll be honest with you throughout about where the limits are.
1. DIY hydrating serum: aloe vera, glycerin, and the hyaluronic acid secret
What the commercial serum does
The hydrating serum we’re looking at uses two hero ingredients: hyaluronic acid and polyglutamic acid. Both are humectants, which means they pull water from the environment and hold it in the skin. The result is plumper, more comfortable, better-hydrated skin.
That’s it. That’s the job. Everything else in the formula is there to deliver those two humectants in a stable, pleasant texture.
Why this is the easiest DIY swap
Humectants are among the simplest skincare ingredients to work with at home. You probably already have one of them in your kitchen right now.
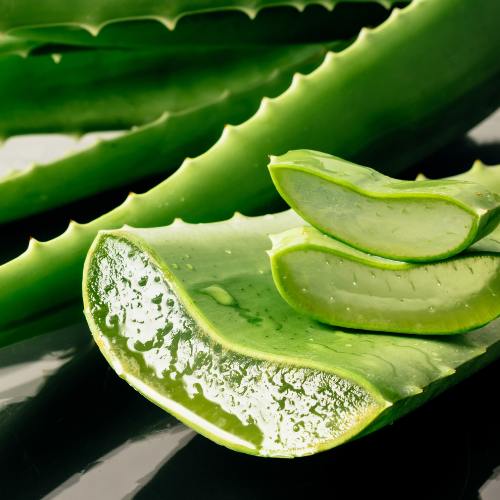
Aloe vera gel is a natural humectant. It also contains polysaccharides that form a light protective film on the skin, locking in moisture beautifully. Vegetable glycerin is another humectant that’s been used in skincare for over a century — cheap, effective, and very skin-friendly.
If you want to go a step further, hyaluronic acid powder or serum is now widely available and genuinely affordable. A small bottle costs around £8–10 ($10–13) and lasts months.
The DIY recipe
- 4 tablespoons pure aloe vera gel
- 1 teaspoon vegetable glycerin
- Optional: 2–3 drops hyaluronic acid serum stirred through
Mix in a small clean bowl and transfer to a dark glass bottle or pump dispenser. Apply to clean, slightly damp skin before moisturiser. The damp skin is important — humectants work best when there’s moisture already present to draw in.
Realistic expectations
This is genuinely comparable to the commercial version for everyday hydration. It won’t have the exact same silky texture because commercial formulas use specialist polymers for that finish, but the hydrating effect is real and effective. For a lot of people, the results are indistinguishable.
You can read more about how aloe vera works for skin in my article on aloe vera gel benefits and its active ingredients.
2. DIY bakuchiol anti-aging serum: the cleanest swap of them all
What the commercial serum does
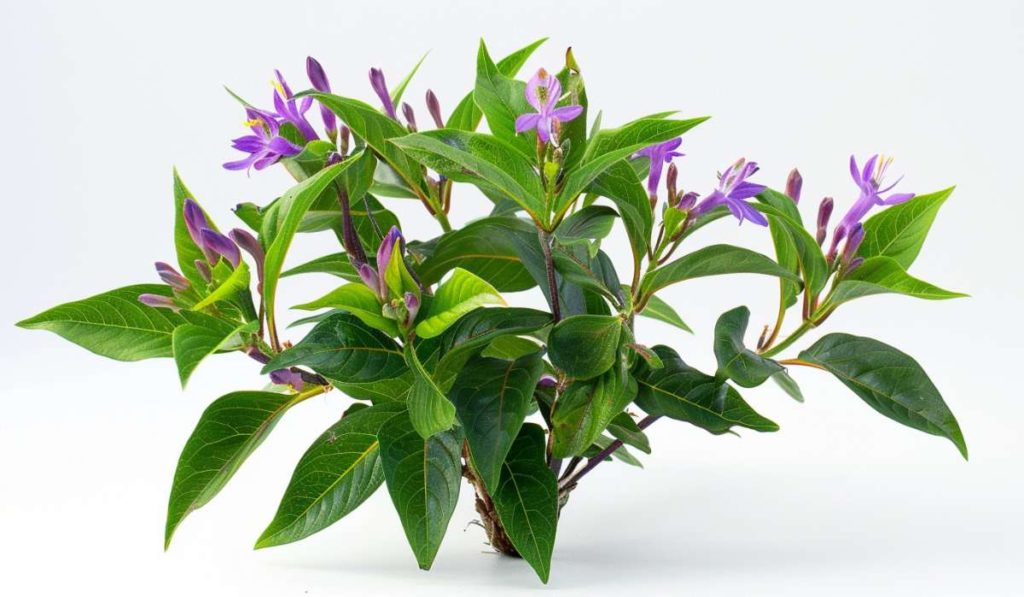
The bakuchiol serum uses 1% bakuchiol — a plant-derived compound extracted from the seeds of the Psoralea corylifolia plant. It works by stimulating collagen production, supporting cell turnover, and reducing the appearance of fine lines and dark spots. All without the irritation that retinol can cause.
This is actually one of my favourite ingredients in natural skincare. I’ve written about it extensively, and I genuinely believe in it — especially for sensitive or mature skin. If you want the full story on why I think it’s one of the best things to happen to natural anti-ageing skincare, have a read of my piece on bakuchiol vs retinol.
Why this is an almost perfect swap
Here’s the thing: bakuchiol is bakuchiol. The plant extract works the same way regardless of whether it’s sitting in an expensive serum or a blend you’ve made yourself. You’re not losing anything by going DIY here — you’re just cutting out the middleman.
Paired with rosehip oil, which is naturally rich in vitamin A precursors and antioxidants, you’ve got a genuinely powerful anti-ageing blend. Add a few drops of vitamin E, and you’re also protecting the blend from oxidising too quickly, which extends its useful life and adds extra antioxidant benefit to your skin.
The DIY recipe
- 1 tablespoon rosehip oil
- 1 teaspoon bakuchiol oil
- 3 drops vitamin E oil (acts as antioxidant and natural preservative)
Combine in a dark glass dropper bottle. Use 3–4 drops on clean skin in the evening. This blend is entirely oil-based, so it stays stable well and has a reasonable shelf life when stored correctly (more on that in the storage section below).
Realistic expectations
This is as close to a like-for-like swap as you’ll get in DIY skincare. Same active, same function, same evening application. The commercial version has a lighter texture because of additional polymers, but the skincare results are comparable. Consistent use over 8–12 weeks is where you’ll really see the difference.
3. DIY dark spots serum: fresh papaya and natural brighteners
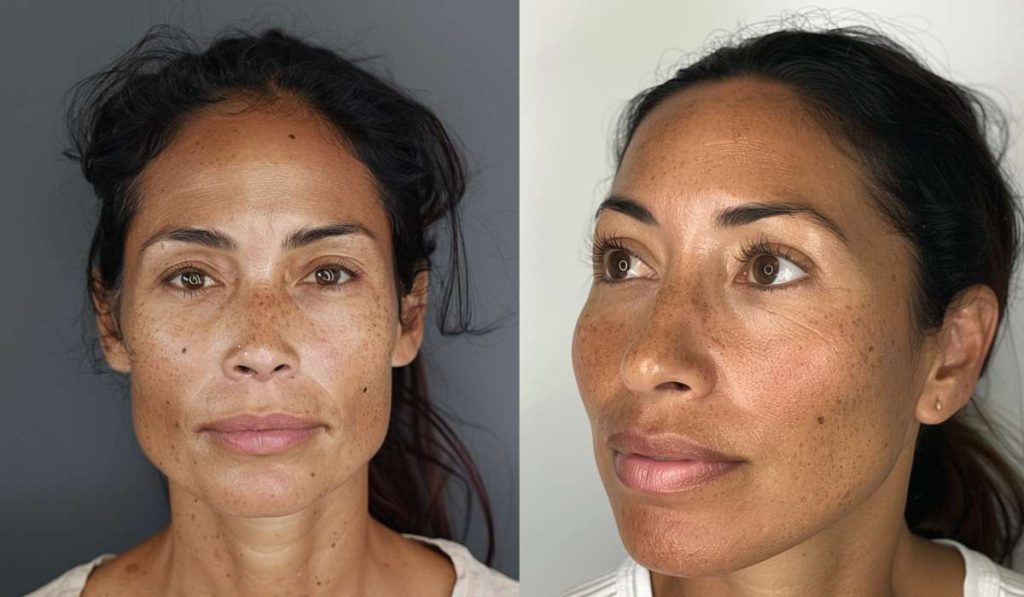
What the commercial serum does
The dark spots serum targets hyperpigmentation using two key approaches: niacinamide to regulate melanin production and strengthen the skin barrier, and papain enzyme (derived from papaya) to gently exfoliate and encourage cell renewal.
Both ingredients are working towards the same goal — a more even, brighter skin tone over time.
The papaya revelation
Here’s something I find genuinely exciting. Unripe papaya contains natural papain enzyme — the exact same compound used in the commercial serum — in quite meaningful concentrations. FACTCHECK on exact papain levels in unripe vs ripe papaya. Unripe papaya has significantly more papain than ripe, because the enzyme breaks down as the fruit matures.
This means a simple unripe papaya mask is not a vague approximation of the serum. It’s delivering the actual active ingredient, straight from the source.
Mash a few tablespoons of unripe (green) papaya flesh and apply to clean skin for 10–15 minutes, then rinse thoroughly. Do this once or twice a week. Your skin will feel noticeably smoother afterwards.
For the brightening and barrier-strengthening side of things, turmeric is your best natural ally. Its active compound curcumin has well-documented anti-inflammatory and brightening properties. A small amount mixed into your papaya mask covers both bases in one simple step.
The DIY recipe: brightening papaya mask
- 2 tablespoons mashed unripe (green) papaya
- A pinch of turmeric powder
- 1 teaspoon aloe vera gel to soothe
Mix together, apply to clean skin, leave for 10–12 minutes, rinse well. Use once or twice a week. Always patch test first — papain is an enzyme and can cause sensitivity in some skin types, particularly if you have very reactive skin.
Realistic expectations
Gentler and less standardised than the commercial version, because you can’t control the exact papain concentration in fresh fruit. But genuinely effective with consistency, and there’s something really lovely about using an ingredient in its whole, natural form rather than an isolated extract. For the niacinamide effect, turmeric and consistent gentle exfoliation work in a similar direction, though if you want true niacinamide strength, the commercial product may serve you better there.
You can read more about turmeric for skin in my article on turmeric face masks.
4. DIY vitamin C glow serum: rosehip oil and the stability truth
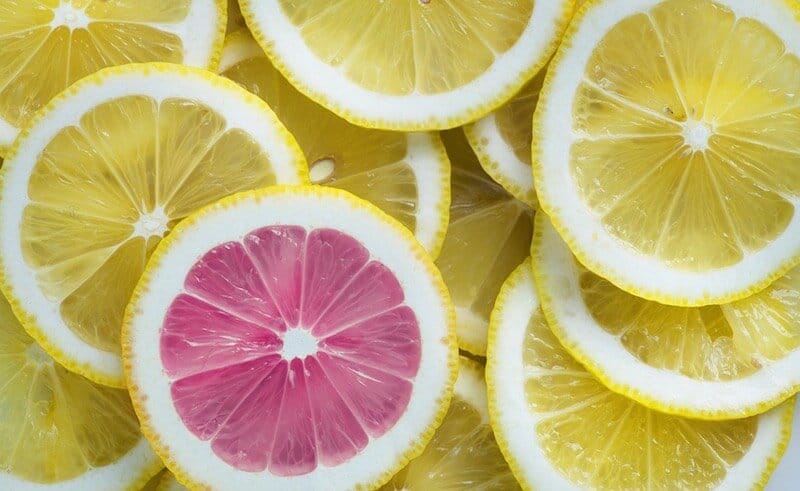
What the commercial serum does
The glow serum uses a blend of stabilised vitamin C derivatives — specifically sodium ascorbyl phosphate, ascorbyl glucoside, and 3-O-ethyl ascorbic acid — totalling around 7–10% vitamin C equivalents. These are paired with vitamin E for antioxidant protection and a small amount of sunflower oil.
The goal is brighter skin, more even tone, and protection against free radical damage.
The honest truth about DIY vitamin C
I want to be straight with you here, because this is where a lot of DIY skincare content gets it wrong.
Pure vitamin C (ascorbic acid) is notoriously unstable. It oxidises quickly when exposed to air and light, turning orange and losing potency fast. A homemade pure ascorbic acid serum can be ineffective within days if not stored carefully. The commercial serum uses specifically chosen stabilised derivatives that don’t have this problem.
So rather than chasing an unstable DIY vitamin C serum, I’d point you towards something that naturally delivers vitamin C precursors in a stable, skin-friendly form.
Rosehip oil is the answer here. It’s rich in trans-retinoic acid and vitamin C precursors, genuinely brightening, and completely stable in its natural form. Paired with a touch of turmeric for extra brightening and vitamin E to slow oxidation and nourish the skin barrier, you have a genuinely effective natural brightening blend.
The DIY recipe
- 1 tablespoon rosehip oil
- 3–4 drops vitamin E oil
- Optional: a tiny pinch of turmeric (test first — it can temporarily stain)
Combine in a dark glass dropper bottle. Apply 3–4 drops to clean skin in the evening (vitamin C derivatives are best used at night as UV degrades them). Shake gently before each use.
Realistic expectations
This is not a perfect like-for-like swap, and I want to be honest about that. The commercial serum uses precisely formulated, pH-adjusted stabilised derivatives that deliver a more consistent result. Rosehip oil works differently — it brightens and evens tone through a combination of natural retinoids and antioxidants rather than direct vitamin C activity.
That said, rosehip oil has an impressive track record for skin brightening and is one of the most researched carrier oils for uneven tone and scarring. For many people it produces beautiful results. It just works in its own way, not as a carbon copy.
If you want the specific benefits of stabilised vitamin C and find rosehip oil isn’t quite enough for your skin goals, the commercial serum may genuinely be the better choice here. And that’s fine — knowing why helps you spend your money intentionally rather than accidentally.
5. DIY gentle peeling serum: fermented rice water and the acid truth
What the commercial serum does
This serum uses lactic acid (an AHA) for chemical exfoliation, combined with niacinamide to brighten and squalane to hydrate. It resurfaces the skin, fades dark spots, and improves texture over time.
It’s a well-designed product. And I have to be honest with you: this one is the hardest to replicate at home.
Why acid serums are tricky to DIY
Lactic acid and other AHAs work because of their pH. The exfoliation only happens when the acid is formulated at a specific pH range (roughly 3.5–4.0). Without lab equipment to test and adjust pH, a homemade lactic acid serum could either do nothing at all or cause irritation — and you wouldn’t know which until it was too late.
This is where I draw the line as a formulator. I won’t encourage people to DIY acids without proper pH testing because the margin for error is real.
The honest pivot: fermented rice water
What I will recommend is fermented rice water. It naturally contains lactic acid produced during the fermentation process — at gentler concentrations that don’t require pH adjustment and are much kinder to sensitive skin. FACTCHECK on exact lactic acid content in fermented rice water.
The results are milder than a commercial AHA serum, but the exfoliation is real, the brightening effect is documented, and there’s no risk of over-acidifying your skin. I have a full guide on how to make and use rice water for skin and hair if you want to go deeper.
Willow bark extract is a plant-based BHA alternative worth mentioning too, though it can be harder to source than rice water.
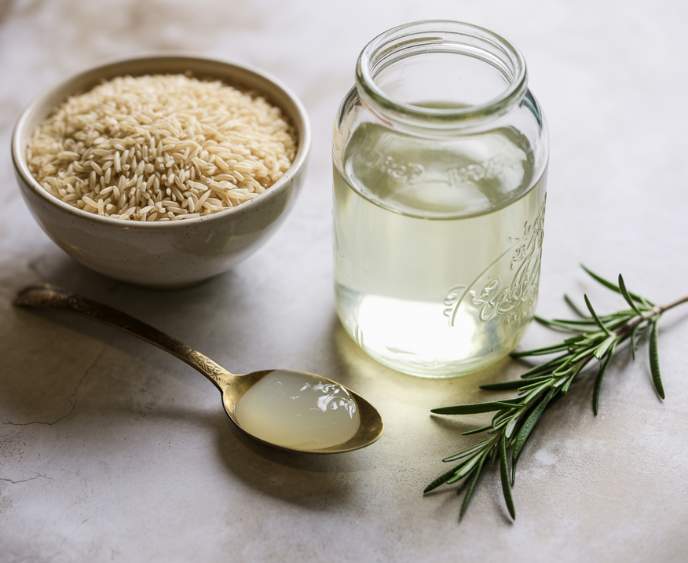
The DIY: fermented rice water toner
- Soak 2 tablespoons of uncooked rice in 1 cup of distilled water for 24–48 hours at room temperature
- Strain, keep the liquid, and apply to skin with a cotton pad after cleansing
- Store in the fridge and use within 5 days
Realistic expectations
This is a gentle, genuine exfoliant — not a clinical-strength acid peel. If you’re looking for noticeable resurfacing or significant dark spot fading in a short time, the commercial serum will outperform this. But if you want consistent, gentle skin renewal with a very low irritation risk and zero cost, fermented rice water is a lovely regular practice.
This is one case where I’d say: try the DIY first, and if your skin needs more, consider the commercial product for targeted use. Both have a place.
Shelf life, storage, and keeping your DIY serums safe
This section matters. A lot. Commercial serums have sophisticated preservative systems that keep them stable for 12–24 months. Your DIY blends do not. Here’s what you need to know.
Oil-based blends (bakuchiol serum, rosehip brightening blend)
Oil-based serums are the most stable of the DIY options because water is what bacteria needs to grow, and these formulas contain none. Adding vitamin E to every oil-based blend, as I’ve suggested throughout this article, slows oxidation and extends the life of the oils significantly.
Store in a dark glass bottle away from heat and light. A cool, dark cupboard is ideal. Expect a shelf life of 2–3 months. If the oil starts to smell rancid (a crayon-like or sour smell), it’s time to make a fresh batch.
Water-based blends (aloe vera hydrating serum)
Water-based DIY serums are much more vulnerable because water creates the conditions bacteria and mould need to thrive. Without a proper preservative system, these should be kept in the fridge and used within 7–10 days. Make small batches — enough for a week or so at a time.
If you notice any change in smell, colour, or texture, discard immediately.
Fermented rice water
Keep refrigerated and use within 5 days. Full stop.
General rules for all DIY skincare
Always use clean, dry hands or utensils when handling your blends. Store in clean, sterilised glass containers. Avoid leaving lids off. Keep everything away from direct sunlight and humidity (so not the bathroom shelf, as tempting as that is).
And always — always — do a patch test before applying anything new to your face. Apply a small amount to the inside of your wrist, wait 24 hours, and check for any reaction.
The starter kit: what to buy to make all five
If you want to start making your own versions of all five serums, here are the core ingredients you’ll need. Many of them overlap, so the investment is smaller than you might expect.
- Aloe vera gel — for the hydrating serum base
- Vegetable glycerin — humectant for the hydrating serum
- Hyaluronic acid serum — optional upgrade for the hydrating serum
- Rosehip oil — base for the brightening blend and bakuchiol serum
- Bakuchiol oil — for the anti-ageing serum
- Vitamin E oil — added to every oil-based blend (available in most health food shops and online)
- Fresh unripe papaya — from any supermarket, used fresh
- Uncooked rice — you already have this
Total approximate cost: around £25–35 ($30–45) for most of the above, and several ingredients will last you months of regular use.
Compare that to £50–150 ($60–185) for a single commercial serum, and the maths speaks for itself.
Final thoughts
I’m not here to tell you to throw out everything in your bathroom cabinet. I use carefully chosen products myself, and I believe some commercial formulas are genuinely excellent.
What I am here to tell you is that the knowledge to make effective skincare at home is not complicated, not expensive, and absolutely within your reach. The ingredients doing the real work in those beautifully designed bottles are often the same ones you can buy for a fraction of the price, mix in five minutes, and apply with the same result.
For hydration, bakuchiol, and gentle brightening, the DIY versions in this article are strong, honest alternatives. For vitamin C, going natural means accepting a different mechanism but still getting real results. For acid exfoliation, fermented rice water is a gentler, safer starting point — and sometimes gentler is exactly what your skin needs.
You have the choice. Now you have the knowledge too.
Resources
- Telang PS. Vitamin C in dermatology. Indian Dermatol Online J. 2013;4(2):143–146. Available from: https://pubmed.ncbi.nlm.nih.gov/23741676
- Draelos ZD. Niacinamide: A B vitamin that improves aging facial skin appearance. Dermatol Surg. 2005;31(7):860–865. Available from: https://pubmed.ncbi.nlm.nih.gov/16029679
- Chaudhuri RK, Bojanowski K. Bakuchiol: a retinol-like functional compound revealed by gene expression profiling and clinically proven to have anti-ageing effects. Int J Cosmet Sci. 2014;36(3):221–230. Available from: https://pubmed.ncbi.nlm.nih.gov/24471735
- Milani M, Sparavigna A. The 24-hour skin hydration and barrier function effects of a hyaluronic 1%, glycerin 5%, and Centella asiatica stem cells extract moisturizing fluid: an intra-subject, randomized, assessor-blinded study. Clin Cosmet Investig Dermatol. 2017;10:311–315. Available from: https://pubmed.ncbi.nlm.nih.gov/28848364
- Bonina F, Puglia C, Ventura D, et al. In vitro antioxidant and in vivo photoprotective effects of a lyophilised extract of Capparis spinosa L buds. J Cosmet Sci. 2002;53(6):321–335. Available from: https://pubmed.ncbi.nlm.nih.gov/12512679
- Vavouli C, Katsambas A, Gregoriou S, et al. Chemical peeling with lactic acid: clinical and histological assessment. J Cosmet Dermatol. 2013;12(3):214–218. Available from: https://pubmed.ncbi.nlm.nih.gov/24033769