My Favourite 5 DIY Face Mask Recipes With Aloe for that OH-SO-GORGEOUS Glow!
So, today I’m sharing my favourite DIY face mask recipes with aloe.
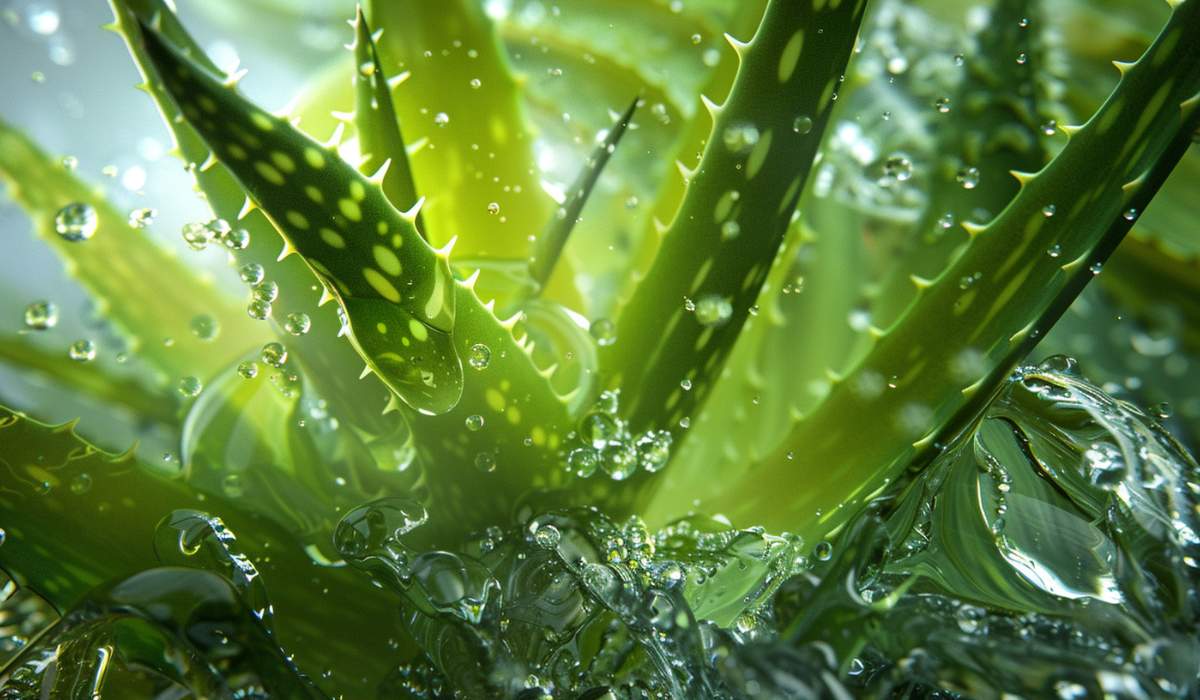
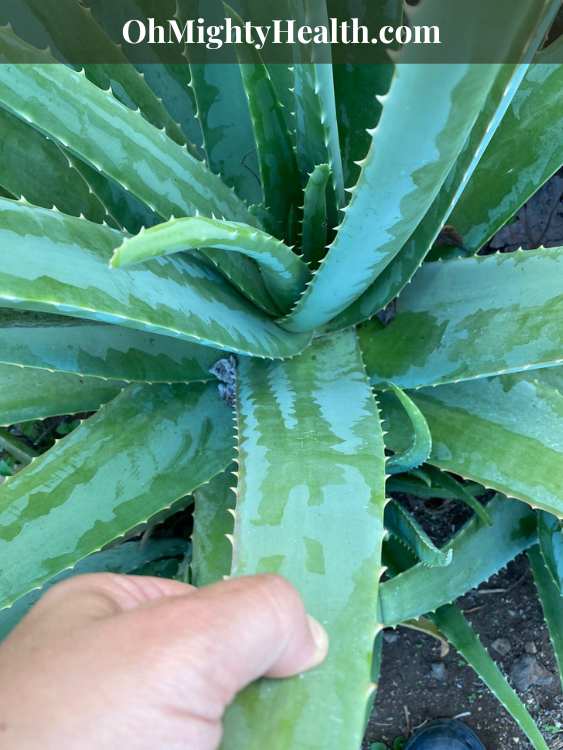
I ADORE aloe vera and grow it extensively in my land (I have dozens ((and dozens)) of them). I make my own gel which I sell at the market. It is THE BEST ALOE VERA GEL I’ve ever put on my skin.
As a certified organic skincare formulator you can imagine I spend a lot of time preparing beautiful concoctions for the skin…
So today I wanted to focus on the magic of aloe vera combined with other plant-based goodies. I’ll show you how to create SIMPLE yet EFFECTIVE face masks!
Whether you’re battling dryness, looking to soothe irritation, or just fancy a bit of pampering, these masks will be exactly what you’re looking for. There’s a lot of HELPFUL information below. Don’t skimp on reading it. Each mask Each mask has been carefully crafted to address specific skin concerns, and I’ve included all the details you need to make the most of these natural remedies.
Below you’ll find affiliate links that might earn me some money at no extra cost to you.
While I use my own homemade aloe vera gel, you can use any pure, high-quality aloe vera gel you can find. Just make sure it’s as close to 100% aloe as possible, without added fragrances or unnecessary preservatives. HERE’S MY RECOMMENDED ONE.
Aloe vera is WONDERFUL for your skin. With 75 potentially active components which include vitamins, minerals, enzymes, amino acids and more. It’s lightening properties can diminish dark spots and minimise hyperpigmentation. I have written about it EXTENSIVELY here and here. Worth taking a look when you have time.
The magic of simple ingredients!
My below recipes are INCREDIBLY easy to make at home. There’s NO EXCUSE for you not to at least try one at some point. They use just a few natural ingredients you might already have in your kitchen. Each mask combines the SOOTHING, HYDRATING power of aloe vera with another STAR ingredient to target specific skin concerns.
In the following recipes, you’ll find:
- A list of simple ingredients
- Step-by-step instructions on how to make and apply each mask
- Information on who the mask is best suited for
- How often to use it
- What skin concerns it targets
- Tips and tricks for getting the most out of your mask
Remember, consistency is key in skincare. While these masks can provide an immediate boost, regular use will give you the best results. And the best part? You can whip these up whenever you need a little skin pick-me-up!
So, are you ready to give your skin some natural, aloe-infused love? Let’s get started with our first mask recipe!
These are VERY SIMPLE, VERY EASY and QUICK to make recipes! Check them out:
1. “Cool as a cucumber” (Aloe and cucumber mask for soothing sun-stressed skin)
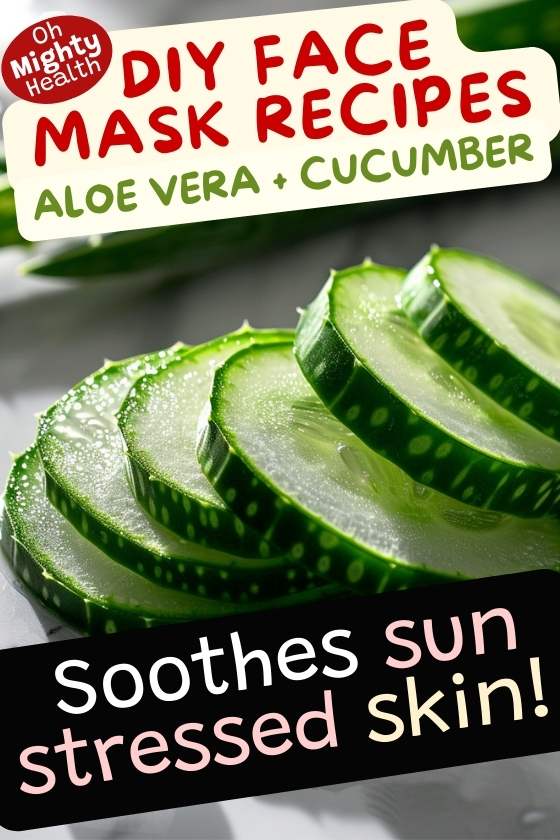
Incredibly easy homemade DIY face mask recipe with such a humble kitchen ingredient: cucumber.
Who is this for?
This mask is perfect for anyone looking to soothe and hydrate their skin, especially after sun exposure or during hot summer days.
Ingredients
- 2 tablespoons aloe vera gel
- 1/4 cucumber
How to make it
- Peel and roughly chop 1/4 of a cucumber.
- Blend the cucumber pieces in a food processor or blender until smooth.
- Strain the cucumber puree through a fine mesh sieve to remove excess liquid.
- In a small bowl, mix 2 tablespoons of aloe vera gel with 2 tablespoons of the cucumber puree.
- Stir well until combined.
- Use within 1-2 days.
How to apply
- Cleanse your face and pat dry.
- Using clean fingers or a face mask brush, apply a generous layer of the mask to your face and neck, avoiding the eye area.
- Leave on for 15-20 minutes.
- Rinse off with cool or lukewarm water.
- Pat your skin dry with a soft towel.
Frequency
Use 1-2 times per week, or as needed when skin feels particularly parched or inflamed.
Best time of day
Apply in the evening after sun exposure or whenever your skin feels hot and irritated.
How to incorporate in skincare routine
Use this mask after cleansing and before applying your regular serums and moisturisers. On mask days, you may find you need less moisturiser than usual due to the hydrating effects of the mask.
Age range
Suitable for all ages, from teenagers to mature skin.
Skin type
Ideal for all skin types, especially beneficial for sensitive or irritated skin.
Why use this mask?
The combination of aloe and cucumber provides intense hydration, cooling relief, and gentle anti-inflammatory benefits.
Targets
Dehydration, redness, inflammation, and sun-stressed skin.
What it fixes
Helps to calm sunburn, reduce redness, and restore moisture balance.
What to watch out for…
If you have extremely sensitive skin, do a patch test on your inner wrist before applying to your face. Discontinue use if any irritation occurs.
Tips and hacks!
- For an extra cooling effect, refrigerate the mask for 30 minutes before applying.
- Make a larger batch and freeze in ice cube trays for quick, single-use portions.
- Use any leftover cucumber puree in a refreshing drink or add to a salad—no waste!
2. “Oat-so-Soothing” (Aloe and oatmeal mask for sensitive & irritated skin)
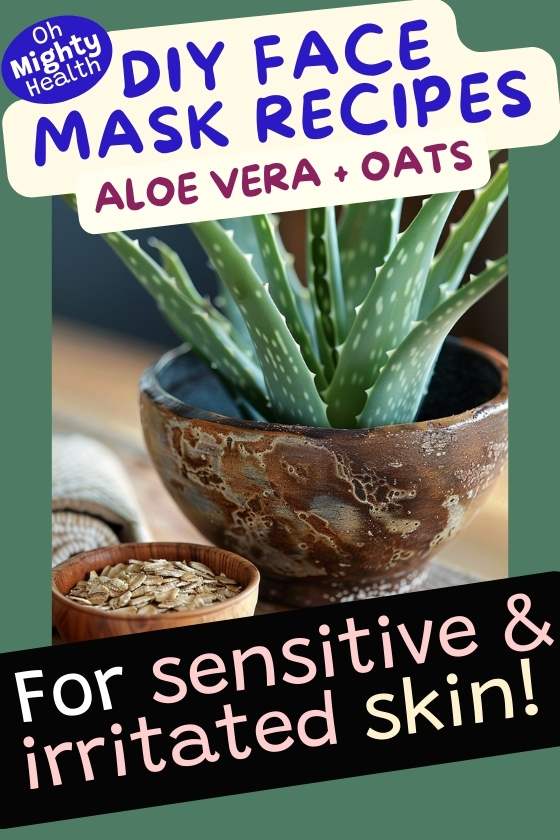
An easy DIY oatmeal face mask recipe you can whip up in no time.
Who is this for?
This mask is ideal for those with sensitive or irritated skin, or anyone looking for gentle exfoliation and soothing hydration.
Ingredients
- 2 tablespoons aloe vera gel
- 1 tablespoon finely ground oatmeal
How to make it
- In a small bowl, mix the aloe vera gel and ground oatmeal.
- Stir well until you have a smooth, consistent paste.
- If the mixture is too thick, add a few drops of water to achieve the desired consistency.
- Use within 1-2 days.
How to apply
- Start with a clean, dry face.
- Apply the mask evenly over your face and neck, avoiding the eye area.
- Gently massage the mask into your skin using circular motions for mild exfoliation.
- Leave on for 10-15 minutes.
- Rinse off with lukewarm water, continuing to use gentle circular motions.
- Pat your face dry with a soft towel.
Frequency
Use 1-2 times per week.
Best time of day
This mask is suitable for use any time of day, but evening application allows for uninterrupted relaxation time.
How to incorporate in skincare routine
Use after cleansing and before applying your usual serums and moisturisers. On mask days, you might find your skin needs less moisturiser.
Age range
Suitable for all ages, particularly beneficial for those with mature or sensitive skin.
Skin type
Excellent for dry, sensitive, or normal skin types. Those with oily skin may prefer to use it less frequently.
Why use this mask?
The combination of aloe and oatmeal provides gentle exfoliation, soothes irritation, and deeply moisturises the skin.
Targets
Dryness, sensitivity, mild redness, and rough skin texture.
What it fixes
Helps to calm irritated skin, remove dead skin cells, and improve overall skin texture and hydration.
What to watch out for…
If you have extremely sensitive skin or eczema, do a patch test first. Avoid if you have a known oat allergy.
Tips and hacks!
- For extra soothing properties, use colloidal oatmeal if available.
- Keep the ground oatmeal in a sealed jar in your bathroom for quick mask preparation.
- Use cooled chamomile tea instead of water to thin the mask for added calming benefits.
3. “Green tea glow” (Aloe and matcha mask for fighting free radicals & acne)
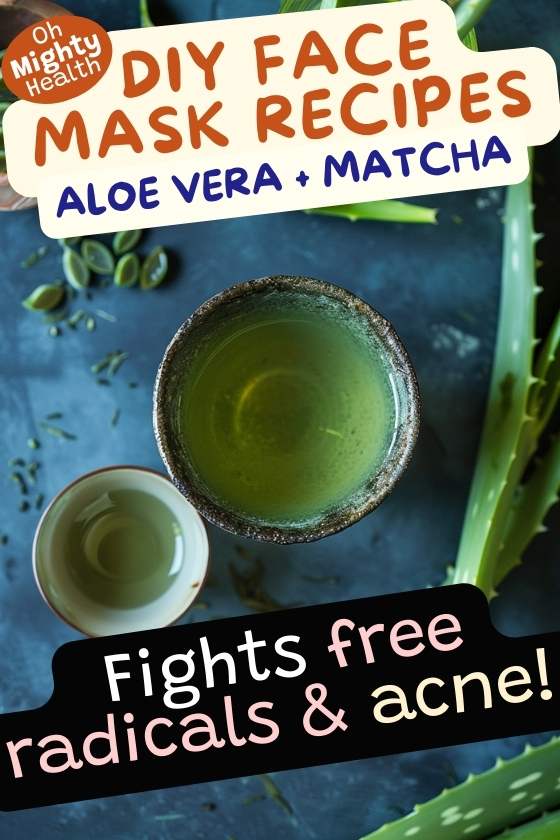
Another easy DIY face mask recipe for glowing skin! This one is also great for acne.
Who is this for?
This mask is perfect for those looking to fight free radical damage, reduce inflammation, and achieve a brighter complexion.
Ingredients
- 2 tablespoons aloe vera gel
- 1 teaspoon green tea powder (matcha)
How to make it
- In a small bowl, combine the aloe vera gel and matcha powder.
- Mix thoroughly until you achieve a smooth, even consistency.
- If the mixture is too thick, add a few drops of water and mix again.
- Use within 1-2 days.
How to apply
- Cleanse your face and pat dry.
- Using clean fingers or a face mask brush, apply an even layer of the mask to your face and neck, avoiding the eye area.
- Leave on for 10-15 minutes.
- Rinse off with lukewarm water, using gentle circular motions.
- Pat your skin dry with a soft towel.
Apply after cleansing and before your usual serums and moisturisers. On mask days, you may find your skin needs less of your regular products.
Frequency
Use 1-2 times per week.
Best time of day
This mask is great for morning use to energise and protect your skin for the day ahead, but can be used any time.
How to incorporate in skincare routine
Apply after cleansing and before your usual serums and moisturisers. On mask days, you may find your skin needs less of your regular products.
Who is this for?
This mask is perfect for those looking to fight free radical damage, reduce inflammation, and achieve a brighter complexion.
Age range
Suitable for all ages, particularly beneficial for those concerned with early signs of ageing or dull skin.
Skin type
Ideal for all skin types, especially beneficial for acne-prone or combination skin.
Why use this mask?
The combination of aloe and green tea provides antioxidant protection, helps reduce inflammation, and promotes a healthy, radiant complexion.
Targets
Dullness, uneven skin tone, mild acne, and early signs of ageing.
What it fixes
Helps to brighten skin, reduce redness, fight acne-causing bacteria, and provide antioxidant protection against environmental stressors.
What to watch out for…
If you have extremely sensitive skin, do a patch test first. The matcha may temporarily tint your skin slightly green, but this will wash off easily.
Tips and hacks!
- For an extra cooling and de-puffing effect, refrigerate the mask for 15 minutes before applying.
- Use leftover matcha in a latte or smoothie for an antioxidant boost from the inside out.
- Mix in a drop of tea tree oil if you’re specifically targeting acne (but always patch test first).
4. “Avo-licious” (Aloe and avocado mask for deep hydration & nourishment)
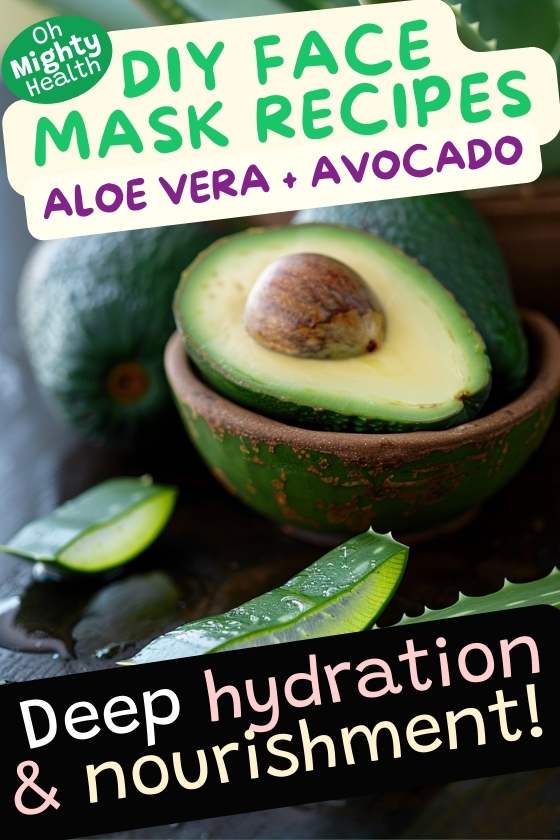
Looking for DIY avocado face mask recipe? Here it is.
Who is this for?
This mask is perfect for those with dry, dehydrated, or mature skin looking for intense nourishment and hydration.
Ingredients
- 2 tablespoons aloe vera gel
- 1/4 ripe avocado, mashed
How to make it
- Scoop out the flesh of 1/4 ripe avocado into a small bowl.
- Mash the avocado thoroughly with a fork until smooth.
- Add the aloe vera gel to the mashed avocado.
- Mix well until you achieve a creamy, consistent texture.
- Use immediately.
How to apply
- Start with a clean, dry face.
- Apply a generous layer of the mask to your face and neck, avoiding the eye area.
- Gently massage the mask into your skin using upward motions.
- Leave on for 15-20 minutes.
- Rinse off with lukewarm water.
- Pat your skin dry with a soft towel.
Frequency
Use 1-2 times per week.
Best time of day
This deeply nourishing mask is ideal for evening use, allowing the nutrients to absorb overnight.
How to incorporate in skincare routine
Use after cleansing and before your night-time moisturiser. You may find you need less of your usual night cream after this mask.
Who is this for?
This mask is perfect for those with dry, dehydrated, or mature skin looking for intense nourishment and hydration.
Age range
Suitable for all ages, particularly beneficial for those with mature skin or anyone experiencing dryness.
Skin type
Ideal for dry, normal, and combination skin types. Those with oily skin may prefer to use it less frequently.
Why use this mask?
The combination of aloe and avocado provides deep moisturisation, nourishment, and a boost of vitamins and healthy fats for the skin.
Targets
Dryness, dehydration, dullness, and fine lines.
What it fixes
Helps to deeply moisturise, improve skin elasticity, reduce the appearance of fine lines, and restore a healthy glow.
What to watch out for…
If you have a known avocado allergy, avoid this mask. Always do a patch test if you’re trying it for the first time.
Tips and hacks!
- For an extra nutrient boost, add a few drops of vitamin E oil to the mixture.
- Use any leftover avocado on toast for a healthy snack – no waste!
- If your skin is particularly dry, leave a thin layer of the mask on overnight as a sleeping mask.
5. “Golden glow” (Aloe and turmeric mask for brightening & evening skin tone)
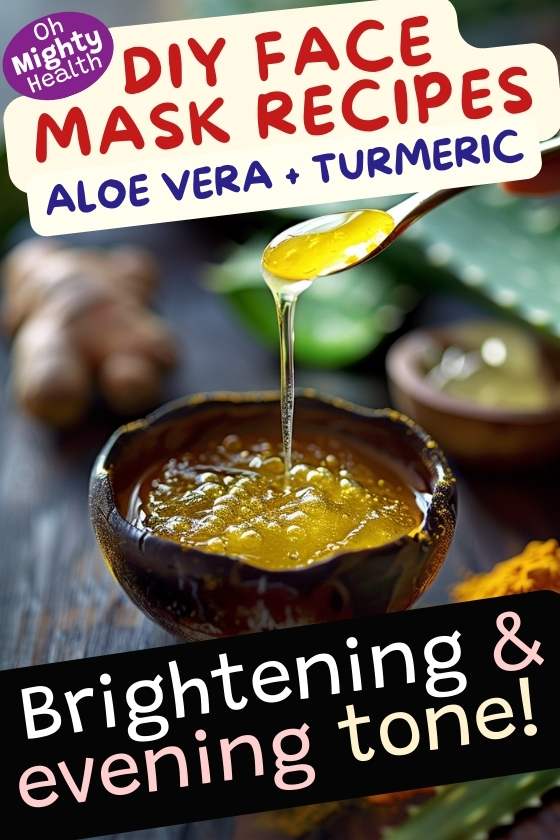
Here’s a wonderful DIY turmeric face mask for brightening and evening your skin tone.
Who is this for?
This mask is ideal for those looking to brighten their complexion, reduce inflammation, and achieve a natural glow.
Ingredients
- 2 tablespoons aloe vera gel
- 1/4 teaspoon turmeric powder
How to make it
- In a small bowl, combine the aloe vera gel and turmeric powder.
- Mix thoroughly until you achieve a smooth, even consistency with no lumps.
- If the mixture is too thick, add a few drops of water and mix again.
- Use within 1-2 days.
How to apply
- Cleanse your face and pat dry.
- Using clean fingers or a face mask brush, apply an even layer of the mask to your face and neck, avoiding the eye area.
- Leave on for 10-15 minutes.
- Rinse off with lukewarm water, using gentle circular motions.
- Pat your skin dry with a soft towel.
Frequency
Use 1-2 times per week.
Best time of day
This mask can be used any time, but evening application allows for uninterrupted time for the turmeric to work its magic.
How to incorporate in skincare routine
Apply after cleansing and before your usual serums and moisturisers. On mask days, you may find your skin needs less of your regular products.
Age range
Suitable for all ages, particularly beneficial for those concerned with uneven skin tone or early signs of ageing.
Skin type
Suitable for all skin types, especially beneficial for those with dull skin or hyperpigmentation concerns.
Why use this mask?
The combination of aloe and turmeric provides anti-inflammatory benefits, helps to brighten the skin, and promotes a more even skin tone.
Targets
Dullness, uneven skin tone, inflammation, and minor blemishes.
What it fixes
Helps to brighten complexion, reduce redness, even out skin tone, and provide a natural glow.
What to watch out for…
Turmeric can stain clothing and may temporarily tint the skin yellow, especially for those with fair skin. Always do a patch test first.
Tips and hacks!
- Add a pinch of finely ground oats for gentle exfoliation.
- If you’re concerned about staining, apply a thin layer of oil to your skin before rinsing off the mask.
- For an extra brightening boost, add a few drops of lemon juice (but be cautious with sun exposure afterwards).
- Use an old towel to dry your face, as turmeric can stain fabrics.
Here’s why I love natural face masks
- Think of them as a mini spa treatment for your face
- They deliver a concentrated boost of nourishment to your skin
- Perfect for targeting specific skin concerns
- A brilliant way to practise self-care and relax
Why should we use them?
- Deep cleansing: They draw out impurities better than regular cleansers
- Hydration: Masks can provide intense moisture for thirsty skin
- Gentle exfoliation: Some masks help remove dead skin cells for a brighter complexion
- Soothing properties: Calm irritated or inflamed skin
- Plumping effect: Can temporarily reduce the appearance of fine lines
Natural masks vs commercial products:
- Natural masks can replace or complement:
- Store-bought face masks
- Intensive moisturisers
- Exfoliating treatments
- Pore-refining products
- They’re often more cost-effective
- You know exactly what’s going on your skin – no mysterious ingredients!
Why go back to nature?
- Fewer synthetic chemicals on your skin
- Environmentally friendly – less packaging waste
- Customisable to your skin’s needs
- Fun to make – bring out your inner mixologist!
- Often gentler on sensitive skin
Tips for mask success:
- Consistency is key – aim for 1-2 masks per week
- Always patch test new ingredients
- Listen to your skin – it’ll tell you what it needs
- Don’t forget your neck and décolletage
- Use mask time to practise mindfulness or meditation
Did I miss anything?
Do you have everything you need to get started?
Yes??
Time to go to your kitchen then and make that DIY mask!