
Castor oil spot layering for extra dry patches
You know the patch I mean. It sits right by your nose, or camps out at the corner of your mouth, or takes up residence over one eyebrow like it pays rent there. You slather on serum, then oil, then a rich cream on top for good measure, and somehow that one bit of skin still looks like it’s shedding.
Meanwhile the rest of your face is perfectly happy, possibly even a bit shiny from all the product you didn’t need.
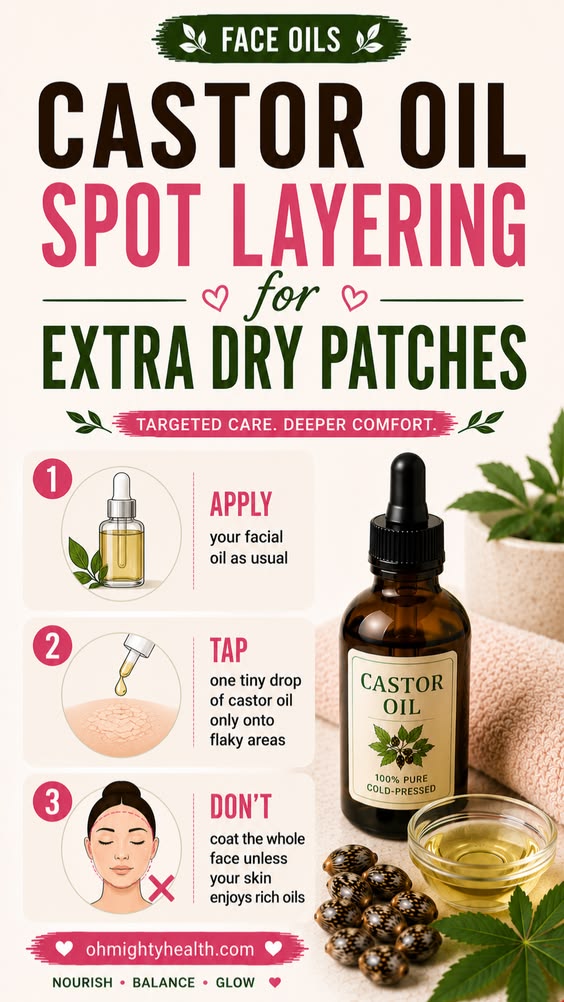
This is where spot layering earns its keep, and where castor oil, of all things, turns out to be the unlikely hero.
I’m Patri Hernández, a certified organic skincare formulator and dermocosmetic technician with a background in health coaching, and I have spent more hours than I’d like to admit troubleshooting exactly this problem: one stubborn dry patch that laughs in the face of your entire moisturiser collection.
Some links in this post are affiliate links, so I may earn a small commission if you buy through them, at no extra cost to you. I only recommend ingredients I’d genuinely put in a formulation myself.
What is castor oil spot layering, actually?
Strip away the pretty branding and it’s a wonderfully simple idea: you do your normal skincare routine exactly as usual, then you go back in with a single drop of castor oil and apply it only to the patch that’s misbehaving. Not your whole face. Just the crime scene.
Think of it as patching a pothole rather than repaving the entire street. You wouldn’t resurface your whole driveway because of one crack, and you don’t need to drown your whole face in a thick oil because of one dry corner.
So why not just use it everywhere?
Because castor oil is dense. Genuinely, properly dense, in a way that a lot of “lightweight” facial oils simply aren’t. That thickness is precisely what makes it so good at holding moisture over a rough patch, and precisely what makes it a bit much everywhere else. Used all over, it can feel tacky, sit heavy, and on some skin types flirt with congestion. Used as a spot treatment, you get all of the payoff and none of the greasy-forehead regret.
Why castor oil is so good at this specific job
Castor oil comes from the seeds of the castor plant, Ricinus communis, and it’s dominated by one particular fatty acid: ricinoleic acid, which makes up around 90% of its composition. That’s unusually high, and it’s the reason castor oil behaves so differently to, say, jojoba or grapeseed oil.
It’s an occlusive, not a moisturiser
Here’s the bit that people often get backwards. Castor oil doesn’t hydrate your skin from within. It sits on top of it and slows down water loss, a process called transepidermal water loss, or TEWL if you want to sound clever at dinner parties. It’s a lid, not a drink.
That’s exactly why it works so well applied over other products rather than instead of them. Your serum or moisturiser does the actual hydrating; the castor oil on top just stops that hydration evaporating into thin air overnight.
What the science does and doesn’t say
Ricinoleic acid has been studied for mild anti-inflammatory activity, and castor oil has a genuinely long history of traditional use for dry, irritated skin. That’s worth taking seriously. What I wouldn’t do is oversell it as a treatment, because it isn’t one. It’s a supportive, occlusive ingredient, not a remedy for a skin condition. If a patch is cracking, weeping, or simply won’t calm down no matter what you do, that’s a job for a dermatologist, not a dropper bottle, however lovely that dropper bottle looks on your shelf.
What you need
- A 100% pure, cold-pressed castor oil, ideally without added fragrance
- Your usual facial oil or moisturiser
- A pipette or dropper (most bottles come with one built in, handily)
- Clean, dry hands
If you’re shopping for one, this 100% pure cold-pressed castor oil does the job without any nonsense added, or you could try a Jamaican black castor oil if you fancy something a little different (I’ll explain the distinction shortly).
How to spot layer castor oil, step by step
- Cleanse and do your usual routine. Serums, hydrating layers, all of it, exactly as normal. Castor oil’s job is to seal things in, not to do the hydrating itself, so it needs something underneath to actually seal.
- Apply your facial oil or moisturiser as usual, over your whole face. Don’t skip this bit hoping the castor oil will do double duty. It won’t.
- Go looking for the culprit. Actually look, close up, in decent light, rather than guessing from memory. Flaky, tight, rough patches are the ones you’re after.
- Tap one tiny drop of castor oil onto that patch, and that patch only. A little truly does go a long way here. You want a thin film, not a glossy puddle.
- Press it in gently. Do not rub. Rubbing a thick oil into already-flaky skin can drag the surface and irritate it further. A gentle press lets it settle without any friction drama.
- Leave it be. This is a job for the evening, ideally, so the oil has hours undisturbed to do its quiet, unglamorous sealing work while you sleep.
Where it earns its place, and where to leave it in the cupboard
Spot layering is brilliant for small, well-defined trouble spots. It is not the answer to a generally dull, dehydrated-feeling face.
- Flaky patches around the nostrils
- Chapped corners of the mouth
- Rough patches across the eyebrows or hairline
- Cracked knuckles or elbows, if you want to borrow the technique for the rest of you
Do not coat your whole face in castor oil unless your skin genuinely loves rich, heavy oils. If you’re oily or acne-prone, an all-over application is a fairly reliable way to end up with congestion by the weekend. Reactions do vary from person to person, but there’s no need to test that theory on your entire face when a spot treatment does the same job with a fraction of the risk.
Common mistakes worth avoiding
Using far too much
More is not more here. Because castor oil is so viscous, even a slightly excessive amount can sit on the skin looking shiny and unabsorbed hours later. One drop, tapped onto the patch itself, genuinely is enough. I know it feels like it shouldn’t be. It is.
Reaching for it on broken or already irritated skin
If a dry patch has progressed to actual cracking or visible irritation, sealing it under a thick oil isn’t the sensible first move. Calm the area down with something gentle and fragrance-free first, then bring castor oil in once things have settled.
Skipping the patch test because “it’s just oil”
Natural doesn’t mean risk-free, and castor oil is no exception. Apply a small amount to your inner arm or behind your ear and give it 24 to 48 hours before you let it anywhere near your face for the first time.
Layering it under sunscreen without thinking it through
A thick oil sitting directly under sunscreen can interfere with how evenly that sunscreen sits and performs. If you want to use this technique in the morning, apply it after your sunscreen has properly settled, or simply save the whole ritual for night, which is when it works best anyway.
Cold-pressed versus Jamaican black castor oil
You’ll see both floating around, and they’re not quite the same thing.
Cold-pressed castor oil is extracted mechanically without heat, which preserves more of its natural fatty acid profile and gives you a paler colour and a much milder smell.
Jamaican black castor oil is traditionally made by roasting the beans before pressing, which darkens it, gives it a distinctly smokier scent, and raises its ash content slightly. It’s a favourite in hair care circles, but for spot treating your face, I’d point you towards a plain cold-pressed version. It’s the more predictable, gentler option, and predictable is exactly what you want when you’re dealing with sensitive dry patches.
How often should you actually do this?
While a patch is properly unhappy, nightly spot application is entirely reasonable. Once it’s calmed down and feels smoother to the touch, ease back to two or three nights a week, or simply keep the bottle handy for whenever a rough patch has the audacity to reappear.
Storing your castor oil so it doesn’t go off on you
Castor oil holds up better than a lot of delicate carrier oils, but it isn’t immortal. Heat and light will still degrade it over time.
- Keep the bottle somewhere cool and dark, well away from a sunny windowsill
- Screw the dropper cap back on properly every time, not just balanced on top
- A well-stored, pure castor oil should comfortably see you through one to two years
If it ever starts smelling sharp, rancid, or just wrong compared to when you bought it, that’s your cue to bin it and start fresh, however much oil is left in the bottle.
Frequently asked questions
Can I use castor oil spot layering every single day?
Yes, while you’re actively treating a patch. Small amount, targeted application, no reaction. Once the patch resolves, there’s no need to keep it up daily; save it for when it’s actually needed.
Will castor oil clog my pores?
It can, for some skin types, particularly if you get heavy-handed or use it across the whole face rather than as a spot treatment. Keeping it targeted is the easiest way to sidestep this entirely.
Can I blend castor oil with something lighter?
Absolutely, and plenty of people do exactly this to take the edge off its thickness. Mixing a small amount into a lighter oil such as jojoba oil or rosehip oil makes it easier to spread while still holding onto some of that occlusive benefit.
Is castor oil safe to use on skin during pregnancy?
Applied topically to the skin, castor oil is generally considered fine. Taken orally, it’s a different story entirely, as it has traditionally been used to try to induce labour, so that route should be avoided. If you’re pregnant and want a second opinion, your midwife or doctor is the right person to ask, not the internet.
There’s something quietly satisfying about solving a stubborn problem with less product rather than more. One drop, exactly where it’s needed, left completely alone to do its job overnight. No fuss, no faff, and hopefully, by morning, one less patch giving you grief in the mirror.
Love, Patri xx
