10 Essential Oil Tips Every Beginner Needs to Know
I’m excited to share my top 10 essential oil tips with you. It takes time to extract the great info and I made sure below, you’ll find just that. Great info.
Each and every tip below is IMPORTANT, trust me. Read on and make sure to take notes!
1. Quality matters! Learn to choose pure (and potent) oils 🌿
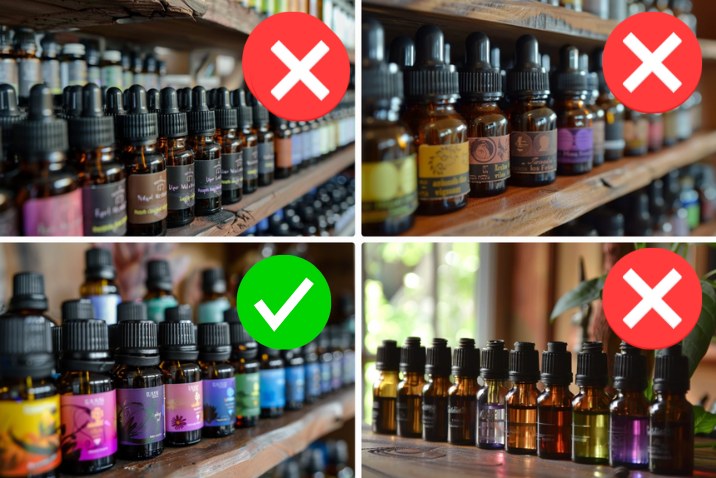
When you’re just starting out with essential oils, it can be tempting to grab the first bottle you see on the shelf. But trust me, not all oils are created equal! Investing in high-quality, pure essential oils is absolutely crucial if you want to experience their true benefits (and even avoid any potential nasties).
Look for brands that are transparent about their sourcing and testing processes and avoid companies that are shifty about these details (red flag! 🚩).
Check the labels for important information:
- Scientific name (e.g., Lavandula angustifolia for lavender)
- Country of origin
- Extraction method (e.g., steam distillation, cold pressing)
Choose oils that are:
- 100% pure and natural
- Free from additives, fillers, or synthetic fragrances
- Preferably organic or wild-crafted
Trust your senses when selecting oils:
- High-quality oils should have a vibrant, authentic aroma
- Avoid oils that smell artificial or have a weak scent
Here’s a very helpful video on spotting a fake!
2. Safety first: ALWAYS patch test!!
Now that you know how to choose high-quality essential oils, let’s talk about safety!
Before you start slathering yourself in your new favourite oil, it’s ABSOLUTELY CRUCIAL to perform a patch test. This simple step can save you from a whole lot of discomfort down the line… 😅
Here’s how to do it:
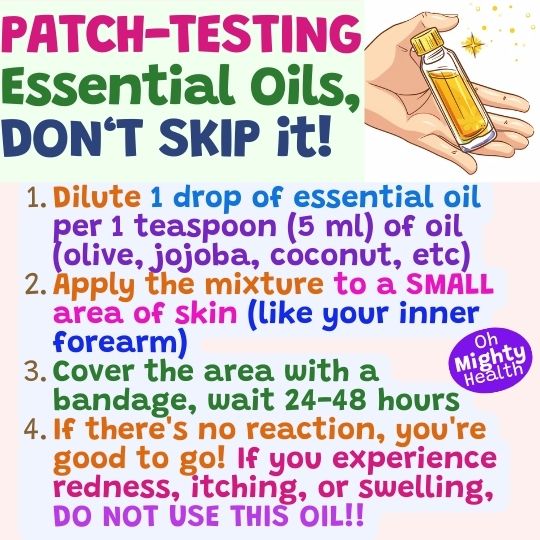
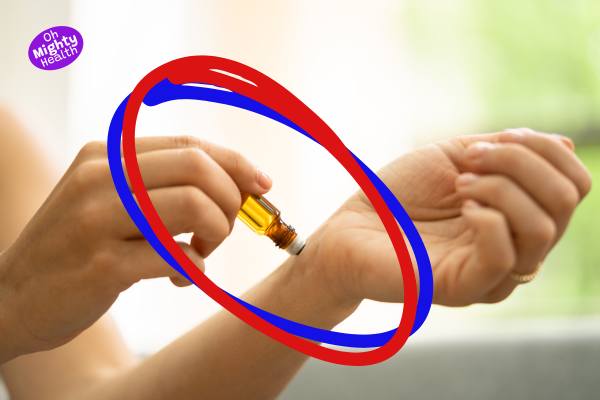
- Dilute a small amount of the essential oil in a carrier oil (like coconut or jojoba)
- Apply the mixture to a small area of skin (like your inner forearm)
- Cover the area with a bandage and wait 24-48 hours
- If there’s no reaction, you’re good to go! If you experience redness, itching, or swelling, it’s best to steer clear of that oil.
If you have any pre-existing health conditions or take medications, it’s always a good idea to consult with your doctor. Some oils can interact with medications or exacerbate certain conditions, remember!
Potential interactions to watch out for:
- Peppermint oil can interfere with certain medications (like those for acid reflux or diabetes)
- Citrus oils can increase photosensitivity, making your skin more prone to sunburn
- Some oils (like rosemary and sage) should be avoided by people with high blood pressure or epilepsy
3. Application… Diffusing? Topical use? Inhalation? Oh, My!
Alright, you’ve got your high-quality, patch-tested oils – now it’s time to put them to use. There are 3 main ways to apply essential oils: DIFFUSING, TOPICAL USE, and INHALATION. Each method has its own set of benefits and guidelines, so let’s break it down for you below.
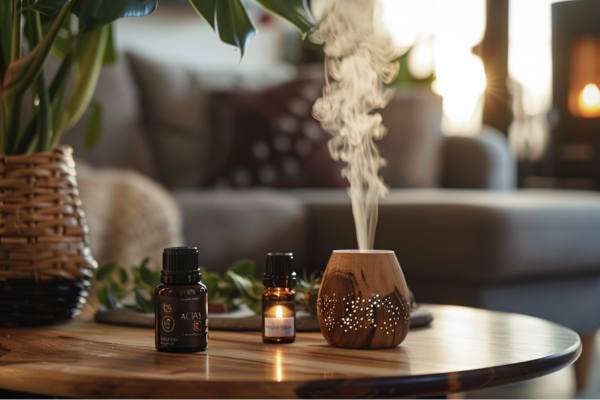
DIFFUSING: By adding a few drops to a diffuser, you can fill your space with a lovely aroma and reap the benefits of the oil.
- Start with 3-5 drops of oil per 100ml of water in your diffuser
- Ensure proper ventilation and limit diffusing sessions to 30-60 minutes
- Perfect for creating a calming atmosphere or boosting your mood 😊 Try lavender and chamomile for relaxation, peppermint and lemon for an energy boost, or eucalyptus and tea tree to purify the air.
⚠️⚠️ DO NOT DIFFUSE ESSENTIAL OILS IF YOU HAVE PETS AT HOME. DISCUSS FIRST WITH AN AROMATHERAPIST OR PROFESSIONAL.⚠️⚠️
TOPICAL USE: Applying essential oils directly to your skin can be a great way to target specific areas.
- Always dilute essential oils with a carrier oil before applying to your skin
- A good rule of thumb is to use 2-3 drops of essential oil per teaspoon of carrier oil
- Some great places to apply oils include your wrists, temples, and the soles of your feet. Try lavender or frankincense on your temples for relaxation, peppermint on your wrists for a quick pick-me-up, tea tree on blemishes for clearer skin, or a blend of bergamot and ylang-ylang on your neck for a confidence boost. That’s just the start!
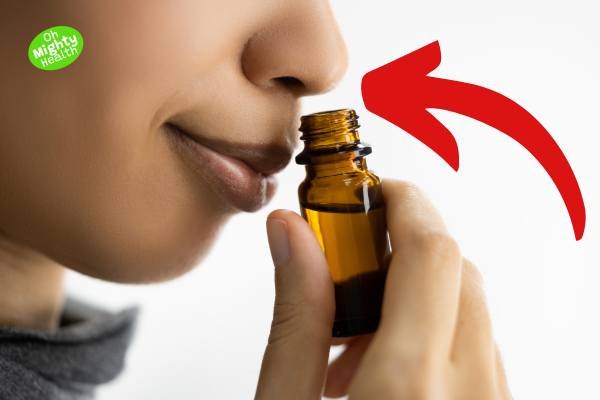
INHALATION: This method is perfect for when you need a quick pick-me-up or want to enjoy the benefits of an oil on the go. It’s my favourite because of how quick and effective it is (and, yes, I am addicted to the scents…)
- Simply open the bottle and take a few deep breaths
- You can also add a drop or two to a cotton ball and inhale periodically
- Great for oils like peppermint (for an energy boost) or lavender (for relaxation)
No matter which method you choose, always listen to your body and start with small amounts.
4. Essential oil starter kit: The top oils for beginners 🧴
When you’re first starting out, it can be overwhelming to choose from the endless array of essential oils available. To make things easier, I recommend beginning with a few VERSATILE oils that can be used in a variety of ways.
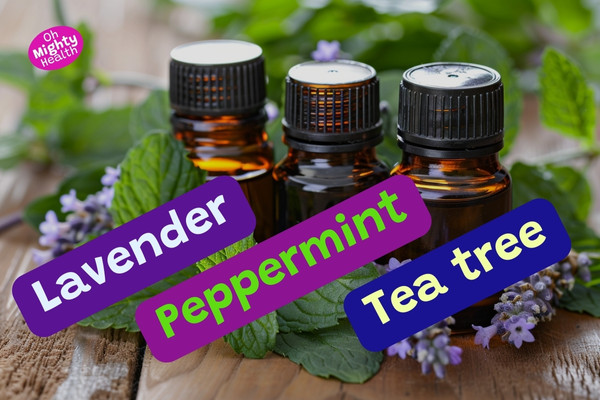
Here are my TOP PICKS for a beginner’s starter kit:
- Lavender: This soothing oil is perfect for promoting relaxation, reducing stress, and improving sleep quality. It’s also great for soothing minor skin irritations. Add a few drops to your diffuser before bedtime or mix with a carrier oil and massage into your temples for a calming effect.
- Peppermint: Need an energy boost? Peppermint oil is your go-to. It can also help alleviate headaches, improve mental clarity, and soothe digestive discomfort. Inhale directly from the bottle for a quick pick-me-up.
- Tea Tree: This powerful oil is a must-have for its cleansing and purifying properties. It’s fantastic for promoting healthy skin and can be used to clean surfaces around your home. Mix one drop with your facial moisturiser to combat blemishes or add a few drops to a spray bottle with water for a natural household cleaner.
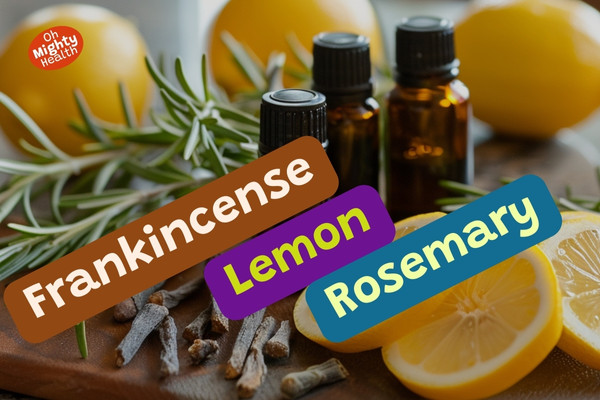
As you become more comfortable with these basic oils, you can start exploring some lesser-known options that offer unique benefits:
- Frankincense: This grounding oil is wonderful for promoting feelings of peace and balance. It’s also great for nourishing and rejuvenating the skin. Add a few drops to your diffuser during meditation or mix with a carrier oil and apply to your face as a natural moisturiser.
- Lemon: Bright and refreshing, lemon oil is perfect for boosting your mood and promoting mental clarity. It’s also a great addition to homemade cleaning products. Diffuse a few drops in the morning for an energizing start to your day or add a few drops to a mixture of vinegar and water for a natural all-purpose cleaner.
- Rosemary: This invigorating oil can help improve focus and memory, making it ideal for study sessions or work projects. It’s also fantastic for soothing sore muscles after a workout. Inhale directly from the bottle or apply diluted to your temples when you need a mental boost, or mix with a carrier oil and massage into sore muscles for relief.
5. Caution with kids, pets, and mums-to-be!

It’s crucial to be VERY cautious when using them around children, pets, and pregnant people.
These groups can be more sensitive to the effects of essential oils, so it’s important to take extra precautions to ensure their safety.
I was tempted to give some more tips but decided not to in order to push you to speak to a professional/specialist.
All I will say here is that you SHOULD NOT USE ESSENTIAL OILS on children, around pets or if pregnant UNTIL A PROFESSIONAL has advised you on this.
6. Storing your essential oils so they last you longer
You’ve invested in some amazing essential oils, and now you want to make sure they stay fresh and potent for as long as possible.
Proper storage is key to maintaining the quality of your oils and ensuring you get the most out of them.
Here are some tips to keep in mind:
- Keep your oils in a cool, dark place away from direct sunlight and heat sources
- Store them in airtight glass bottles with tight-fitting lids (avoid plastic, as it can react with the oils)
- If you’re using a dropper, make sure it’s clean and dry before inserting it into the bottle to avoid contamination
- Label your bottles with the date of purchase so you can keep track of their age
When it comes to shelf life, most essential oils can last anywhere from 1-3 years when stored properly. However, some oils have a shorter shelf life due to their chemical composition:
- Citrus oils (like lemon and orange) tend to oxidize more quickly and may only last 6-12 months
- Oils with a high concentration of terpenes (like pine and spruce) can also deteriorate faster
- On the other hand, oils with a high concentration of sesquiterpenes (like sandalwood and patchouli) can last for several years
Essential oils shelf life*
*The complete list of essential oils and their shelf life is at the end of this article.
| Essential Oil | Shelf Life | Notes |
|---|---|---|
| Lavender | 4-5 years | Longer shelf life due to its stability. |
| Lemon | 1-2 years | Highly volatile, prone to oxidation. |
| Peppermint | 4-5 years | Store away from direct sunlight. |
| Tea Tree | 1-2 years | Prone to oxidation, especially when exposed to air. |
| Eucalyptus | 2-3 years | Can last longer if stored properly. |
| Frankincense | 5-6 years | Resin-based oils are generally stable. |
| Chamomile | 5 years | Contains esters and sesquiterpenes, which are stable. |
So, how can you tell if an oil has gone bad? Here are some signs to watch out for:
- The aroma has changed or weakened significantly
- The color has darkened or become cloudy
- The consistency has thickened or become sticky (Note: Some essential oils, like myrrh and patchouli, are naturally thick and sticky, so this alone may not be a sign of expiration. However, if you notice a change in their usual consistency, it’s best to check for other signs of deterioration.)
If you notice any of these changes, it’s best to err on the side of caution and dispose of the oil. Using an expired oil can be less effective and may even cause skin irritation.
7. The simple recipes you will need 🌺
One of the most exciting aspects of using essential oils is the ability to create your own unique blends!
Here are a few simple recipes to get you started:
To calm & soothe you
For a calming and soothing blend (perfect for winding down after a long day or promoting a peaceful night’s sleep.)
- 3 drops lavender
- 2 drops bergamot
- 1 drop ylang-ylang
To boost your energy (& enhance your focus)
To boost your energy and focus (this invigorating blend is ideal for tackling that to-do list or powering through a workout.)
- 3 drops peppermint
- 2 drops rosemary
- 1 drop lemon
To refresh & uplift you
For a refreshing and uplifting atmosphere (diffuse this blend to create a bright and cheerful ambiance in your home or workspace.)
- 3 drops grapefruit
- 2 drops lime
- 1 drop spearmint Diffuse this blend to create a bright and cheerful ambiance in your home or workspace.
When creating your own blends, it’s essential to keep a few things in mind:
- Start with small batches to avoid wasting oils if you don’t like the combination
- Keep a record of your blends, including the oils used and their ratios, so you can easily recreate your favourites
- Be mindful of the individual properties of each oil and how they may interact with each other
- Trust your intuition and have fun experimenting!
As you become more comfortable with blending, you can start to create more complex combinations and even tailor your blends to address specific concerns, such as respiratory support or muscle relaxation.
8. Your new daily self-care routine with essential oils
Now that you’ve got a handle on the basics of essential oils, it’s time to start incorporating them into your daily self-care routine.
One simple way to use essential oils daily is by adding them to your skincare routine:
- Add a drop of frankincense to your facial moisturiser to promote a glowing complexion
- Mix a drop of tea tree oil with your face wash to help combat blemishes and oily skin
- Combine a drop of lavender with a carrier oil for a soothing and calming facial massage
You can also use essential oils to create a spa-like experience at home:
- Add 5-10 drops of your favourite oil to a warm bath for a luxurious and relaxing soak. For a standard-sized bathtub, this amount will provide a noticeable aroma without being overpowering. Adjust the number of drops based on your preference and the size of your tub.
- Create a DIY massage oil by mixing 10-15 drops of peppermint and 5-10 drops of eucalyptus with 1 ounce (30ml) of a carrier oil to soothe sore muscles. (always patch test before applying the blend to larger areas of your body.)
- Make a refreshing foot soak by adding 3-5 drops of lemon and 2-3 drops of rosemary to a basin filled with warm water. This amount will create a noticeable aroma and provide the benefits of the oils without being too strong. Soak your feet for 10-15 minutes, and enjoy the experience!
Essential oils can even be used to enhance your home environment:
- Diffuse a blend of 3-4 drops of orange and 1-2 drops of cinnamon to create a warm and inviting atmosphere. This ratio will provide a balanced aroma that’s not overpowering. Adjust the number of drops based on the size of your room and the strength of your diffuser.
- Add 10-15 drops of lemon or tea tree oil to a 16-ounce (500ml) bottle of your homemade cleaning product for a fresh and natural scent. This amount will provide a noticeable aroma without being too strong. Shake well before each use to ensure the oils are evenly distributed throughout the cleaning solution.
- Create a DIY room spray by mixing 20-30 drops of your favourite oils with 4 ounces (120ml) of water in a spray bottle. This ratio will create a concentrated spray that can be used to freshen up any room. Shake well before each use, and spritz the air, curtains, or linens for an instant aromatherapy boost. Avoid spraying directly on furniture or surfaces, as the oils may cause damage.
The key to making essential oils a part of your daily routine is to find simple and practical ways to incorporate them into the things you already do. By doing so, you can transform everyday moments into opportunities for self-care and relaxation.
9. Mindfulness and meditation: A new level with essential oils 🧘♀️
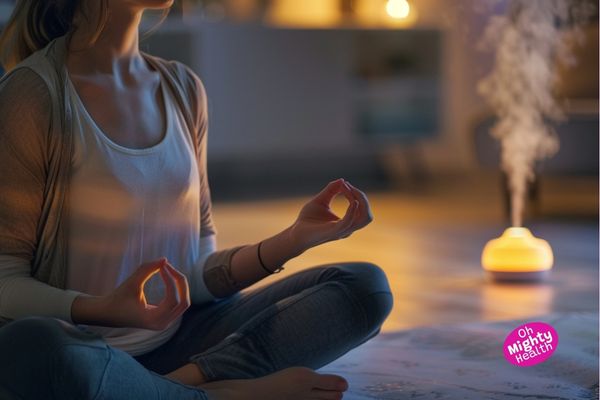
Incorporating essential oils into your mindfulness and meditation practice can take your experience to a whole new level. By engaging your sense of smell, you can create a deeper sense of relaxation, focus, and inner peace. Here’s how:
Choose oils that promote a calm and centered state of mind:
- Sandalwood: This grounding oil is known for its ability to promote mental clarity and emotional balance. Diffuse 3-4 drops during your meditation practice to create a serene atmosphere.
- Frankincense: With its warm and comforting aroma, frankincense can help to deepen your breathing and quiet your mind. Add 2-3 drops to your diffuser or apply a drop to your temples before your practice.
- Lavender: This soothing oil can help to relax your body and mind, making it easier to let go of stress and tension. Diffuse 4-5 drops or apply a drop to your palms and inhale deeply.
Create a dedicated space for your practice:
- Set up a comfortable and quiet area in your home for mindfulness and meditation
- Use an essential oil diffuser to fill the space with your chosen aroma
- Create a ritual around your practice by diffusing the same oil each time to signal to your mind and body that it’s time to relax and go inward
Enhance your breathing exercises:
- Add a drop of peppermint or eucalyptus oil to your palms, rub them together, and inhale deeply to invigorate your senses and clear your airways
- Place a drop of lavender or chamomile on your chest or under your nose to promote deeper, more relaxed breathing
- Experiment with different oils to find the ones that resonate with you and enhance your breathing practice
If an oil doesn’t feel right or is too overpowering, trust that feeling and try something else.
10. Continuing your essential oil journey (learning, community, and professional guidance)
Congratulations on making it to the final tip! By now, you’ve learned so much about essential oils and how to incorporate them into your daily life.
But the journey doesn’t stop here – there’s always more to discover and explore in the world of aromatherapy.
One of the best ways to continue your essential oil education is by connecting with others who share your passion!
- Join online forums and social media groups dedicated to essential oils
- Attend local workshops and events to learn from experts and meet like-minded individuals
- Share your experiences and knowledge with friends and family to inspire them on their own essential oil journeys
As you continue to learn and experiment with essential oils, don’t be afraid to seek out professional guidance when needed:
- Consult with a certified aromatherapist to get personalised recommendations based on your unique needs and goals
- Seek advice from a naturopathic doctor or holistic healthcare provider to learn how essential oils can support your overall health and well-being
- Take an online course or workshop to deepen your understanding of essential oils and their therapeutic applications (I have taken many!).
Remember, the world of essential oils is vast and ever-evolving, so there’s always something new to discover.
By staying curious, open-minded, and willing to learn, you’ll continue to grow. That’s my experience.
So keep exploring, keep experimenting, and most importantly, keep enjoying the magic of essential oils. Your journey has only just begun! 🌿✨
As a final note, always listen to your body and trust your intuition when it comes to essential oils. Everyone’s experience is unique, so what works for someone else may not work for you.
Be patient, stay curious, and enjoy the process of discovering what makes you feel your best.
*Essential oils shelf life – complete list
| Essential Oil | Shelf Life | Notes |
|---|---|---|
| Citrus Oils | ||
| Lemon | 1-2 years | Highly volatile, prone to oxidation. |
| Orange | 1-2 years | Store in a cool, dark place. |
| Grapefruit | 1-2 years | Oxidizes quickly. |
| Lime | 1-2 years | Both distilled and cold-pressed. Cold-pressed oils have shorter shelf life. |
| Bergamot | 1-2 years | Contains furocoumarins which can degrade over time. |
| Mandarin | 1-2 years | Highly volatile, prone to oxidation. |
| Floral Oils | ||
| Lavender | 4-5 years | Longer shelf life due to its stability. |
| Rose | 6 years | High in monoterpenols and esters, which are stable. |
| Jasmine | 5-7 years | Well-preserved with proper storage. |
| Herbal Oils | ||
| Peppermint | 4-5 years | Store away from direct sunlight. |
| Eucalyptus | 2-3 years | Can last longer if stored properly. |
| Tea Tree | 1-2 years | Prone to oxidation, especially when exposed to air. |
| Spice Oils | ||
| Clove | 3-4 years | Contains eugenol, which is relatively stable. |
| Cinnamon | 4-5 years | Both bark and leaf oils have similar shelf lives. |
| Ginger | 4-5 years | Stable if kept in a cool, dark place. |
| Woodsy Oils | ||
| Sandalwood | 6-8 years | Extremely stable, improves with age. |
| Cedarwood | 5-7 years | Contains sesquiterpenes and sesquiterpenols, which are stable. |
| Resinous Oils | ||
| Frankincense | 5-6 years | Resin-based oils are generally stable. |
| Myrrh | 4-6 years | Similar stability to frankincense. |
| Others | ||
| Chamomile | 5 years | Contains esters and sesquiterpenes, which are stable. |
| Patchouli | 6-8 years | Improves with age due to the presence of sesquiterpenes. |
| Ylang Ylang | 2-3 years | Contains esters and alcohols which can degrade over time. |
| Additional Oils | ||
| Basil | 1-2 years | Prone to oxidation, best used fresh. |
| Bay | 3-5 years | Stable if stored properly. |
| Black Pepper | 4-5 years | Contains stable components. |
| Cardamom | 4-5 years | Stable if kept in a cool, dark place. |
| Carrot Seed | 4-5 years | Contains stable components. |
| Cajeput | 2-3 years | Prone to oxidation, best used within its shelf life. |
| Cypress | 1-2 years | Best stored in a cool, dark place to extend shelf life. |
| Fennel | 2-3 years | Contains stable components if stored properly. |
| Geranium | 4-5 years | Contains stable components, lasts longer if stored in a cool, dark place. |
| Juniper Berry | 2-3 years | Prone to oxidation, best used fresh. |
| Lemongrass | 2-3 years | Prone to oxidation, best stored in a cool, dark place. |
| Marjoram | 4-5 years | Contains stable components, lasts longer if stored properly. |
| Melissa | 1-2 years | Prone to oxidation, best used fresh. |
| Neroli | 4-5 years | Contains stable components, lasts longer if stored in a cool, dark place. |
| Oregano | 1-2 years | Prone to oxidation, best used within its shelf life. |
| Palmarosa | 4-5 years | Contains stable components, lasts longer if stored properly. |
| Pine | 2-3 years | Prone to oxidation, best used fresh. |
| Ravensara | 3-4 years | Contains stable components if stored in a cool, dark place. |
| Rosemary | 1-2 years | Prone to oxidation, best stored in a cool, dark place. |
| Spearmint | 1-2 years | Prone to oxidation, best used fresh. |
| Thyme | 1-2 years | Prone to oxidation, best used within its shelf life. |
| Vetiver | 6-8 years | Extremely stable, improves with age. |