My Recommended Natural Ingredients for Skin Tags! (with step-by-step instructions!)
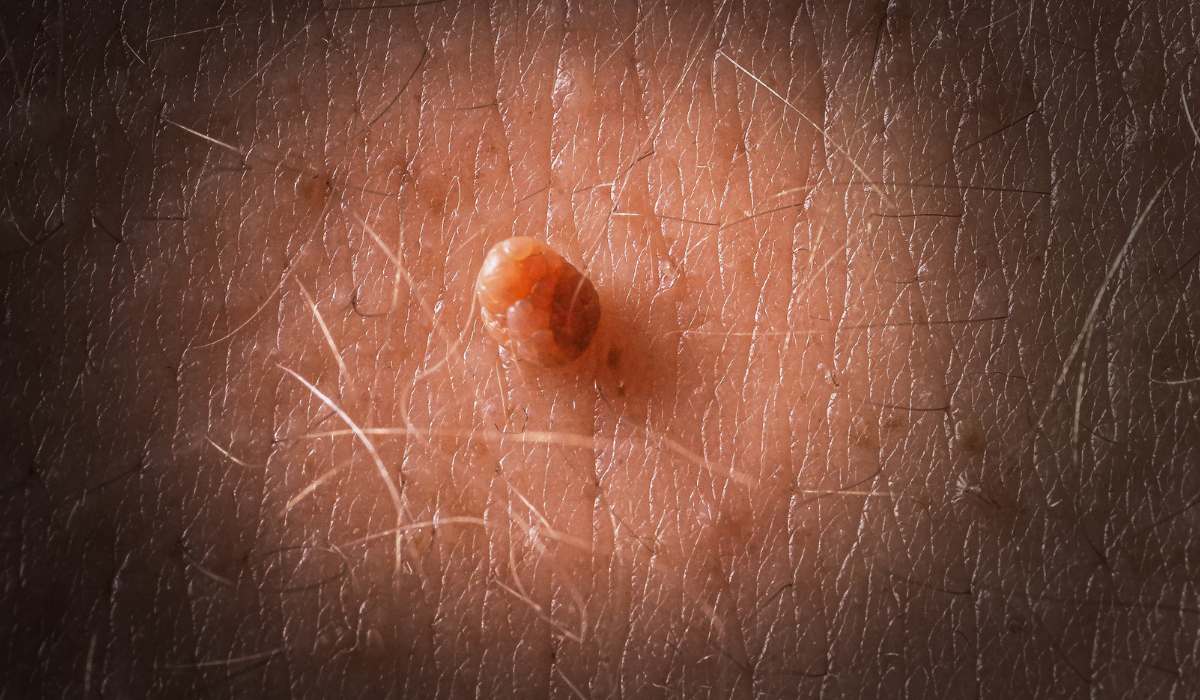
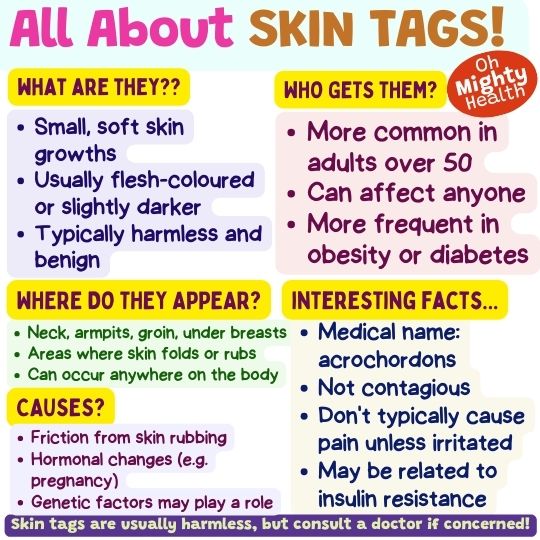
Skin tags. Yes, those “little flappy bits” of skin. They pop up from time to time… Anyone can have them.
They usually appear in dry spots like your neck or pits. Yes, they’re cheeky and can turn up anywhere… No biggie health-wise, yes, but oh boy can they be a pain when your necklace catches on them or your deodorant makes them itch!
Plus, they’re not exactly the look we signed up for.
If you’re going to DIY remove, be careful! You might end up with an infection or a scar.
A nifty trick is to use essential oils and other natural ingredients instead. They’re affordable, easy to use and way less risky.
Worth a shot I’d say!
Essential oils are super-concentrated plant juices, distilled down to pack a serious punch. These volatile little wonders are 100% natural.
⚠️ ⚠️Home remedies usually take longer. DON’T CUT OFF SKIN TAGS!! They can get infected and bleed. Be careful and consult a doctor when in doubt.⚠️ ⚠️
DISCLAIMER: I link to affiliate products below. If you purchase using my links I might earn a commission at no extra cost to you.
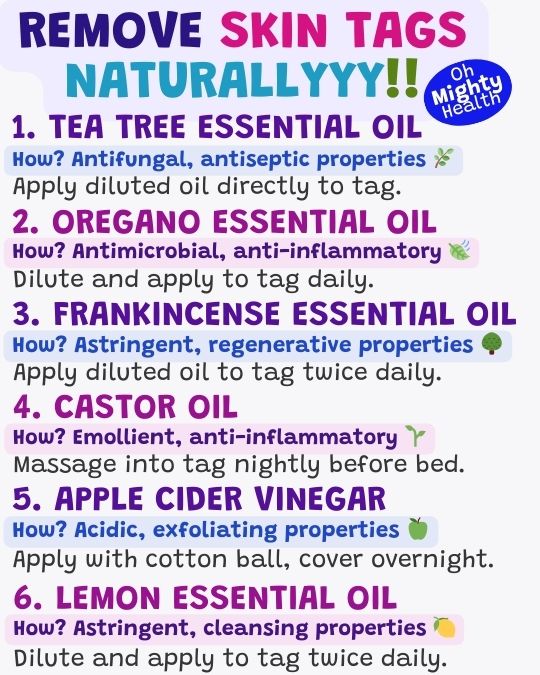
1. TEA TREE ESSENTIAL OIL

Best for those who want a well-rounded, potent option. It’s great if you’re concerned about bacteria or infection. Choose this if you’re after a strong, proven essential oil with multiple benefits.
Tea Tree oil is a potent natural remedy for skin tags. This Australian essential oil acts as a disinfectant and antiseptic, combating microbes often associated with skin tags. It also offers immune-boosting properties when absorbed.
- Apply a liberal amount of coconut or almond oil to the skin around the tag.
- Place a few drops of Tea Tree oil on a small piece of cotton.
- Secure the cotton over the skin tag using medical tape.
- Leave in place for up to a few hours.
- Remove the cotton and clean the area.
- Wait 24 hours before repeating the process.
- Continue this regimen until you see results, typically over several weeks.
- Be patient!
2. OREGANO ESSENTIAL OIL

It’s one of the most potent options, so choose this if other milder oils haven’t worked. Best for those who don’t have sensitive skin.
Oregano oil is a robust natural option for addressing skin tags. This Mediterranean essential oil is packed with carvacrol and thymol, compounds known for their strong antimicrobial and antifungal properties. It may help dry out skin tags over time.
- Dilute oregano oil with a carrier oil like coconut or olive oil (1 drop of oregano essential oil to 1 teaspoon carrier oil).
- Apply the diluted mixture directly to the skin tag using a cotton swab.
- Cover with a plaster or small bandage.
- Leave on for a few hours or overnight.
- Remove the covering and wash the area gently.
- Allow the skin to breathe for at least 12 hours before reapplying.
- Repeat this process daily for several weeks.
- Be consistent and patient – results may take time!
3. FRANKINCENSE ESSENTIAL OIL
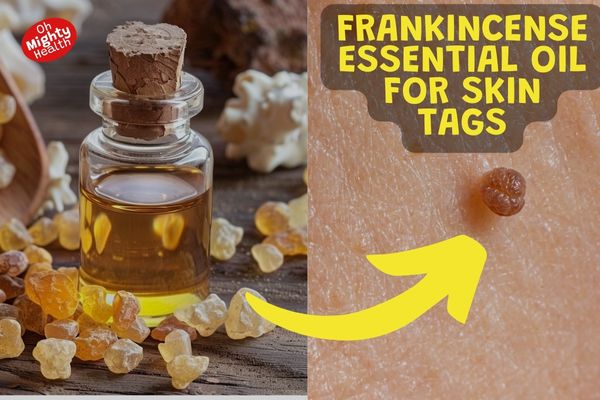
Perfect for those with sensitive skin or if you’re looking for a gentler approach. It’s also great if you’re interested in overall skin health, not just tag removal.
Frankincense oil, derived from Boswellia tree resin, has been used for centuries in traditional medicine. It’s known for its astringent properties and potential to promote healthy cell regeneration, making it a gentle option for skin tag treatment.
- Mix 2-3 drops of Frankincense oil with 1 teaspoon of carrier oil (like jojoba or sweet almond).
- Apply the mixture directly to the skin tag using a cotton bud.
- Gently massage the area for a minute to encourage absorption.
- Leave it on without covering, if possible.
- Apply twice daily – morning and evening (wash the area with mild soap and water before each new application).
- Continue this regimen for several weeks.
- Be patient and consistent – Frankincense works subtly but effectively!
4. CASTOR OIL

Choose this if you want a mild, moisturising option. It’s ideal for dry or irritated skin and is generally safe for long-term use.
Castor oil, extracted from castor beans, is rich in ricinoleic acid. This fatty acid has anti-inflammatory and antimicrobial properties, potentially helping to dry out and remove skin tags over time. It’s also known for its skin-nourishing benefits.
- Cleanse the area around the skin tag with mild soap and water.
- Apply a small amount of pure, cold-pressed castor oil directly to the skin tag.
- Gently massage it in for about a minute.
- If desired, cover with a plaster or bandage to prevent oil transfer.
- Leave on overnight or for at least 8 hours.
- Remove covering and rinse the area in the morning.
- Repeat this process daily.
- Be patient – it may take several weeks to see noticeable results!
5. APPLE CIDER VINEGAR

Best for those who prefer a non-oil option. It’s readily available and affordable. Choose this if you’re comfortable with a slightly more acidic treatment.
While not an essential oil, apple cider vinegar (ACV) is a popular natural remedy for skin tags. Its high acidity may help break down the excess skin cells that form the tag. ACV also has antimicrobial properties that can help prevent infection.
- Cleanse the area around the skin tag thoroughly.
- Soak a small cotton ball in raw, unfiltered apple cider vinegar.
- Apply the soaked cotton directly to the skin tag.
- Secure it in place with a plaster or medical tape.
- Leave on for 15-30 minutes. (Start with less time and gradually increase if no irritation occurs.)
- Remove and rinse the area with cool water.
- Apply a moisturiser to prevent drying.
- Repeat this process 2-3 times daily for several weeks.
6. LEMON ESSENTIAL OIL

Ideal if you’re looking for a fresh, citrusy option that also brightens skin. Best used at night due to its photosensitivity effects.
Lemon essential oil is known for its astringent and antiseptic properties. Its natural acidity may help in gradually breaking down the tissue of skin tags. It’s also rich in citric acid and vitamin C, which can promote skin health.
- Mix 2-3 drops of lemon essential oil with 1 teaspoon of carrier oil (like coconut or jojoba).
- Cleanse the area around the skin tag.
- Apply the diluted oil mixture directly to the skin tag using a cotton swab.
- Gently massage for about 30 seconds.
- Leave on for 15-20 minutes.
- Rinse off with cool water and pat dry.
- Apply twice daily, morning and evening.
- Continue for several weeks, being patient and consistent.
⚠️IMPORTANT! Lemon oil can make skin photosensitive. Avoid sun exposure after application and always use sun protection. As with all essential oils, do a patch test first and discontinue use if irritation occurs.⚠️
7. GARLIC OIL
Choose this if you’re comfortable with a stronger smell and don’t mind a more hands-on preparation. It’s best for those who prefer using fresh, whole ingredients.
Garlic has powerful antimicrobial and antioxidant properties. While not a traditional essential oil, garlic oil or fresh garlic preparation may help in reducing skin tags due to its natural compounds.
- Crush a fresh garlic clove and mix with a few drops of olive oil to make a paste.
- Clean the area around the skin tag thoroughly.
- Apply a thin layer of the garlic paste directly to the skin tag.
- Cover with a plaster or small bandage.
- Leave on for 15-20 minutes.
- Remove and rinse the area with cool water.
- Apply once daily before bed.
- Continue for several weeks, monitoring for any skin irritation.
Note: Garlic can be quite strong and may cause skin irritation in some people. Always do a patch test first and discontinue use if you experience any discomfort or excessive redness.
Aftercare!
Aftercare is crucial for maintaining skin health and preventing infection after treating skin tags.
Follow these steps to ensure proper healing:
- Keep the area clean and dry
- Avoid touching or picking at the treated area
- Apply a mild, fragrance-free moisturiser to prevent drying and irritation
- Protect the area from direct sunlight and use SPF if exposed
- Wear loose, breathable clothing to avoid friction
- Monitor for any signs of infection (redness, swelling, warmth, or discharge)
- Discontinue treatment and consult a doctor if irritation persists
- Be patient – complete healing may take a few weeks
- Once healed, maintain good skin hygiene to prevent new skin tags
- Consider addressing underlying factors like friction or hormonal changes
Remember, proper aftercare is just as important as the treatment itself for achieving the best results.
Surgical procedures
If you’re interested in knowing what doctors do with skin tags, here’s the list!
- Cauterisation. Heat removes the skin tag.
- Cryosurgery. Your skin tag is removed with liquid nitrogen.
- Electrocautery. The skin tag is burnt with electricity.
- Ligation. Skin tags are removed by cutting off blood flow.
- Surgery. The tag is snipped off! PLEASE DON’T DO THIS AT HOME.
Wrapping up
So, there you have it – nature’s toolkit for tackling skin tags. hese home remedies can be real skin-savers, but remember, they’re not magic potions. You’ll need to stick with it and be patient.
Keep in mind:
- Always dilute essential oils properly to avoid skin irritation.
- If you experience any adverse reactions, discontinue use immediately.
- These treatments work best on small, new skin tags.
- For larger or suspicious growths, always consult a healthcare professional.
- If you have sensitive skin or other skin conditions, speak to a dermatologist before trying these remedies.
Natural doesn’t always mean risk-free, so use your instinct and treat your skin with care. If those skin tags are being real troublemakers, it might be time for a chat with your doctor.