The Ultimate Vegan DIY Lip Balm Guide: Smooth, Nourishing & Actually Effective
Making your own lip balm should be fun—and give you something that actually works.
In this guide, I’ll walk you through how to craft a vegan lip balm that feels amazing, protects your lips, and holds its own next to anything you’ll find in a shop.
No beeswax, no fluff—I’m vegan myself, so I’ve swapped it out with fantastic plant-based options you’re going to love.
In this guide, you’ll find:
• A troubleshooting chart for common balm problems
• The secrets to a smooth, healing lip balm (without beeswax)
• Fixes for greasy or grainy textures
• A decoder for vegan waxes, butters, and oils
• Seasonal recipes for every time of year
• Essential oil safety tips
• Storage advice to keep balms fresh
• Customisation ideas to make each balm your own
• And a no-fail beginner recipe to get started
Let’s get mixing!

What Makes a Good Lip Balm?
A great lip balm isn’t just about slapping on some oils and hoping for the best. It’s a careful balance of texture, performance, and ingredients your lips will actually love. Sounds simple… but there’s a bit more to it than meets the eye.
No stress—I’ve broken it all down for you below.
Here’s what really makes a lip balm work (yes, even without beeswax):
1. Smooth glide
It should swipe on easily without tugging at your lips. This comes from the right mix of oils and waxes that create a silky, lubricating layer.
For example, plant waxes like candelilla add slip and gloss, and oils like coconut or jojoba prevent a sticky drag.
The balm should literally glide – think “buttery” application, not a waxy crayon feel. Hope that makes sense.
2. Comfortable feel (non-greasy)
Nobody wants to feel like they kissed an oil slick. A good balm feels light and cushiony, not overly greasy or heavy.
This is achieved by balancing fast-absorbing oils with more occlusive ones. For instance, jojoba or grapeseed oils sink in quickly without residue, while a bit of richer oil like avocado or castor adds lasting moisture.
The goal: lips that feel softly moisturised, not glossy grease.
3. Staying power
The balm should last on your lips, protecting them for hours instead of vanishing in minutes.
This is where waxes and thick oils shine. Waxes create an occlusive barrier that seals in moisture, and viscous oils like castor give the formula “grip” so it stays put (and a lovely shine!).
A touch of a hard wax like carnauba can increase melt-resistance and longevity in warm weather.
The best balms strike a balance: long-lasting but still soft on the lips.
4. Healing and nourishing
Beyond just sitting on top, a great balm helps repair dry, cracked lips over time. Ingredients like shea butter, mango butter, and cocoa butter are rich in fatty acids that nourish skin.
Natural additives can boost healing – for example, calendula-infused oil brings anti-inflammatory and antibacterial properties to soothe chapped skin.
A quality lip balm will include vitamins or antioxidants (like a drop of vitamin E) to support skin health and prevent lipid oxidation. I always add a few drops of vitamin E to my balm formulations and I advice you to do the same.
In short, a good balm not only protects but also restores your lips.
Why no beeswax?
Traditional balms rely on beeswax for a reason: it’s a superb thickener, skin protectant, and humectant. But we can achieve the same benefits with plant-based waxes. Vegan waxes like candelilla and carnauba also form protective barriers and lock in moisture. They tend to be a bit harder than beeswax, but when combined properly with butters and oils, they yield a balm that’s every bit as smooth, hydrating, and effective – all without animal ingredients. THANK YOU.
Why DIY Lip Balms Fail (and How to Fix Them)
Making lip balm at home isn’t hard, but a few pitfalls can lead to less-than-ideal results. If you’ve ever ended up with a gritty, rock-hard, or oily mess, don’t worry – here’s why it happens and how to fix it:
1. Grainy or gritty texture
Ugh, little grainy bits in your balm! This usually happens when using butters (like shea or cocoa) that crystallise as they cool. It has happened to me a few times. Not nice. Shea butter, for example, contains different fatty acids that solidify at different rates; if it cools slowly, they clump into granules.
Fix: Melt your butters COMPLETELY and then cool the balm quickly. For example, after pouring, pop your containers in the fridge for 10–15 minutes to force the fats to solidify TOGETHER, preventing grains. And don’t panic: if your balm turns grainy, you can always re-melt and re-pour it with this technique.
2. Too greasy or oily
If your DIY balm leaves you looking like you munched on fried chips, it’s likely overloaded with high-oil content or very slow-absorbing oils. Oils like castor and olive are wonderful moisturisers but can sit on the skin’s surface for a long time.
Fix: Increase the proportion of wax or solid butter to give the balm more structure and reduce slickness. You can also swap in a fast-absorbing oil for part of the recipe – for example, replace some olive oil with sweet almond or jojoba oil, which are lighter and soak in faster. A rule of thumb is to balance heavy oils with lighter ones (roughly equal parts) for a less greasy feel. Finally, be careful not to over-apply – a good balm should work in a thin layer.
3. Too soft (melts easily)
Is your balm turning to soup in your pocket or smushing when you apply it? This means the formula is too soft or has a low melting point. Perhaps there’s a high percentage of liquid oil, or ingredients like coconut oil (which melts at ~24°C) were used without enough wax to firm them.
Fix: Add more wax or a hard butter to raise the melting point. For instance, plant waxes like candelilla or carnauba can significantly firm up a balm – carnauba in particular, with its very high melting point (~85°C), boosts heat resistance.
Candelilla wax is also denser than beeswax; a little goes a long way (it has about twice the stiffening power). So, tweaking your recipe to include a higher wax-to-oil ratio (or using a harder wax) will yield a balm that stays solid even on a hot day.
Aim for a formula that’s solid at room temperature and only softens upon contact with body heat. If you’ve already made a soft batch, simply re-melt it and stir in a pinch more wax, then test again.
4. Too hard or brittle
The opposite problem; a balm so hard it feels like a candle or tugs on your lips.
This happens with too high a wax content or using very hard waxes without enough oils. Carnauba, for example, can make a rock-like balm if overdone.
Fix: Melt it back down and add more carrier oil or butter to soften the blend. Even a teaspoon of extra oil in a small batch can transform the texture from brittle to smooth. Also consider swapping a portion of that hard wax for a slightly softer wax like rice bran or more butter. A trick us formulators use is combining waxes for better texture, for example, a mix of candelilla and carnauba plus ample oils gives firmness and spreadability.
Your balm should be firm in the tube, but melt on contact with your lip skin. Adjust until a single swipe leaves a nice coating without pressure.
5. Feels dry or not moisturising
Some DIY balms end up making your lips feel drier, often because they lack sufficient emollients.
Too much wax relative to oils can create a balm that sits on top but doesn’t impart moisture. Or perhaps you used only light “dry” oils that absorbed away without a heavier occlusive to lock hydration.
Fix: Ensure your recipe includes a good ratio of rich, nourishing ingredients. Adding a creamy butter (shea, mango) or a thicker oil (castor or avocado) will boost the moisturising power. Remember, waxes by themselves don’t moisturise – they seal. You need oils and butters UNDERNEATH that seal to actually condition the skin.
Also, consider if you’re sensitive to an ingredient (some people find pure coconut oil drying). If so, swap it out and include a drop of vitamin E or a healing oil infusion for extra lip care. And don’t forget to stay hydrated, even the best balm can’t fix dehydration!
By understanding these common issues, you can tweak your formula or process for much better results.
DIY is all about experimentation, so if at first you don’t succeed, simply remelt and adjust. 😄 Every “oops” is just a step closer to your perfect vegan lip balm!
Here’s Your Vegan Ingredient Decoder (You’ll Understand the Ingredients Really Easily!)
Let’s break down the all-star ingredients for vegan lip balms: what they do, how they behave, and tips for using them.
Think of this as your ingredient cheat sheet:
1. Waxes (The Structure & Stay Factor)
Plant-based waxes are the backbone of a vegan balm, replacing beeswax.
They provide thickness, shape, and that protective layer on the lips.
Here are three popular ones:
1.1 Candelilla wax (for lovely glide)
Derived from a desert shrub, candelilla is the go-to vegan wax. It has a melting point around 70°C and is harder than beeswax. Candelilla gives balms a firm texture with a subtle gloss and smooth glide. Because it’s denser, you use about half as much candelilla as you would beeswax in a recipe (source).
Tip: Candelilla can be a bit brittle on its own, so pair it with enough oils or butters for creaminess. It’s wonderful for locking in moisture and is easily absorbed without feeling tacky (source).
1.2 Carnauba wax (for hardness and longevity)
Sourced from Brazilian palm leaves, carnauba is known as the “queen of waxes.” It’s one of the hardest natural waxes with a very high melting point (80–86°C). Carnauba adds serious staying power and heat resistance. It is great for balms that won’t melt in summer. It lends a resilient, flexible film and can even increase the wear time of lip products.
Tip: Use carnauba in small amounts (a little goes a long way) and usually in combination with another wax or butter. Blending carnauba with candelilla or softer waxes yields a balm that’s solid but still spreads easily. Your lips get the benefit of high gloss and durability without the crumbling effect.
1.3 Rice bran wax (for creaminess)
A lesser-known but excellent vegan wax, it’s obtained from dewaxing rice bran oil. Rice bran wax is a pale yellow, hard wax (melting ~79–85°C) that surprisingly gives a creamy, non-sticky feel to balms (source). It’s often used in lipsticks to prevent unsightly oil “sweating” from the formula (source). In lip balms, rice bran wax can improve texture by reducing stickiness and adding a soft gloss.
Tip: You can use rice bran wax similarly to candelilla (ratios are comparable since their melting points are close). It’s great to combine with candelilla. Together they balance each other, creating a smooth yet stable balm. Also, rice bran wax can make a balm more buttery feeling, counteracting the brittleness of other waxes.
Mixing Tips: Don’t be afraid to use a blend of waxes. Each wax has unique strengths: candelilla for glide, carnauba for hardness and longevity, rice bran for creaminess.
By mixing, you can get the best of all worlds. For example, a recipe might use mostly candelilla with a dash of carnauba to hold up in hot climates, plus a touch of rice bran wax to keep the texture soft.
Always melt waxes first (since they need higher heat) and stir well to incorporate your butters/oils into the wax for a uniform texture.
2. Butters (The Moisturisers & Texture Enhancers)
Plant butters are solid fats that add richness, nourishment, and help stabilise the balm’s consistency.
Here’s the lowdown on three popular vegan butters:
2.1 Shea butter for rich moisture and healing
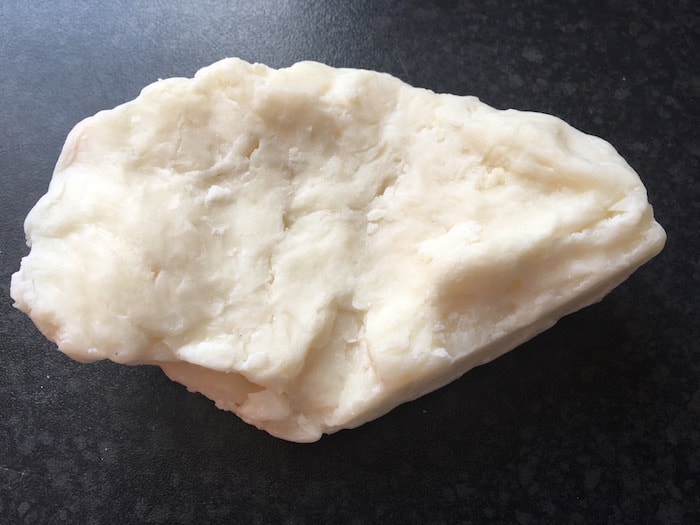
A classic lip balm superstar, shea butter (from the African shea nut) is creamy and ultra-moisturising. I use shea butter in almost every skincare formula I make (facial creams, body creams, hair conditioner, lip balms, serums… everything!).
Shea butter melts around body temperature (~37°C), which helps a balm melt into your lips. Shea is high in unsaponifiables (natural lipids) and vitamins A and E, so it promotes healing and softens skin.
It gives balms a lovely creaminess and glide. However, as discussed above, shea can go grainy if not handled right.
Tip: Melt shea thoroughly and try combining it with other butters or rapid-cooling your balm to avoid crystal grains. Refined shea has less scent and is more predictable, while unrefined has a nutty aroma and slightly tackier feel (I ONLY use organic unrefined shea butter in all my formulas because it retains more of its natural properties, making it richer in nutrients and skin-loving compounds.).
Use shea for intense lip repair and to add a plush, balm-y feel that isn’t too heavy. I simply love it.
2.2 Mango butter for a lighter, non-greasy feel
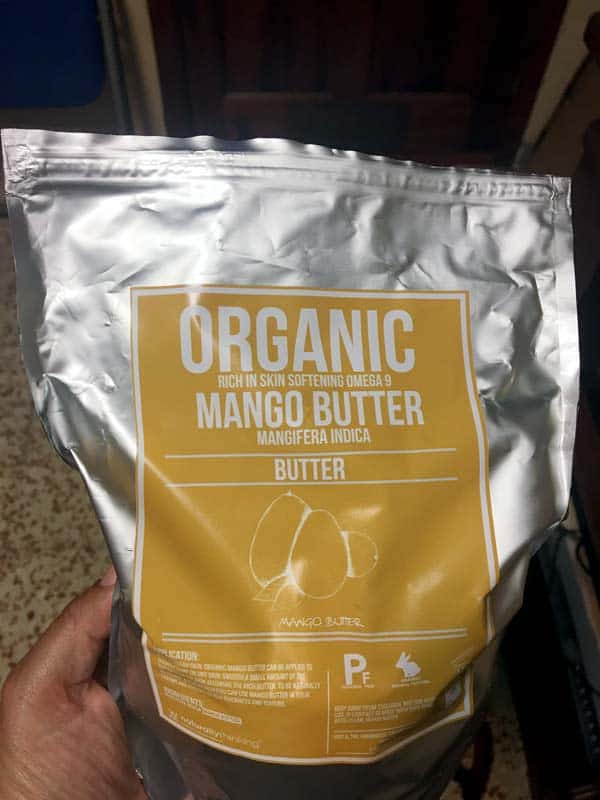
Pressed from mango kernels, this butter is a DIY favourite because it’s lightweight yet still nourishing.
Mango butter is firmer and less greasy than shea; it’s often described as having a dry, silky touch.
It melts around 34°C, just below body temperature. In a balm, mango butter adds stability (it’s solid at room temp) and a smooth, non-oily finish. It doesn’t tend to go grainy like shea can.
Tip: Use mango butter if you want a balm that’s not too glossy or if you find shea too greasy. It pairs well with shea (balancing out shea’s oiliness) or with harder butters to create a well-rounded texture. Mango butter is great for summer balms or any time you want a lighter feel that still heals.
2.3 Kokum butter for firmness and staying power
From the seeds of the kokum tree in India, kokum butter is a real hard butter, even harder than cocoa butter! It’s brittle at room temperature and has a high melting point (~38–40°C).
Kokum is fantastic for adding firmness to a balm without relying solely on wax. It has very little scent and a non-greasy feel.
Because it’s so solid, it can help keep a balm from melting in your pocket.
Tip: Use kokum in small amounts to boost hardness, especially in vegan balms where you want to compensate for no beeswax. It’s ideal in hot weather formulas. Since kokum is quite dry on its own, make sure to also include more emollient butters or oils so the balm isn’t too hard. A benefit of kokum: it doesn’t get grainy and is full of essential fatty acids that help regenerate skin cells (perfect for rejuvenating chapped lips).
Melting/Cooling Tips: Always melt your butters gently (use a double boiler or water bath). Overheating can destroy some of their beneficial properties. Add butters after waxes have melted, if possible, to avoid excessive heat. Once everything is just melted and mixed, pour into containers. If using grain-prone butters like shea or cocoa, consider rapid cooling (fridge or freezer for a short time) to lock in a smooth texture. For most DIYers, quick cooling is the easiest trick (remember to stir while cooling if you’ve added any powders or shimmer so they stay evenly distributed).
3. Oils (Carrier Oils are The Softeners & Spreaders)
Oils are the liquid portion of your balm.
They affect how fast it absorbs, how glossy or matte it is, and how nourishing it will be.
Different oils have different “speeds” and textures.
Choosing the right ones helps control how greasy, light, or long-lasting your balm feels:
3.1 Fast-absorbing oils for a lightweight, non-greasy feel
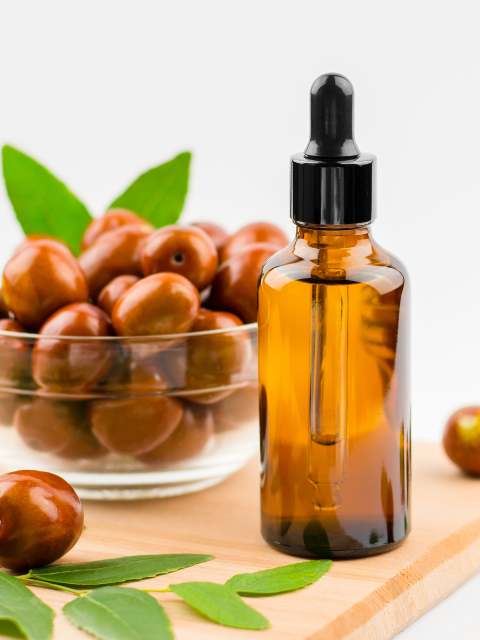
These oils sink in quickly and won’t leave a heavy film.
Examples: jojoba oil (actually a wax ester, very compatible with skin’s sebum), grapeseed oil, hazelnut oil, and fractionated coconut oil.
These are great for reducing greasiness. They make a balm feel lighter and more immediately moisturising.
On their own, they might evaporate or absorb too fast to protect lips for long, but in a balm they help avoid a waxy after-feel.
Tip: Use fast oils to create a balm that’s day-friendly (no shiny clown lips) or as a base under lipstick. Jojoba is a star because it has a long shelf life and is very conditioning.
3.2 Slow-absorbing oils for overnight hydration and shine
These stick around longer on the skin, providing lasting occlusion and shine.
Examples: castor oil, avocado oil, olive oil, sweet almond oil (moderate), virgin coconut oil (medium-slow).
Castor oil in particular is a common lip balm ingredient because it’s very thick, giving high shine and staying power (I must admit I love using it in my lip balm formulations).
Castor oil is actually a humectant too, drawing moisture to the skin. Avocado and olive are packed with vitamins and fatty acids but can feel a tad greasy.
Tip: Include at least one slow oil for overnight moisture and barrier protection. Castor is fantastic in small amounts to give that silky, glossy finish that doesn’t immediately disappear. Just balance it with lighter oils so the balm isn’t too sticky.
3.3 Medium oils for balanced, everyday moisture
These are in-between (not too light or heavy.)
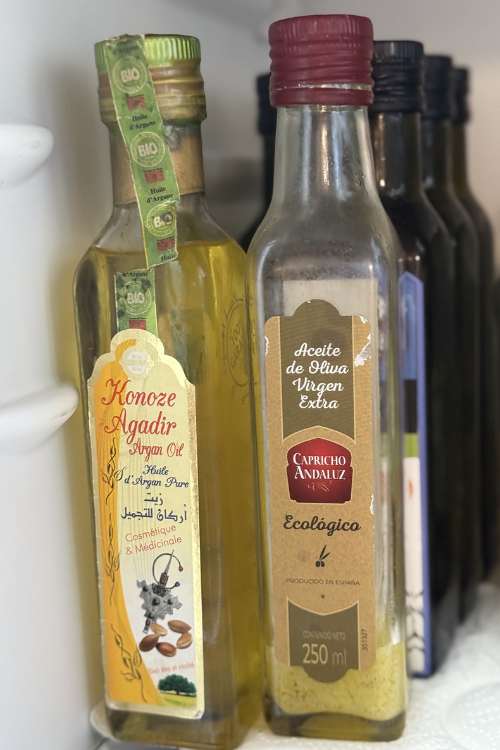
Examples: sweet almond, apricot kernel, argan, sunflower. They’re often the bulk of a recipe because they moisturise well without extreme greasiness.
Tip: If unsure, using a medium oil like almond is a safe bet for a pleasant texture. You can then tweak by adding a bit of something heavier (like castor) or lighter (like jojoba) as needed.
Texture Pairing: The secret to a perfect balm oil blend is combining a variety. For instance, try something like 1 part castor (thick, slow) with 1 part jojoba (fast, light) and 1 part almond (medium) to cover all bases. The castor gives shine and longevity, jojoba makes it absorb nicely, and almond keeps it smooth and neutral. Oils also contribute to the healing aspect: many plant oils have therapeutic compounds. For example, olive oil is rich in antioxidants and squalene, coconut oil has mild antimicrobial properties, and rosehip oil (though with a short shelf life) brings vitamin A for skin repair. If you want a super healing balm, consider infusing your carrier oils with herbs (more on that next) or choosing oils high in linoleic acid (like hemp or evening primrose) which support skin barrier function.
Add-Ons (Boosters & Fun Extras)
These are the little extras that can take your DIY balm from basic to brilliant:
1. Vitamin E for oxidation protection and skin repair
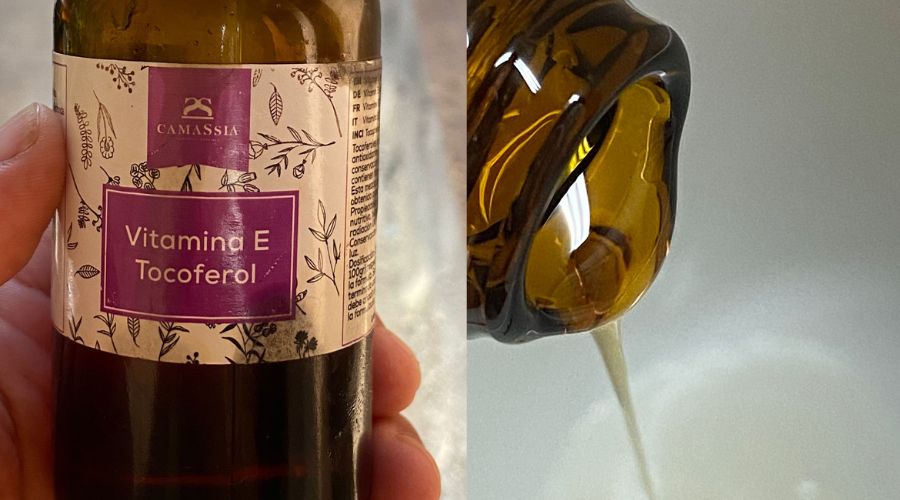
This antioxidant is a staple in natural skincare. Vitamin E doesn’t act as a broad preservative (there’s no water in a balm anyway), but it prevents oils from going rancid – extending your balm’s shelf life.
It’s also soothing for skin and may help repair lips; some research suggests it aids healing by combating free radicals.
Tip: Use a few drops (typically ~0.5–1% of your formula). Choose natural d-alpha tocopherol if possible. Add it when your mixture is cooling but still liquid, to avoid degrading it with heat. It’s essentially insurance for all those lovely oils—and a great marketing point if you’re gifting or selling (I always tell my clients when my formulas contain Vit E – they love it).
2. Herbal infused oils for extra healing power
Infusing oils with herbs is a wonderful way to inject added benefits. A favourite is calendula-infused oil.
Simply steep dried calendula flowers in a carrier oil (like sunflower or olive) for a few weeks, or heat gently for a few hours.
The oil will extract calendula’s anti-inflammatory and antimicrobial properties, helping to soothe chapped lips.
Other great lip-friendly herbs to infuse:
– Chamomile (calming, anti-irritant)
– Lavender (gentle antiseptic, relaxing scent)
– Peppermint leaf (for a mild minty kick)
– Plantain leaf (skin-repairing)
– Rose petals (light fragrance and luxury)
Tip: Ensure herbs are fully dry before infusing (to avoid mould) and strain well. Substitute infused oil for plain oil in any recipe for a “healing salve” effect.
3. Natural tints for colour without chemicals
Want a tinted balm? You’ve got vegan options.
One is using oil-infused colourants like alkanet root (for pink-red hues) or annatto seed (for orange).
You can also try beetroot powder or hibiscus powder, though they’re less oil-soluble and produce subtle colour.
Mica powders or iron oxides are another option—they’re cosmetic-grade, lip-safe, and can add colour or shimmer.
Tip: Start with a tiny amount—e.g. ⅛ tsp of red iron oxide in a standard batch gives a rosy tint. Mix colour into the oils while still liquid to ensure even blending. Always check that your colourants are approved for lips (some are only eye-safe).
4. Shimmer and sparkle using cosmetic mica
To create a shimmery balm, just add cosmetic-grade mica. It comes in shades like pearl, gold, or pink and gives lips a subtle glow.
For a classic shimmer, a pinch of pearlescent white mica works beautifully.
Tip: Blend micas (e.g. bronze + pearl = champagne glow). Use fine mica particles for a smoother feel—chunky glitter is not ideal for lips. Add mica while the balm base is liquid and stir thoroughly to prevent clumps.
5. Scent or flavour for fun and indulgence
This is the fun part: giving your balm a lovely taste or scent.
Essential oils (EOs) are a natural way to scent a balm, but only choose lip-safe ones and use them sparingly.
Popular options:
– Peppermint EO (cooling and fresh – 1 drop per 10g is plenty)
– Sweet Orange EO (uplifting – use distilled orange to avoid phototoxicity, keep below 1%)
– Lavender EO (gentle, floral, calming)
– Vanilla oleoresin or CO₂ (sweet aroma, but oleoresin may not mix easily)
– Rose or jasmine absolute (luxurious – always dilute before use)
Alternatively, use food-grade flavour oils (like cherry, chocolate, or cola), designed to be lip-safe. Some also add a drop of stevia or balm-safe sweetener for a kiss of sweetness.
Tip: Always stay below 1% total essential oils—often 0.5% is enough. Avoid irritating oils like cinnamon, clove, tea tree—these can burn or dry out lips. And remember: fragrance oils ≠ flavour oils. Fragrance oils may not be safe unless specifically marked as lip-safe. When in doubt, use less. (You can always apply balm over a lip tint).
With this decoder, you can confidently choose your vegan ingredients knowing what each brings to the table. The beauty of DIY is tweaking these elements to craft your perfect balm – one that glides just right, feels amazing, stays put, and nurtures your lips.
Seasonal Lip Balm Recipes (Quick & Cozy Versions)
Let’s get creative!
Different seasons and situations call for different lip balms.
Below are a few seasonal recipe ideas with short explanations.
These aren’t full step-by-step recipes, but rather formulations you can try with the ingredients above, tailored for specific needs.
Feel free to adjust based on what you have… And remember to keep it fun and experiment!
1. Winter Repair Balm (Ultra-Healing & Protective)
For chapped winter lips in need of rescue. This balm is all about heavy-duty moisture and protection from harsh cold winds. It’s richer and thicker than your average balm – think of it as a cosy blanket for your lips.
Key components: a higher ratio of butters and wax for a long-lasting barrier, plus healing boosters.
Ingredients & why
- Candelilla wax – forms a solid, wind-proof layer that seals in moisture
- Shea butter (generous dose) – deeply nourishing and softens dry, flaky skin
- Cocoa butter or kokum butter – adds firmness and extra protection against cold
- Castor oil – thick and sticky; helps the balm stay put through outdoor exposure
- Sweet almond or avocado oil – rich in fatty acids to help replenish cracked skin
- Calendula-infused oil – adds anti-inflammatory, soothing properties (source)
- Vitamin E – antioxidant that protects the oils and your lips from oxidative stress
- Optional scent – keep it unscented for sensitive lips, or add a drop of peppermint essential oil for a cooling tingle (peppermint may also improve circulation and create a slight plumping effect)
Texture & benefits
This is a thick, solid balm that won’t melt easily – perfect to keep in your pocket during snowy days. It goes on with a slight gloss, forming a protective film that lasts.
- The waxes and butters act as occlusives, sealing in moisture
- The oils provide emollient benefits, feeding the lips with essential fatty acids and nutrients
- Loaded with natural actives like:
– Omega fatty acids (from shea and almond)
– Antioxidants (from vitamin E and any infused oils)
Use overnight or before heading out into cold air. By morning, your lips should feel softer and less cracked as the balm works its healing magic.
Bonus: This balm also makes a fantastic cuticle or knuckle balm during dry winter months.
2. Summer Glide Balm (Lightweight & Melt-Proof)
Perfect for sunny days and warm climates. This balm is formulated to beat the heat – meaning it won’t turn to mush in your beach bag, and it feels light on your lips even in sweltering humidity. It offers a smooth, slippery glide without a heavy film, using ingredients that hold up in higher temperatures.
Ingredients & why
- Carnauba wax – just a touch to raise the melting point and add staying power in heat
- Candelilla wax – provides structure and gloss without greasiness
- Mango butter – stable and lightweight, perfect for a non-greasy summer balm base
- Coconut oil or fractionated coconut oil – offers lightweight moisture; fractionated stays liquid and blends well for heat-resistance
- Jojoba oil – absorbs quickly, light on the lips, and non-greasy
- Rice bran wax or kokum butter – stabilises the formula and prevents melting; adds a silky feel
- Optional castor oil – if used, keep minimal to avoid heaviness in hot weather
- Aloe vera extract oil (infused in carrier oil) – soothing and gentle for sun-exposed lips
- Optional scent:
– A drop of sweet orange or lemongrass essential oil (avoid phototoxic oils if you’ll be in the sun – source)
– Peppermint essential oil for a refreshing cooling sensation
Texture & benefits
The Summer Glide Balm is smooth and slick – but in a light way. One swipe gives you a thin layer that immediately makes lips feel supple, without leaving a waxy or overly shiny finish.
- Light, non-greasy feel – ideal for hot, humid weather
- Heat-resistance – thanks to high-melt waxes like carnauba, candelilla, and rice bran wax
- Non-slippery texture – won’t melt into a mess in your pocket or beach bag
- Hydrating oils – coconut, jojoba, and aloe keep lips moisturised without heaviness
- Fine line softening – mango butter smooths lips without adding shine
This balm is also less likely to “sweat” oils in the heat, thanks to stabilisers like rice bran wax, which help prevent oil bleed. Swipe this on before a hike, a beach day, or lounging by the pool – your lips will stay soft, smooth, and comfortable.
3. Overnight Lip Mask (Intensive Nourishment)
This is your deep-conditioning treatment for seriously dry lips. Designed to work while you sleep, this balm—also known as a “lip mask”—coats your lips at bedtime and is still there in the morning, delivering intense hydration and repair. It’s richer, softer, and more treatment-focused than a daytime balm.
Ingredients & why
- Candelilla or rice bran wax (small amount) – provides just enough structure to hold the balm together while keeping it soft
- Shea butter (generous) – deeply healing and nourishing; rich in vitamins A and E for overnight repair
- Kokum or cocoa butter – helps form a lasting protective layer while you sleep
- Castor oil – very thick and sticky, perfect for staying on lips all night
- Avocado oil – nutrient-dense, rich in lipids, supports barrier repair
- Rosehip oil (optional) – packed with vitamin A and C to help regenerate damaged lip skin
- Vitamin E – antioxidant protection and skin-supporting benefits; extends shelf life of the oils
- Optional humectant – a tiny bit of agave syrup or glycerin can be added to attract moisture (but be mindful: glycerin introduces water and needs a preservative unless used as a layered product)
- Essential oil for scent (optional) – choose calming options like lavender or chamomile; 1–2 drops max for a small jar to keep it gentle and soothing
Texture & benefits
This lip mask is soft, buttery, and designed for pot or tin use—not a tube. You’ll apply it more generously, and when you swirl your finger in, it should feel semi-solid but melt instantly.
- Buttery, cushiony texture – ideal for slathering on at night
- Semi-glossy finish – gives a protective film without feeling greasy
- Intense overnight repair – nourishes, seals, and regenerates dry or cracked lips
- Flake-softening – by morning, dead skin is softened and easy to buff away gently
- Moisture barrier – high in occlusives to prevent overnight water loss from lips
- Multi-use – can double as a rescue balm during the day, especially for cracked corners or rough skin just outside the lip line
Many users notice dramatically smoother lips after just a few nights of use. Think of it as a mini facial for your lips—perfect before bed, and especially helpful during cold or dry seasons.
Feel free to adapt these recipes to your liking – add a hint of tint to the summer balm for a beachy lip shine, or a drop of peppermint to the winter balm for a festive touch. These are starting points to inspire your own creations for each season.

Safety Tips for Your DIY Lip Balm
Making your own natural lip balm can be both satisfying and effective, but just because something is natural doesn’t always mean it’s safe.
Poison ivy is natural too, and you definitely wouldn’t want that on your lips.
Below are key safety tips to help ensure your balm soothes and protects, without any unwanted side effects.
Essential oil safety
Essential oils can add lovely scent and skin benefits, but they must be used with care—especially on lips, where the skin is delicate and ingestion is likely.
- Use a low dilution: no more than 0.5%, or 1–2 drops per 10g of balm.
- Stick with gentle, lip-safe options like peppermint, spearmint, sweet orange (non-phototoxic), lavender, chamomile, or vanilla oleoresin.
- Avoid hot or irritating oils: cinnamon, clove, oregano, tea tree, and others can cause burning, reactions, or long-term sensitivity.
- Be cautious with citrus oils, which may be phototoxic unless steam-distilled. When in doubt, opt for lip-safe flavour oils or leave your balm unscented.
Less is more… Your balm only needs a gentle hint of aroma to be enjoyable.
Allergies and patch testing
Even natural ingredients can cause allergic reactions.
- Be cautious with nut oils, shea butter (linked to latex allergy), certain essential oils, and plant extracts.
- Always patch test new recipes: apply a small amount of the balm (or diluted ingredient) to your inner arm and wait 24 hours for any signs of redness, itching, or irritation.
- If you’re gifting or selling your balm, list all ingredients clearly so others can test for themselves.
If you notice any burning, swelling, or rash, discontinue use immediately.
Natural doesn’t always mean harmless
Some of the most irritating skincare ingredients are completely natural.
- Peppermint and citrus oils, for instance, can dry or irritate lips when overused.
- Unrefined cocoa butter might trigger reactions in those with chocolate allergies.
- On the flip side, synthetic ingredients like petrolatum (not vegan) are sometimes safer in terms of skin compatibility.
The key is to judge ingredients based on research and personal tolerance, not whether they’re natural. And since lip products are ingested in small amounts, it’s wise to use edible-grade ingredients wherever possible.
Cleanliness and hygiene
Hygiene plays a big role in balm safety—even if your formula contains no water.
- Wash all tools and containers with hot, soapy water, rinse well, and dry thoroughly.
- Where possible, sanitize with isopropyl alcohol before use.
- Avoid introducing contaminants through botanicals, dirty utensils, or fingers.
- For balms in jars, use clean fingers or a small spatula to apply.
If a balm ever smells rancid, looks mouldy, or changes in texture unexpectedly, discard it.
Ingredients to avoid
Some ingredients just don’t belong in lip balm:
Never heat oils directly on a flame. Use gentle, indirect heat to melt ingredients safely and avoid degrading their quality.
Raw honey contains water and can promote bacteria growth. It’s also NOT vegan.
Craft glitter is unsafe for lips—opt for cosmetic-grade mica if you want shimmer.
Don’t add kitchen preservatives like salt; balms without water don’t need preservatives.
If you include even one drop of a water-based ingredient, you must use a proper broad-spectrum cosmetic preservative.
Storage & Shelf Life
You’ve made the perfect vegan lip balm.n
Now what? How you store it can make a big difference in how long it stays fresh and effective. The good news?
A well-made balm holds up well.
But there are a few things to keep in mind to avoid any surprises later on.
Shelf life of ingredients
The longevity of your balm depends mainly on the oils and butters you’ve used.
- Some oils spoil quickly—rosehip and flaxseed might only last about 6 months, especially unrefrigerated.
- Others are more stable—jojoba (technically a wax) can last years, and fractionated coconut oil has excellent shelf life.
- Butters like cocoa, kokum, and mango typically last 1–2 years.
For best results, use homemade balms within 6–12 months. Adding antioxidants like vitamin E can help extend freshness. It’s a good habit to label each batch with a “made on” date.
Signs of spoilage
Use your senses. If your balm:
- Smells off (crayon-like, sour),
- Has changed colour,
- Shows specks or dark spots,
- Feels lumpy or separated…
…it’s probably past its best. Some changes like cocoa butter bloom (a white surface layer) are harmless, but anything fuzzy or foul-smelling should be tossed. Texture changes alone aren’t always spoilage—temperature swings can cause graininess—but when in doubt, make a fresh batch.
Heat and melt risk…
Store balms in a cool, dry place away from sunlight.
- Heat speeds up rancidity and can melt the balm.
- If your balm fully melts (like in a hot car), it may develop graininess as it re-solidifies.
- You can gently re-melt and quick-cool it to improve texture, but repeated heating isn’t ideal.
If you need a travel option, use a screw-cap tin inside a small zip bag. If it melts, you won’t lose the product—and it’s easy to pop in the fridge to re-harden.
Packaging matters
Packaging affects both freshness and hygiene.
- Tubes reduce exposure to air and fingers—just fill to the top to limit oxidation.
- Tins or jars are great too, but make sure hands are clean or use a spatula.
- Use dark or opaque containers to protect oils and essential oils from light damage.
- Some essential oils (especially citrus) may degrade certain plastics over time. Use quality plastic, metal, or glass if your balm contains high oil concentrations.
For long-term storage, avoid steamy bathrooms and sunny counters. A cupboard is better—and if you’ve made a large batch, keep the extras in the fridge. Just allow them to return to room temperature before use.
Everyday use & travel
Carrying a balm in your pocket? That’s fine—just know body heat can soften it.
- A well-formulated balm won’t melt outright, but it may become easier to spread.
- Avoid leaving balms in laundry pockets or hot cars—both lead to messy situations.
- Keep balms in a pouch inside your bag to protect against heat and leaks.
And keep them out of reach of pets and young kids. Some ingredients (like tea tree oil or xylitol, if used) can be dangerous if ingested.
Fun Customisation Ideas
One of the joys of DIY is making your lip balm truly your own. Once you’ve nailed the base formula, the options to customise are nearly endless. Whether you’re going for everyday comfort or a standout creation, here are some inspiring ideas to get you started:
Adjust the texture
You’re in charge of how your balm feels.
- Want it softer or glossier? Add more oil or reduce the wax slightly—castor oil is especially good for extra shine.
- Prefer a firmer, more matte finish? Increase the wax or add a hard butter like kokum.
- For a velvety, chapstick-style feel, try 1–2% kaolin or bentonite clay—it absorbs excess oil and gives a dry-touch effect.
- You can also explore alternative waxes like sunflower or berry wax for a creamier, gel-like texture.
Always test a small swipe on your arm or a spoon before pouring—adjust while still warm if needed.
Play with scent and flavour
Your lip balm can smell like your favourite dessert, tea, or memory.
- Blend lip-safe essential oils like lavender and orange for a creamsicle vibe, or vanilla and mint for a mint-cookie twist.
- For a coffee-themed balm, infuse your oil with ground coffee or use food-grade coffee flavour oil.
- Cocoa butter naturally adds a hint of chocolate, or try a dash of cocoa powder for both scent and subtle colour.
Just ensure anything you use is lip-safe. A tiny amount of stevia-based sweetener can add flavour—but use sparingly to avoid odd aftertastes or encouraging lip-licking (which can dry lips out).
Add a tint
Tinted balms are a lovely way to add colour without wearing full lipstick.
- Use alkanet root (for red-pink) or annatto (for peachy-orange) infusions for subtle, natural tones.
- Micas offer a wider colour range—red, bronze, or nude tones can all work well.
- For stronger colour, consider iron oxides or other FDA-approved lip pigments from cosmetic suppliers.
- You can even layer tints: pour a clear balm, let it set, then top with a tinted layer for a fun two-tone effect.
If making multiple shades, label them clearly—a small sticker or colour dot on the cap helps.
Add shimmer or sparkle
Want a bit of glow?
- Use cosmetic-grade mica (under 150 microns) for a smooth, non-gritty shimmer.
- Create themed balms—white mica for a frosty winter look, gold for a sunset glow, pearl for everyday sheen.
- For bolder looks (great for kids or events), try biodegradable glitter made from cellulose.
A shimmer balm can also double as a topper over lipstick—perfect for adding a frosty finish.
Make it multipurpose
Your lip balm can be more than just for lips:
- A tinted balm can double as a cheek tint—just soften the formula slightly and avoid heavy shimmer.
- Add soothing oils like jojoba and essential oils like lavender to create a cuticle balm.
- A minty balm can work as a temple balm to help ease tension.
- A wax-heavy, unscented balm can tame flyaways or eyebrows.
- Pour into a larger tin or deodorant tube for a body balm—ideal for elbows, heels, or dry patches.
Just make sure all ingredients are safe for each area you intend to use it on.
Herbal and aromatherapy twists
Add meaning and extra benefits with infused oils.
- Try a chamomile and lavender balm for bedtime.
- For winter, a balm with peppermint or eucalyptus can help refresh and clear the nose as you wear it.
- Matcha or green tea-infused oils add antioxidants and a subtle green tint.
- Ayurvedic herbs like tulsi (holy basil) offer therapeutic value and a grounding aroma.
Herbal infusions can tint the balm slightly—so take that into account when designing your recipe.
Personal touches
Make each balm truly yours.
- Add a symbolic ingredient—like honeysuckle oil if it reminds you of home.
- Use creative packaging: try lipstick moulds, fun-shaped tins, or layered colours for an ombre stick.
- A drop of lip-safe edible extract or essence can personalise the scent.
Remember: it’s not just about the formula—it’s about the experience of crafting something that reflects you.
Hacks & Smart Tips for DIY Lip Balm Beginners
Even the simplest projects have their secrets. These tried-and-true tips will make your lip balm crafting smoother, cleaner, and more enjoyable, with results that look and feel polished.
Nail the perfect pour
Filling small tubes and tins can get messy fast.
- Use a heat-safe pipette or dropper for precision, especially with narrow tubes.
- A small measuring cup with a spout also works well.
- Pour at the right temperature—too hot and you risk cracks or sinkholes, too cool and the mix clumps or sets unevenly.
- Aim for when the balm is fully melted but slightly thickened at the edges (around 60°C or 140°F).
If you get a dip on top, gently re-melt a bit of balm and top it off—or use a heat gun or hair dryer to smooth the surface.
Pro tip: Stand tubes upright using a tray or DIY holder (like a foam block with holes) for quick, even filling.
Make cleanup easier
Cleaning up oily, waxy tools isn’t fun but it can be quick.
- Wipe out pots and utensils while they’re still warm with paper towel before washing.
- Then use very hot soapy water to break down residue.
- For hardened wax, pour boiling water over the tool and wipe immediately.
- Dedicate an old Pyrex cup or mason jar to melting balms so you don’t need to scrub it spotless each time.
Avoid clogging your drain—let used water cool, then scoop out solid wax before discarding. Got balm on clothes? Treat like a grease stain: dish soap and hot water.
Remelt and fix mistakes
Lip balm is wonderfully forgiving.
- Too soft or firm? Gently re-melt and tweak the ratio of oil or wax.
- If you’ve added essential oils, consider adding them fresh after remelting, as heat may evaporate them.
- For large batches, keep the base warm in a water bath so it stays pourable.
- Test small batches (1–2 tubes) to tweak your formula before making more.
Think of remelting as your “redo” button—it’s part of the process, not a mistake.
Labelling and gifting
Presentation adds charm, especially if you’re sharing or selling.
- Print waterproof labels with the balm name and ingredients, or use washi tape for a handmade look.
- Fun names like Wintermint Rescue or Coconut Kiss give your balm personality.
- Always note ingredients if gifting—especially for allergies.
For yourself, date or number each batch so you can track your favourites. If you’re selling, check your local labelling rules (net weight, ingredients in descending order, contact info, etc.).
Smart prep = smooth process
A little prep saves a lot of stress.
- Warm your containers slightly before pouring, just enough to prevent balm from setting too quickly up the sides.
- Keep extra tins or tubes on hand—you’ll often have a little more balm than expected.
- Measure by weight for best accuracy, but if you’re using spoons, stay consistent.
- Always write down your formula—those “pinches and splashes” are easy to forget later.
Need to salvage a filled tube? Twist the balm up and wipe it out, or pop it in the freezer… Once it shrinks, it often slides out.
You can also gently re-melt the contents.
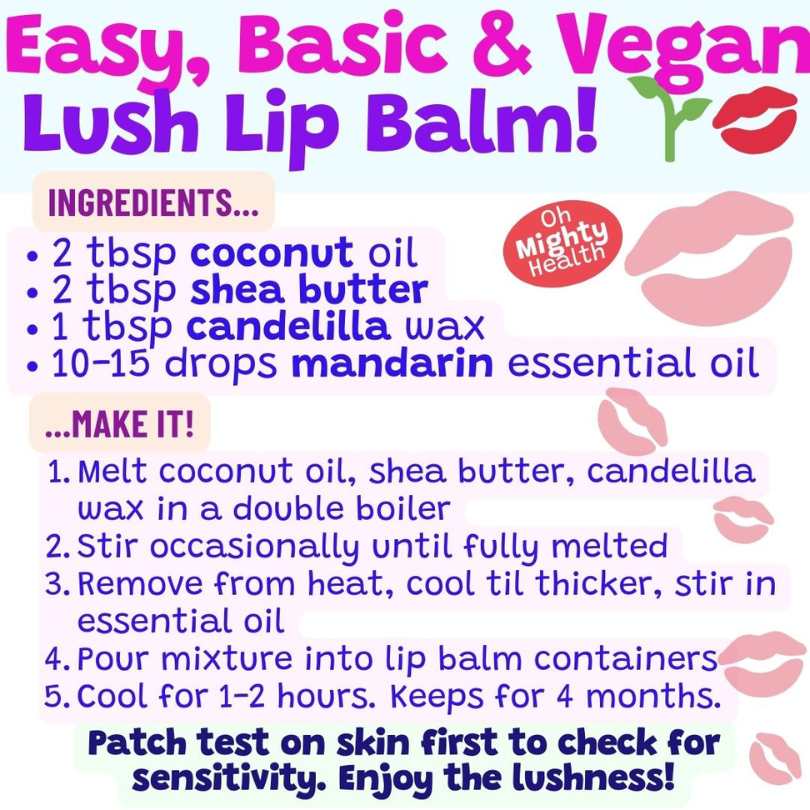
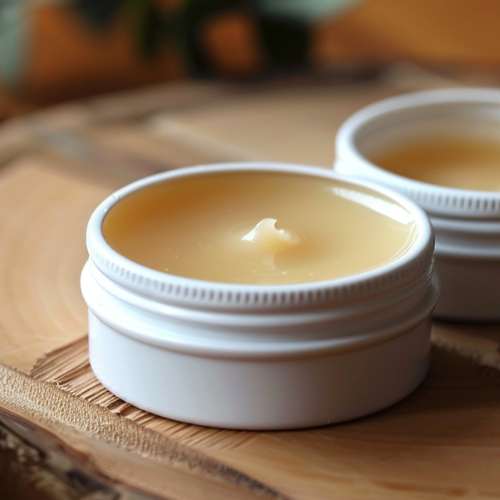
Beginner No-Fail Vegan Lip Balm Recipe 🎉
Ready to dive in and make your first (or next) batch?
Here’s a simple beginner recipe for a vegan lip balm that checks all the boxes: smooth, not too soft or hard, and very forgiving.
We’ll use easy-to-find ingredients and provide notes for tweaking.
This basic recipe will yield about 5-6 standard lip balm tubes (5g each) or a few small tins.
Ingredients (by weight):
- Candelilla Wax – 5 grams (about 1 teaspoon of pellets)
- Shea Butter (or Mango Butter for an even lighter feel) – 10 grams (approx 2 teaspoons)
- Coconut Oil (unrefined for a coconut scent, or refined) – 6 grams (about 1.5 teaspoons)
- Sweet Almond Oil – 9 grams (2 teaspoons)
- Castor Oil – 5 grams (1 teaspoon) – for extra gloss and moisture (can sub jojoba for a less glossy finish)
- Vitamin E Oil – 0.5 gram (≈10 drops) – optional, as an antioxidant to prolong shelf life
- Essential Oil or Flavor – about 3-5 drops of lip-safe essential oil, or ~1% flavor oil (for example, 3 drops peppermint + 2 drops sweet orange for a mild scent)
(This works out to roughly 20% wax, 40% solid butter, 40% liquid oils by weight. If you don’t have a scale, you can approximate: 1 part wax : 2 parts butter : 4 parts total oils. For instance, 1 teaspoon wax, 2 teaspoons shea, 4 teaspoons oils will be in the ballpark, though weighing is more accurate.)
Instructions:
- Melt: Combine the candelilla wax, shea (or mango) butter, coconut oil, sweet almond oil, and castor oil in a double boiler (a heatproof bowl or jar set in a pan of gently simmering water). Heat, stirring occasionally, until everything is fully melted and clear. Candelilla wax will be the last to melt – ensure no little pellets remain. (Tip: Avoid microwaving, as hot spots can overheat the wax; stovetop gives more control.)
- Cool & Add Vitamin E/EO: Once melted, turn off the heat. Let the mixture cool for a minute or two. It should still be completely liquid but not scorching hot (if you have a thermometer, around 60°C is good). Now stir in the vitamin E oil and your chosen essential oil or flavor. Mixing off the heat prevents these heat-sensitive additions from degrading. Stir thoroughly so the vitamin E and scent disperse evenly.
- Pour (See ‘Nail the Perfect Pour’ above for full tips): Carefully pour the liquid balm into your containers. If using tubes, fill them just to the brim but not overflowing. You can use a small funnel or pipette for precision. Work somewhat quickly, as candelilla-based mixtures can start to set up as they cool. If it thickens while pouring, just re-warm it a bit. (Safety: mind the hot mixture – wear gloves or use a towel if your pouring container gets hot.)
- Set: Let the filled balms cool and solidify undisturbed. This usually takes 10-30 minutes. Avoid moving them while they’re setting to get nice even tops. You can put them in the fridge for 10 minutes to speed it up if you like. Once completely solid (they will turn opaque), cap the containers.
- Enjoy: Your lip balms are ready to use! Glide it on and revel in the fact that you made it yourself. It should go on smoothly, feel buttery with a light shine, and keep your lips happy for hours.
Clever Tips to Avoid Common Frustrations (Believe Me, Frustration Happens!)
These clever tips can help you avoid common frustrations, make the process smoother, and give your DIY lip balms a more professional finish without adding extra fuss.
1. NAIL the perfect pour
(See ‘Nail the Perfect Pour’ above for full tips)
2. Make cleanup easier
Waxy tools can be a pain to clean, but a few tricks make it quicker:
- Wipe out mixing jugs and utensils with paper towel while still warm, before washing.
- Use very hot soapy water to remove residue.
- For hardened wax, pour boiling water over the tool and wipe immediately.
- Dedicate a jar or old Pyrex cup for melting your balms, no need to scrub it clean every time.
Don’t pour oily water down the drain. Let it cool and solidify, then scoop the wax into the bin.
Spilled on fabric? Treat it like a grease stain: dish soap and hot water should do the trick.
3. Remelt and fix mistakes
Lip balm is refreshingly easy to adjust.
- If your balm turns out too soft or too firm, just re-melt and tweak the wax-to-oil ratio.
- Re-add essential oils after remelting, as some of the scent may evaporate with heat.
- For large batches, keep your base warm in a water bath so it stays pourable.
Testing a tiny batch first (1–2 tubes) is the best way to get it right.
Think of remelting as a built-in do-over—use it as often as you need.
4. Labelling and gifting
A great label adds personality—especially if you’re giving balms as gifts or selling at markets.
- Print waterproof labels or use washi tape for a rustic touch.
- Add fun names like Wintermint Rescue or Coconut Kiss to give your balm character.
- If gifting, always share the full list of ingredients—especially for allergy safety.
- For yourself, label each batch with the date or version number so you can keep track of your favourites.
Selling? Make sure to check local labelling guidelines for ingredients, weight, and contact details.
5. Smart prep = smoother process
A few extra steps can save you stress later:
- Warm your containers before pouring to help the balm set evenly. (Pop them on a heating pad, or sit them on the double boiler briefly—then dry thoroughly.)
- Keep extra tins or tubes nearby in case your batch makes more than expected.
- Measure by weight for accuracy, but if you use volume, just be consistent.
- Most importantly: write down your formula—those little tweaks are easy to forget.
Need to salvage a balm that’s already set in the tube? Twist it up and wipe it out, freeze it until it shrinks and slides out, or gently re-melt it.
With these smart shortcuts and gentle fixes, you’ll save time, avoid messes, and create lip balms that look as good as they feel.
Troubleshooting Guide (Common Issues & Quick Fixes)
Even with the best recipes and intentions, little hiccups can occur. Here’s a handy troubleshooting chart for quick reference. Find your issue in the left column and see the likely cause and solution on the right. Soon, any lip balm woe will be a piece of cake to fix!
| Problem | Likely Cause (Why It Happens) | Quick Fix (How to Solve It) |
|---|---|---|
| Grainy or gritty balm | Butters (like shea, cocoa) crystallized into fatty acid grains as the balm cooled. This often happens with slow cooling or temperature changes. | Melt the balm fully and cool it rapidly (pop it in the fridge) so all fats solidify at once. Alternatively, re-melt and hold at ~75°C for 20 minutes to eliminate crystal seeds, then cool. Using mango or refined butters can prevent this too. |
| Too hard – no glide | Too much wax or very hard wax (carnauba) in the formula; not enough oils. A high wax ratio makes it firm but also can cause drag on the lips. | Re-melt and add more oil or butter to soften. Start with a small addition (e.g. 1/2 tsp oil per 1 oz batch) and test. You want to increase the oil-to-wax proportion. Also consider swapping out a portion of carnauba/candelilla for a softer wax (or just less wax overall). The balm should then glide better. |
| Too soft or melts easily | Not enough wax/hard butter, or too high a portion of low-melt oils (like coconut) in a warm climate. Balm is losing shape in heat. | Re-melt and incorporate a bit more candelilla or carnauba wax (or kokum butter). Even an extra gram or two of wax can firm up several tubes. If living in a hot climate, aim for a higher melting point: use waxes with higher melt temps (carnauba) and slightly reduce super soft oils. Cool the adjusted balm at room temp to test consistency. |
| Feels too greasy/oily | Excess oils or all oils are slow-absorbing types, with insufficient wax to bind them. No matte ingredients, so it’s leaving a shiny film. | Re-batch and add a bit more wax or butter to bind the oils and reduce surface oiliness. You can also swap part of the greasy-feel oil (e.g. swap some olive/castor) with a “drier” oil like jojoba or add a smidge of arrowroot or cornstarch (1/8 tsp) to the melted mix to cut grease. Pour again – it should feel less slick. |
| Balm won’t solidify (stays liquid or very soft) | Recipe likely missing enough solidifiers – maybe measured something wrong (e.g. used 1 tsp wax instead of 1 tbsp), or used an oil that was supposed to be solid (like used liquid oil in place of a butter). | Double-check your ratios. Reheat and add more wax until a small test drop solidifies firm. If you have no more wax on hand, adding a solid butter (like cocoa) can help firm it slightly. In a pinch, move the balm into a small jar and use it as a semi-solid lip butter (less ideal, but usable). Next time, measure carefully or use volume measures that differentiate tsp vs tbsp. |
| Sinkhole or dent in center of balm (after cooling) | This is from the balm shrinking as it cools, often when poured very hot into tubes – the top solidifies and the middle sinks. | The fix is mostly cosmetic: re-melt a tiny bit of leftover balm (or scrape from one tube), and top off the dent, then let it set. To prevent it: pour a bit cooler, or pour almost to top, let it partially set, then top up (the “double pour” method). A quick pass with a heat gun over the surface can also level it. |
| Cracks on balm surface | Usually from cooling too fast or pouring in a very cold container – the top layer solidified and expanded/contracted too quickly. | Gently re-melt the top with a heat gun or hairdryer until the crack just melts and re-fuses. Or scrape off the top and re-pour a thin layer from reserved balm. To avoid, don’t shock cool – room temp cooling is fine (unless fighting graininess; find a balance). Slightly warming containers can help too. |
| Mold or weird growths | If there’s mold, it means somehow water or heavy contamination got in (since purely oily balms shouldn’t mold). Could be from dipping wet fingers, or botanical bits in the balm carrying moisture. | Unfortunately, if mold is present, discard the balm. Don’t try to salvage moldy product (safety first!). Prevent it by ensuring all additives (herbs, etc.) are completely dry and by not introducing water. Keep fingers clean or use a clean tool to apply if it’s in a pot. |
| Rancid or crayon smell | The oils/fats have oxidized (gone bad). This can happen if the balm is old, kept in heat, or made with oils with short shelf life (like flax, without an antioxidant). | There’s no fixing rancidity – it’s time to make a fresh batch. To extend shelf life next time, use vitamin E as an antioxidant, store balms in a cooler, dark place, and choose oils that are fresh and not near expiry. When not in use for long periods, you can even store balms in the fridge. |
| Lip irritation or burning | An ingredient is not agreeing with you – could be an allergic reaction or an essential oil that’s too strong (common with peppermint, cinnamon, etc.). Lips are very sensitive. | Stop using that batch. For a mild reaction, remove the product and soothe lips with plain oil or aloe. Identify the culprit: if it’s an essential oil, reformulate with less or none (e.g. peppermint at 0.5% can tingle pleasantly, but at 2% might burn). If it’s a flavor oil or botanical, try leaving it out. Always patch test new EOs on your inner arm. When making for others, it’s safest to go gentle on scent/flavor. |
Keep this chart handy the next time something seems “off” with your balm.
Most issues can be easily corrected with a tweak here or there.
Before you know it, you’ll troubleshoot like a pro, but hopefully, with the tips from this guide, your balms will come out just right on the first try!
Happy formulating, and enjoy those luscious vegan lip balms you created.
Patri xx