Moisturizer Cream Cosmetic Base Formula FROM SCRATCH
The Beauty of Homemade Recipes / DIY Formulas
Homemade recipes (blending ingredients at home to achieve particular or desirable results) and DIY formulas (formulating your own version of a product) should be done at home as and when possible, if time permits and the love for the craft is there. We should make an effort to form relationships with the things we put inside our bodies as well as outside our bodies (topically). The moment you buy a product the ‘value’ of the ingredients that went into making the product decreases in the eyes of the buyer because the relationship from ‘plant to person’ has somehow been almost lost.
The DIY formula I bring you today is for making DIY moisturizer cream cosmetic base from scratch (meaning we don’t use a base already created and then add our carrier/essential oils to it).
It is not that difficult to make your own homemade skincare if you have the right products at home. Some might find it a little daunting at first (I’m still learning myself and have made incredible lotions and creams already!) but, like everything else in life, it is only practice that makes perfect, and getting started is the best way to getting started!
Your Skin => Always Give it The Best!
The best natural moisturizer will always be the one you make yourself, as you keep absolute control of what goes into it plus you add your own energy to it as you make it. No one has your energy but YOU, so nobody can add your energy to your products.
Also, it is no good buying a cream base if you’re not sure about the ingredients companies are putting into it – make sure you check them out (a basic guide here). If I was to purchase a cream base, there’s NO DOUBT I would purchase the one from Neal’s Yard [from their ‘Create your Own‘ range], which is beautiful, like everything else they do. Affiliate link to buy the base cream if you wanted to give it a try coming soon.
The other base cream I would purchase is the one from Naturally Thinking (although this is company is based in the UK). Here’s a link to their Naturally moisture cream base [from their ‘Cosmetic Bases‘ range]. As mentioned in other entries, the course I did with them while in London (Naturally Thinking cosmetic course) provided me with a very solid foundation when it comes to formulating the cosmetic bases.
*About Bacteria and Preservatives*
An all natural face moisturizer base will have to have some form of preservative – when using water in your formulas you need a preservative to avoid bacteria growth. The chances are that the bacteria will always be worse than preservatives that are there to make sure you’re not putting on your skin something that has gone off. You can learn more about preservatives from Susan Barclay Nichols (behind swiftcrafteymonkey.com) and what she has to say about them (worth reading!). Or you can watch Marie Rayma here talk about the 12 myths & misconceptions about preservatives. There are very interesting links below her video, I advise that you check them out!
So, yes, in a nutshell your skin deserves the best and you’re in charge and responsible for making that happen.
About this Moisture Cream Base
Let’s have a look at what the formula makes exactly, skin suitability, blending with oils, shelf life, ingredients and COSDNA/EWG.
What this Formula Makes
A highly moisturizing cream cosmetic base perfect for customizing to your liking. It can be a versatile cosmetic base for aromatherapy skin use also. This cream base will remain stable when you add carrier oils and essential oils to it (more on that below).
Skin Suitability
Suitable for all skin types including sensitive skin. You can tailor it to your individual skin type by adding your own mix of essential oils as well as other active ingredients.
Blending Your Carrier & Essential Oils
Adding carrier/essential oils to your mix is optional. I love adding the essential oils and will look for a carrier oil that fulfils the purpose of the cream. For example, I might make a more dense night cream with heavier oils that take longer to get absorbed or keep it light for use during the day. I would also look at the type of skin the cream is for in order to choose both my carrier and essential oils. The amounts you can add are:
- Up to 10% carrier oils
- Up to 2% essential oils (since this is a leave-on cream)
Directions: Stir in your carrier and essential oils once the moisturizer cream base is done.
Stability / Shelf Life
This cream base should last 18 to 24 months without additional ingredients. Remember that if you’re adding carrier oils you need to think about rancidity (some oils go rancid faster than others), etc. Also, take into account that if you add ingredients that have natural preservative in them and also have antioxidant properties the life of the moisturizer cream base can be prolonged although I can’t say for how much.
Ingredients & Functions
And here’s a table with clickable links on ingredients and functions.
| Ingredient | Function |
| Aqua (Distilled Water) | Washing and Moisturising |
| Glycerin (Veg) | Humectant – Draws water to the skin [About Humectants] |
| Caprylic/Capric Triglyceride | Light oil, dispersant, non greasy lubrication and emollient |
| Grapeseed Oil (Vitis Vinisfera)) | Light oil, emollient, slightly drying |
| Glyceryl Stearate SE | Main emulsifier, thickener |
| Glyceryl Stearate & PEG 100 | Co-emulsifier, emollient, moisturizer, adds feel (not for broken skin) |
| Stearic Acid | Thickener, adds white colour, emollient [About Thickeners in cosmetics] |
| Cetyl Alcohol | Emollient, thickener, co-emulsifer, surfactant |
| Sodium Bicarbonate | PH adjuster (reducer) [About PH levels in cosmetics and here] |
| Phenoxyethanol & Ethylhexylglycerin | Preservative [About Preservatives in cosmetics] |
| Vitamin E (Tocopherol) | Antioxidant |
[FORMULA] Natural Moisturizer Cream Base Recipe
Find below the ingredients and steps to creating this moisture cream base. The final amount will make 500gr|17.63oz, which you can use both on face and body as well (the cream is excellent!).
Next to the ingredients you’ll find 3 links: EGW’s Skindeep Cosmetics Database (a cosmetic database website that rates products and ingredients from 1 to 10 according to safety), an informational link (explaining more about the ingredient) and the affiliate link (Lynn and I will get a commission if you purchase the product via the link).
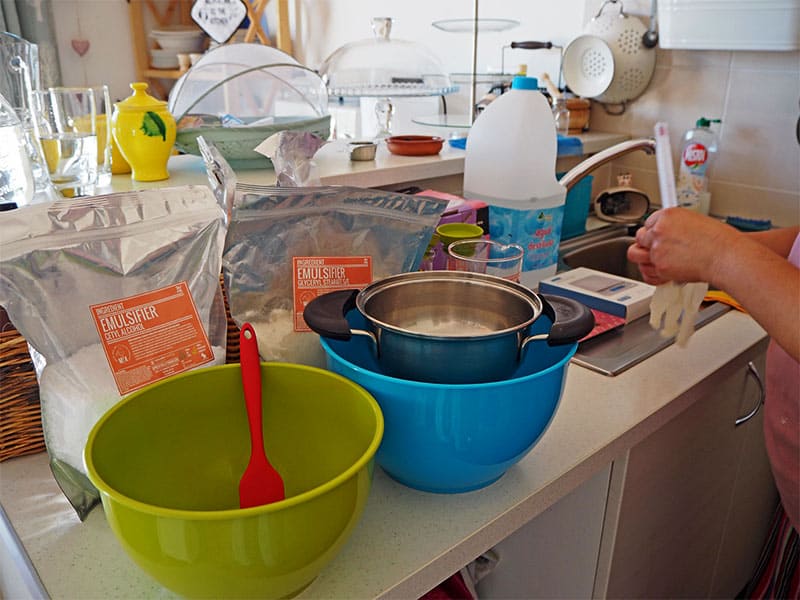
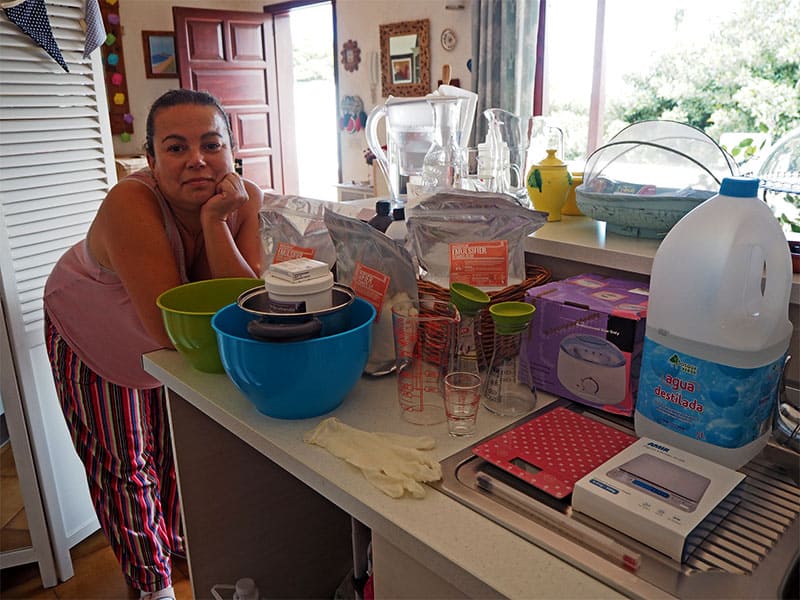
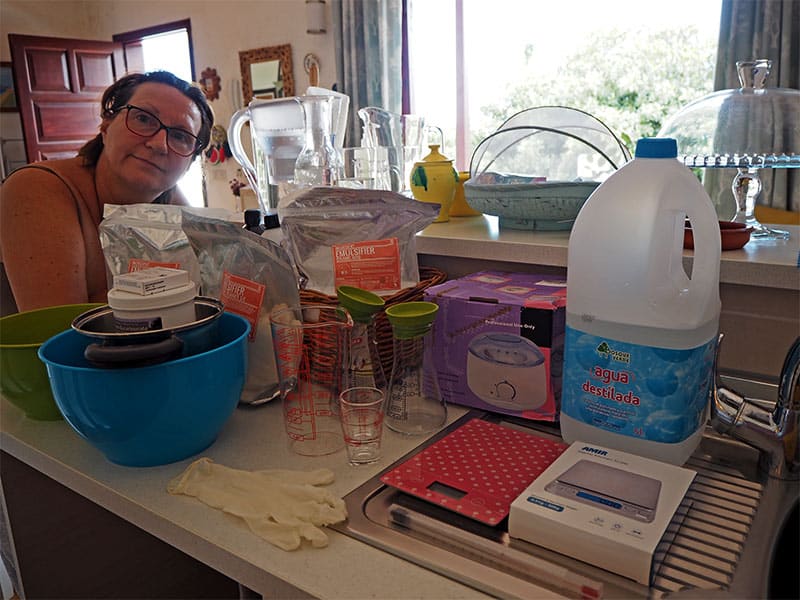
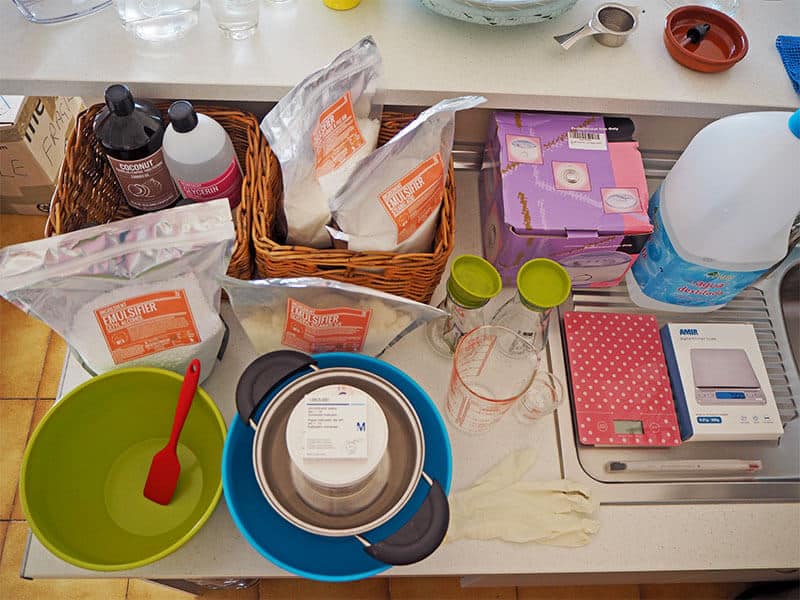
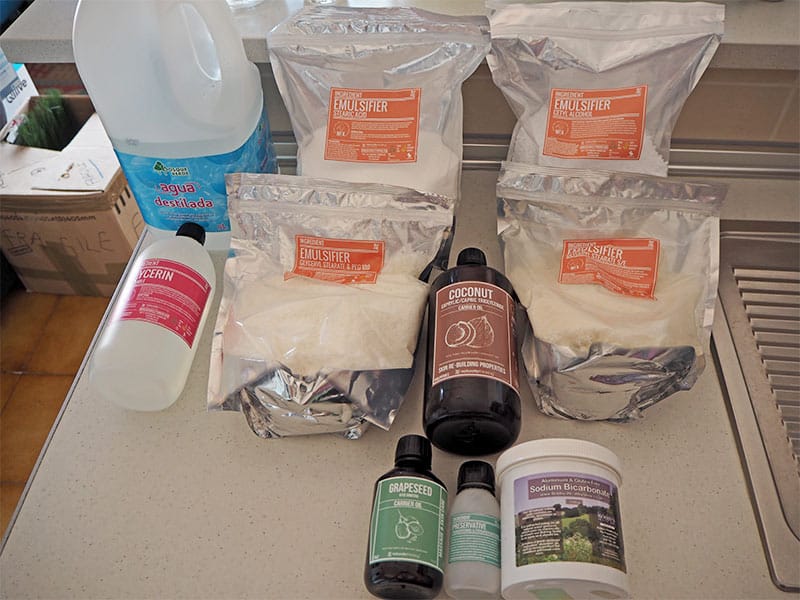
Equipment Needed
**Try to keep separate equipment for your cosmetic production**
**With affiliate links**
– Plastic gloves
– Weighing Scales
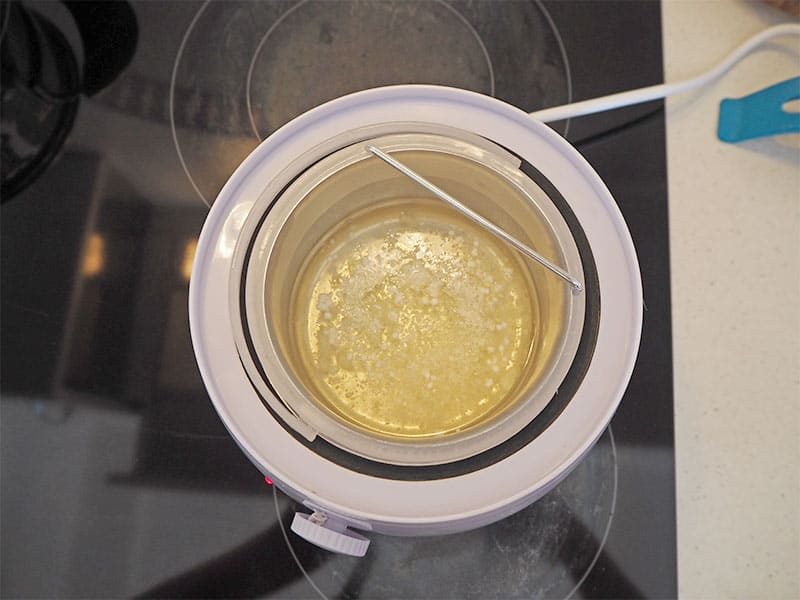
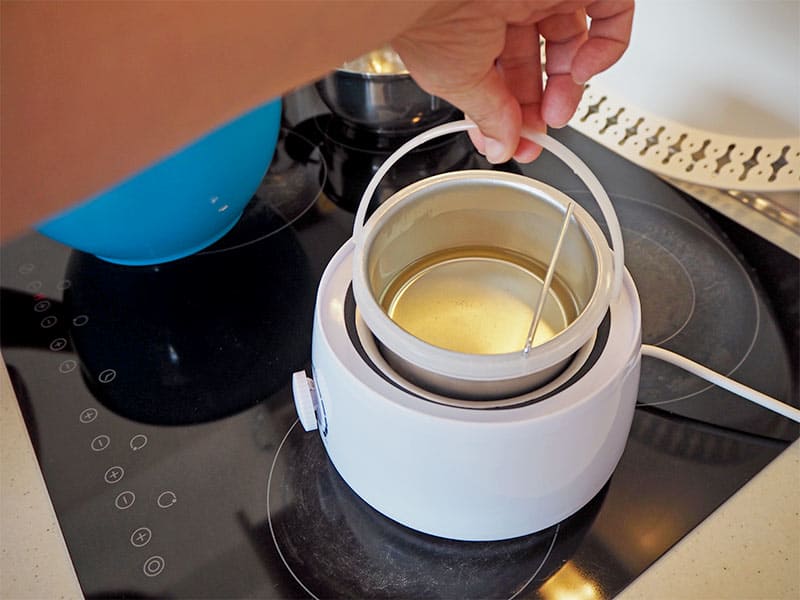
– Bain Marie (some people heat up Pyrex like bowls and with the ingredients, I use a Wax warmer to heat up the oil phase of the formula)
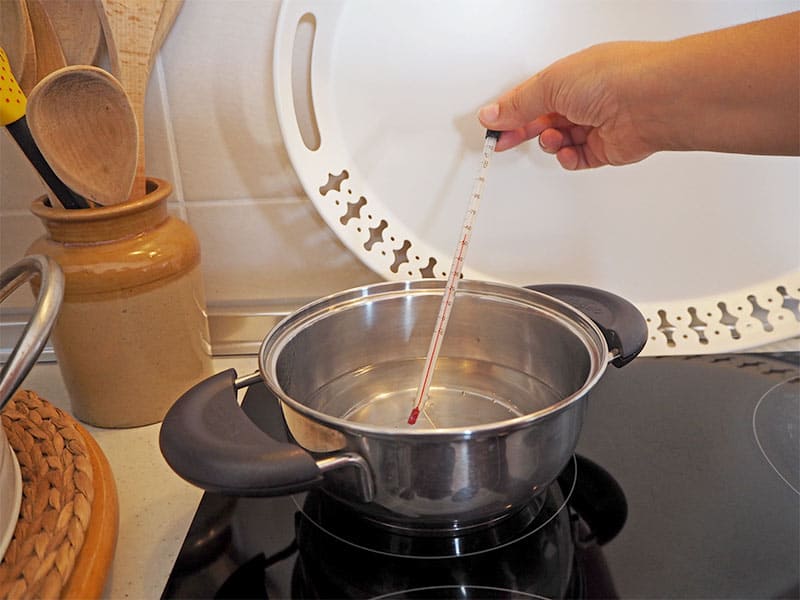
– Thermometer (for checking temperature of water and oils when heating)
– Measuring beakers to measure and weight ingredients (I always have around 3 or 4 so I don’t have to constantly wash up the same one. I use different sizes accordingly)
– Bowls for mixing (Good to have 2 or 3 handy).
– Mixer (hand blender)
– Spatula or spoon (for stirring, mixing)
– Funnel (for bottling)
– PH test strips (PH is good when I make this formula but always good to test PH and adjust accordingly to 5)
– Jars/Containers
Formula/Recipe
This recipe makes 500gr|17.63oz of moisturizer cream.
Link here to convert weights in case you need to.
Water Phase
380g | 13.40oz (76% of the total) Distilled Water [EWG 1 | product info | aff link]
10g | 0.35oz (2% of the total) Glycerin (Veg) [EWG 2| more info| aff link]
Oil Phase
30g | 1.05oz (6% of the total) Caprylic/Capric Triglyceride [EWG 1| more info| non-aff link]
20g | 0.70oz ( 4% of the total) Grapeseed Oil (Vitis vinifera) [EWG 1| more info| aff link]
15g | 0.52oz (57% of the total) Glyceryl Stearate & Peg100 [EWG 1 & EWG 3 | product info (1) and (2) | non-aff link]
10g | 0.35oz (2% of the total) Stearic Acid [EWG 1 | product info | aff link]
10g | 0.35oz (2% of the total) Cetyl Alcohol [EWG 1 | product info | aff link]
20g | 0.70oz (4% of the total) Glyceryl Stearate SE [EWG 1 | product info | aff link]
Cool Down Phase
PH Adjuster | Sodium Bicarbonate [EWG 1| more info| aff link]
5g | 0.17oz [0.5% x 2 of the total)] Phenoxyethanol & Ethylhexylglycerin [EWG 4 & 1| more info| aff link 125g OR aff link 500g]
1g | 0.35oz (0.2%) Tocopherol (Antioxidant, Vitamin E) [EWG 1 | product info | aff link]
Directions
**Celsius to Farenheit link here**
1. Heat all Oil Phase ingredients to 80 degrees Celsius (I melt mine in the wax warmer and when everything is well diluted (there’s no traces of powders) then it’s ready to be added to the water phase).
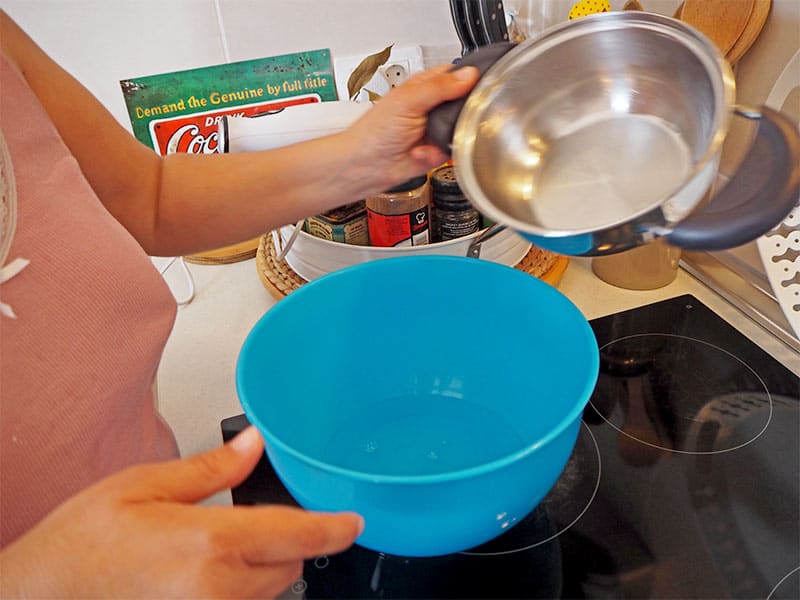
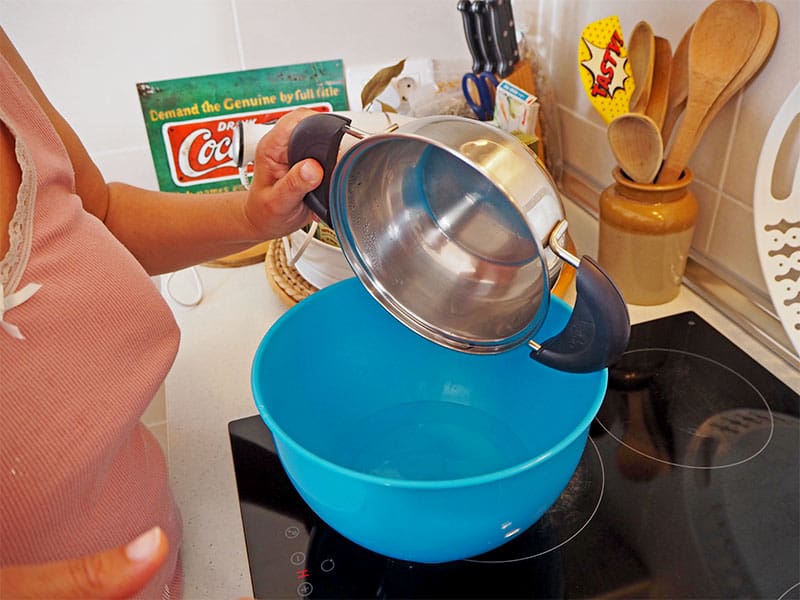
2. Heat Water Phase to 80 degrees (I measure the glycerin and place it in a big bowl. I heat up the water in a pan and when the water reaches the right temperature I add to the glycerin and mix quickly so I can add the oil phase without letting the water cool down).
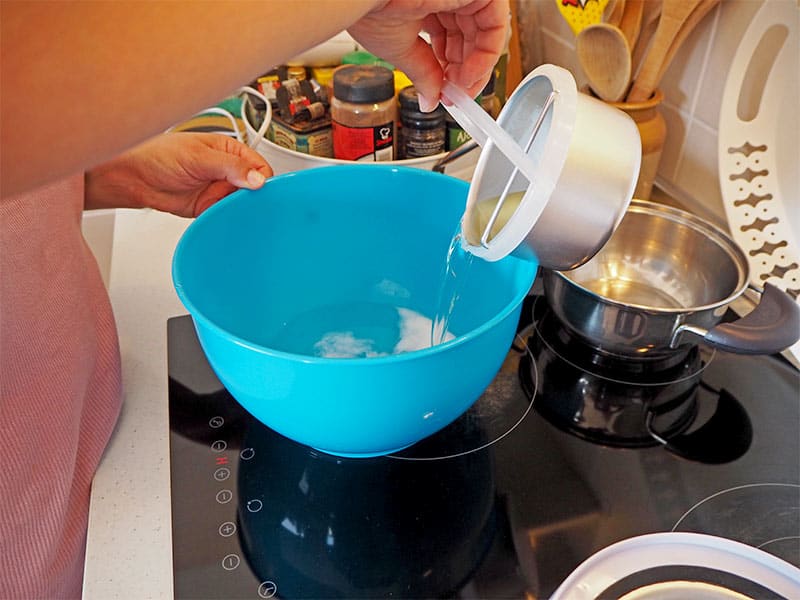
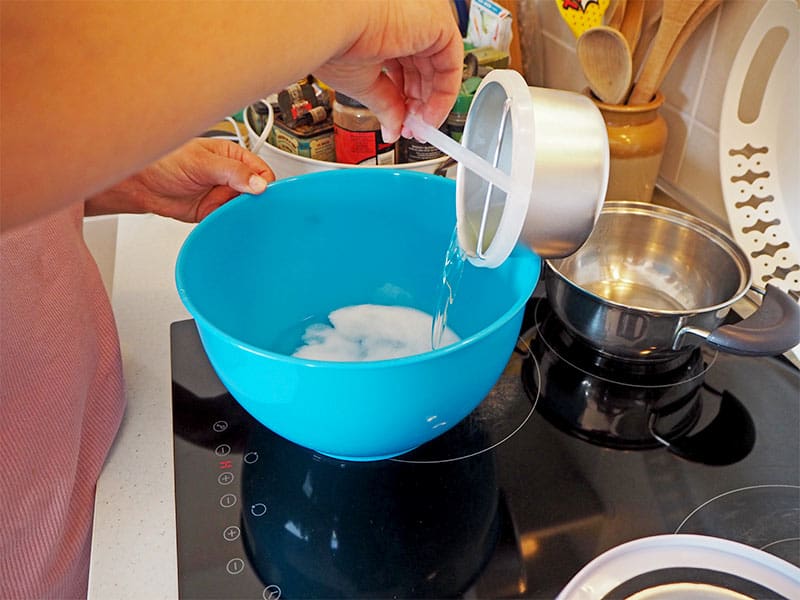
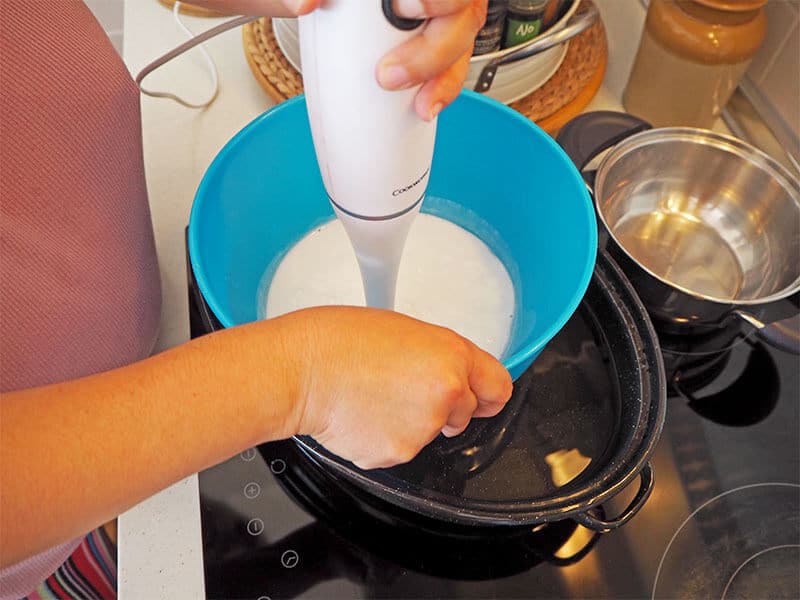
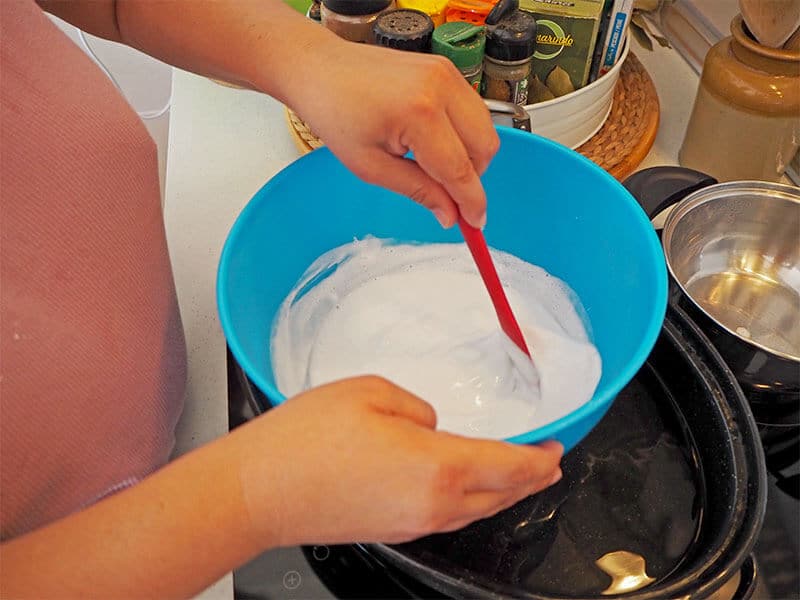
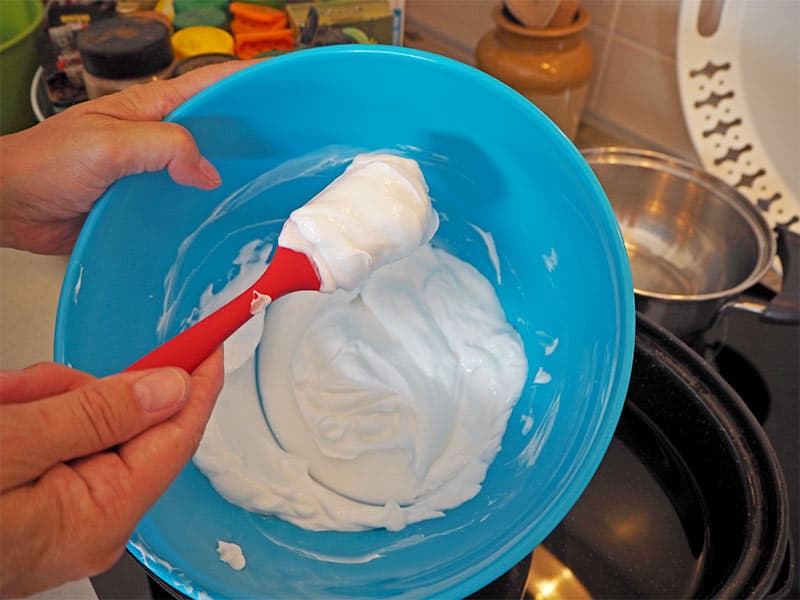
3. Add Oil Phase to Water Phase and blend with the blender (I tip the wax warmer container over the bowl where my water phase is and blend for 1 minute or so, stop for a few minutes, stir with my spatula, blend again, stop for a few minutes, stir with my spatula, stop, etc. It will thicken up!)
4. Stir until 45 degrees Celsius (test PH and adjust by mixing sodium bicarbonate [baking soda] to a tiny bit of distilled water and adding if necessary though my PH is usually good at this stage)
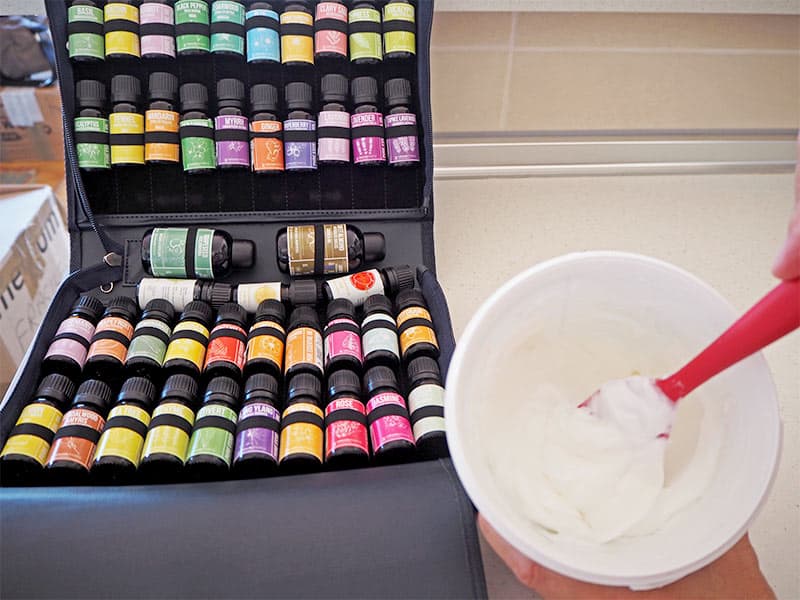
5. Add the preservative, tocopherol and any other carrier oils and essential oils of your choice (up to 12.5g | 0.44oz of carrier oils and up to 25 drops of essential oils)
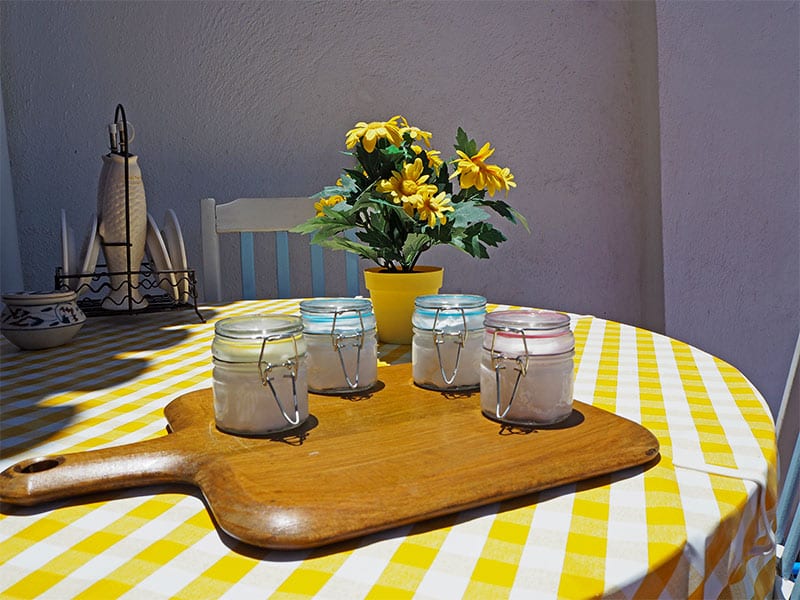
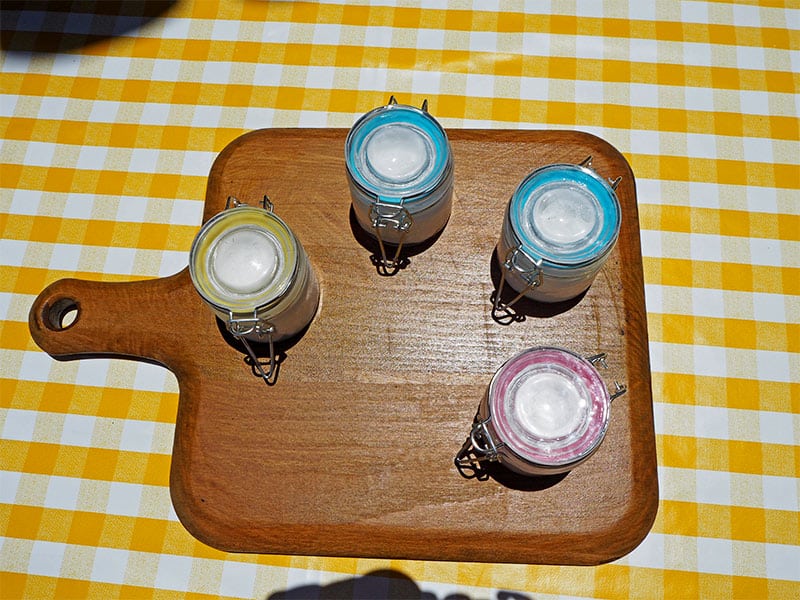
6. Let it rest (24 hours would be good) and add to jar/containers.
Things to Take into Consideration
I’ll try to mention here all the problems I encountered that you might encounter as well. I’ll be making this formula/recipe many times so I’ll add more obstacles or questions I come across myself.
- Do the measures have to be completely exact? This might seem like a silly question but I don’t really worry about tiny little ‘ups’ or ‘downs’ when it comes to exact measurement (I saw at my NT course that it wasn’t a huge deal). I have 2 scales, one measures the 0.00 while the other doesn’t. I use them accordingly. But if I go over or under by a tiny weeny bit and it’s just impossible to get it to the exact measure then so be it.
- Do I need expensive/great quality scales? No. You just need something that measures the weight, that’s all. For my accurate 0.00 digital scale I bought one on Amazon (here’s the aff link to it). The other one I just bought it in a grocery store (weighs in grams, pounds, etc) and it is more than good enough for the measures that don’t need to be .point something.
- I’ve provided the recipe in grams and oz but you can calculate in any other size by using a calculator from makingskincare.com.
- Does water need to be distilled? Yes, ideally. I asked my tutor this same question at the course and he said that if you were desperate and the product was just for you then you could use water you boiled from bottled water but he did insist I should get distilled water. Thankfully I found it in a grocery store – the big (and cheap!) bottles where being displayed at the ironing section, so you might find it there too!
- What about the temperature of the distilled water? Do they have to be exact? Well, 75 to 85 degrees Celsius, 80 being appropriate for the recipe. At the course we were using distilled water at 80°C [degrees celsius] (so not quite at boiling stage, for the water to boil it needs to be at 100°C).
- Do the bowls and measuring jugs, glass, cups, etc, have to be of any particular type/brand? No. I work with plastic and glass. I particularly LOVE Pyrex (actually I’m obsessed with Pyrex) and I collect jugs, measuring cups, etc and use them for general measuring and obviously making my cosmetics (separate ones). Ideally I’ll have a huge collection of Pyrex crockery at some point! [Here’s an affiliate link to a 1 cup Pyrex measuring jug]. I’ve also fallen in love with Mason Cash‘s absolutely gorgeous mini measuring glass (see pics below) which I use for the smaller amounts. I have 2. I couldn’t find them in Amazon but here and here are similar ones that I would personally buy myself [aff links]. For a more ‘laboratory’ feel, here you’ll find something that I think could work nicely, although personally I do prefer the shot glass look.
- Do I need a special or particular blender? No. Just one that works. This product is for home use so I’m not going to be too fussy about tools. Here’s a blender you could use if you don’t have one [aff link]. Personally I prefer to stir by hand using my spatula but it does take me a while to get it to the right thickness.
- What about stirring – do I need a particular rubber spatula? No. Any cooking rubber spatula will do. I would love to get my hands on the Norpro spatulas Marie Rayma from humblebeeandme.com uses and recommends but I can’t as I’m in Europe and they would get ridiculously expensive. I’ll link to her page here so can have a look, and, if you decide to buy it using her link, she can get the well deserved commission.
- If I don’t have one of the ingredients, can I substitute for another? I’m not at the level yet where I can answer that question. I suggest you try to get all ingredients as listed above.
- Do I have to add a preservative? Yes you do! I so much wanted to make DIY skincare without any preservatives (au naturel was my motto) until realising that this is NOT a choice unless I want to be stepping into dangerous territory. Our kitchens are not laboratories and therefore not sterile, which means that nasty microbes will love to dwell in the products we make (especially when adding water).Preservatives are our friends, not our enemies. Here’s a fabulous article Susan wrote about this very topic which I think will convince you. And here’s Marie on the same topic.
- Does the PH have to be exact at 5? No. If you get it at 4.5 or 5.5 that’s ok.
- Can I add any essential oils to the final product? Yes, I love adding the essential oils! You can either add one essential oil or a blend. Just make sure you don’t go above 2% of the total as this is a leave-on product.
- Can I add carrier oils too? Yes. Up to 10% of the total amount of your favourite carrier oil to make a face or body cream or 30% of the total amount to create a massage cream.
- At least know what’s in your skincare products and make informed decisions from now on if you don’t already do so.You can add your chosen essential oils to the finished product according to different needs.
Links of Interest:
- About fractionated coconut oil, click here.
- Cosmetic ingredients that sound toxic but aren’t, link here.
Adding Carrier & Essential Oils to your Moisturizer Cream Base
You can add 10% carrier oil and 2% essential oils (one or a blend).
If you want to create a massage cream add 30% carrier oil to your product.
A Few Blending Ideas
If the product is going to be a facial cream, you can add camellia and/or coconut oil because of the light texture and easy absorption.
If the final product is for the body, oils like argan (expensive!), avocado, sweet almond and sea buckthorn will give you a thick and moisturising product.
Note that the more carrier oil that you add to the final product the longer it takes to be absorbed by the body (that’s why facial creams are heavier when formulated for application at night).
Directions for Blending
Add your carrier and essential oils to your the cream and fold into it (stir and fold). The oils will be absorbed into the cream.
If You’d Like to Make Adjustments to the Product…
If you increase or decrease levels on Stearic acid and Glyceryl stearate you can change thickness and viscosity of your product.
Cetyl alcohol changes can determine how waxy your final product is. The more Cetyl alcohol you add, the waxier your final product will be.
These suggestions come from this formula from Naturally Thinking.
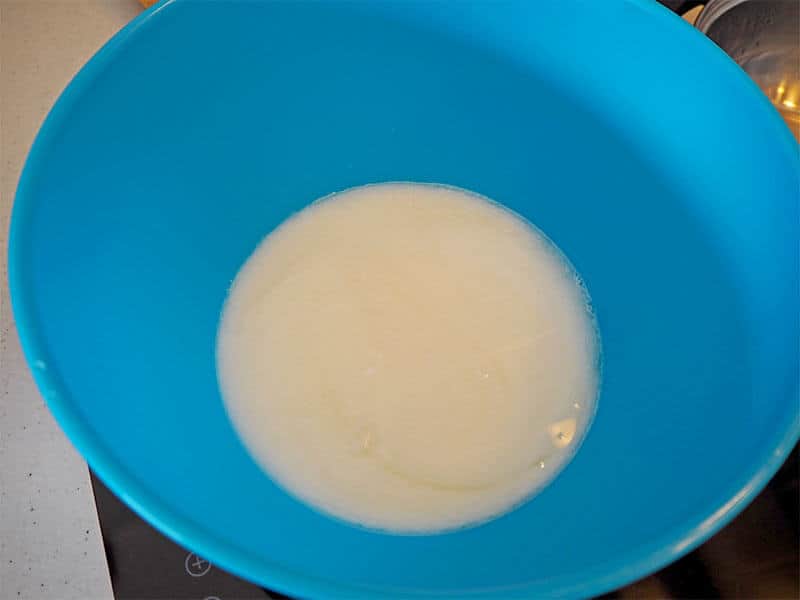
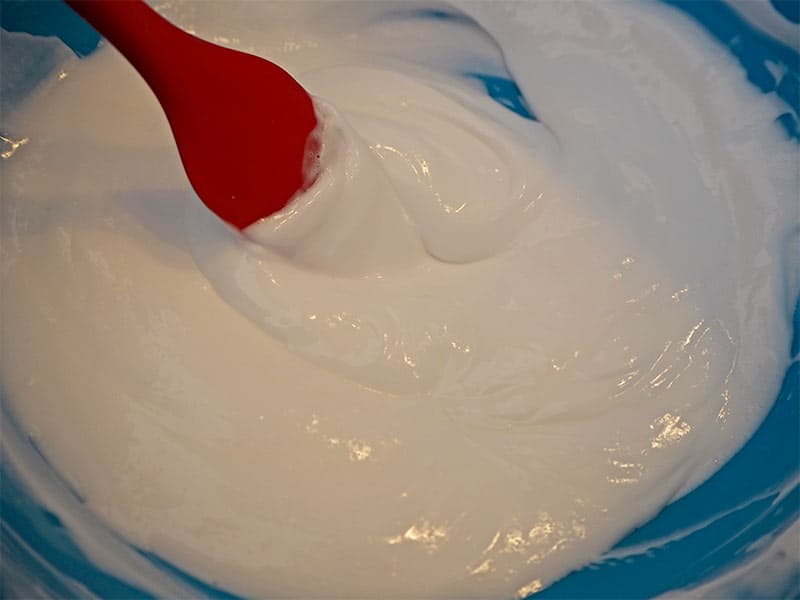
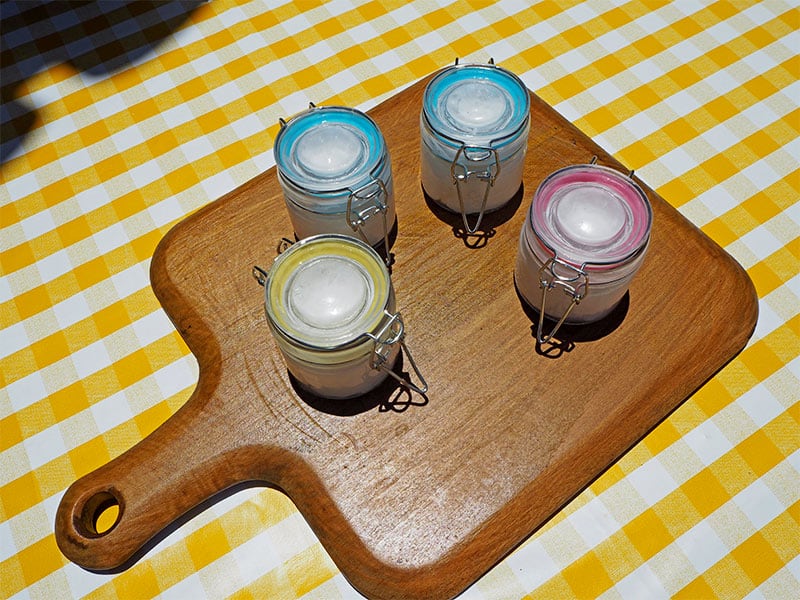
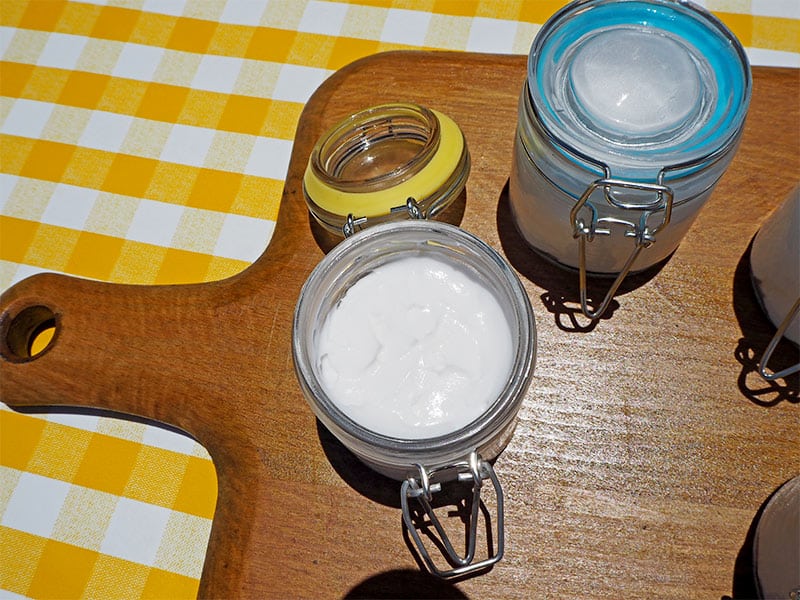
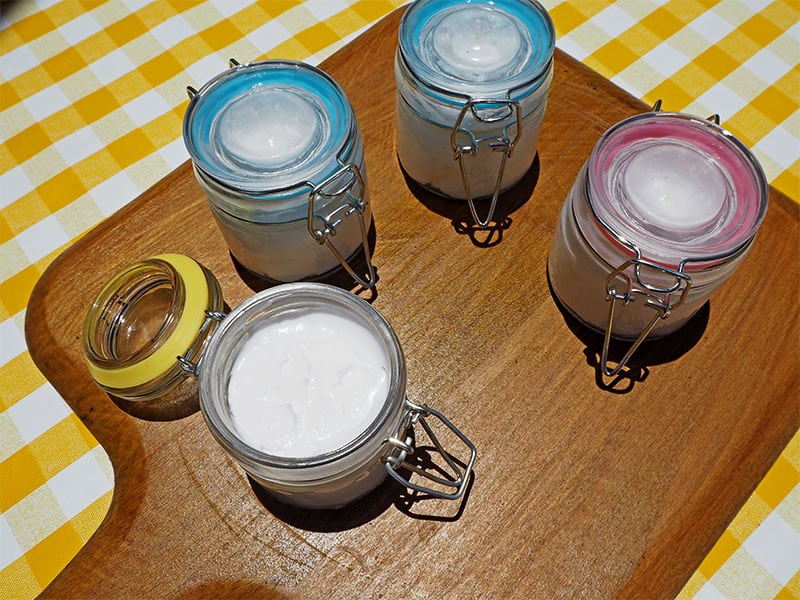
Final Thoughts & Photos
My cream ended up being thicker than I would have wanted it to be. I’m not sure what happened, maybe some water evaporated as I was heating it up for long since the oils hadn’t melted yet. I’m still learning and don’t know why certain things happen but as time goes by I’ll be able to discern all the different ins and outs of DIY skincare!
As for now, I’ll leave you here with a few photos to get you excited about making this cream. Thanks for reading : )